

PowerPoint 2010
Slide Basics
Managing slides and presentations
Video: Managing Slides in PowerPoint 2010
 Watch the video (4:15).
As you add slides to your presentation, PowerPoint offers a variety of views and tools to help you organize and prepare your slide show.
About slide views
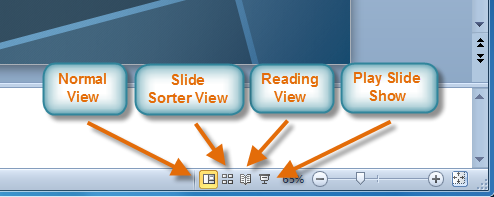
It is important that you be able to access the different slide views and use them for various tasks. The slide view commands are located on the bottom right of the PowerPoint window in Normal View.
 Slide view options
Normal View: This is the default view where you create and edit your slides. You can also move slides in the Slides tab in the pane on the left.
 Normal View
Slide Sorter View: In this view, miniature slides are arranged on the screen. You can drag and drop slides to easily reorder them and to see more slides at one time. This is a good view to use to confirm that you have all the needed slides and that none have been deleted.
 Slide Sorter View
Reading View: This view fills most of the computer screen with a preview of your presentation. Unlike Slide Show View, it includes easily accessible buttons for navigation, located at the bottom-right.
 Reading View
Slide Show View: This view completely fills the computer screen and is what the audience will see when they view the presentation. Slide Show View has an additional menu that appears when you hover over it, allowing you to navigate through the slides and access other features you can use during a presentation.
 Slide Show View
Use the keys on your keyboard (including the arrow keys, Page Up and Page Down, space bar, and Enter) to move through the slides in Slide Show view. Press the Esc key to end the slide show.
To view an outline of your presentation:
The Outline tab shows your slide text in outline form. This allows you to quickly edit your slide text and view the contents of multiple slides at once.
- Click the Outline tab in the left pane.
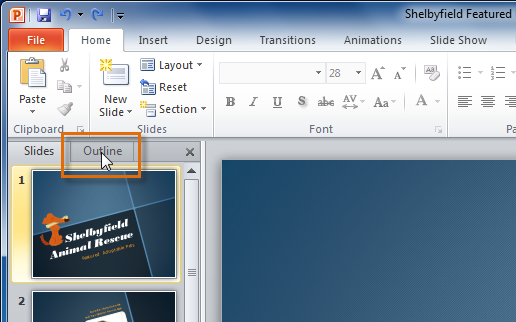 Outline tab
 - An outline of your slide text appears.
- Type directly in the pane to make changes to your text.
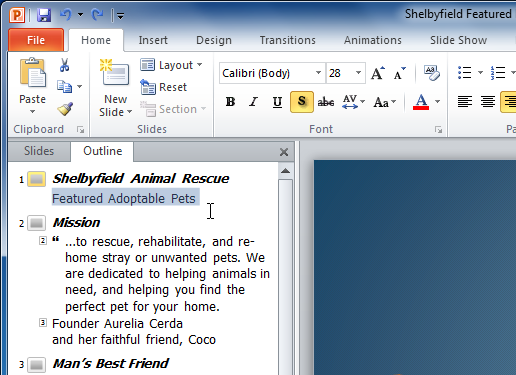 Typing in the outline
To organize slides into sections:
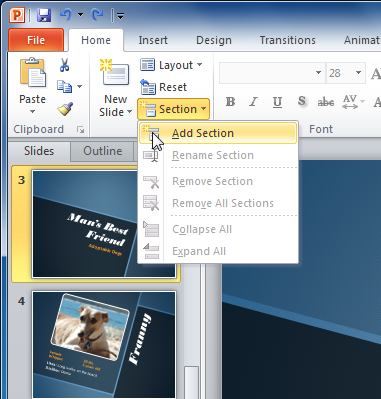
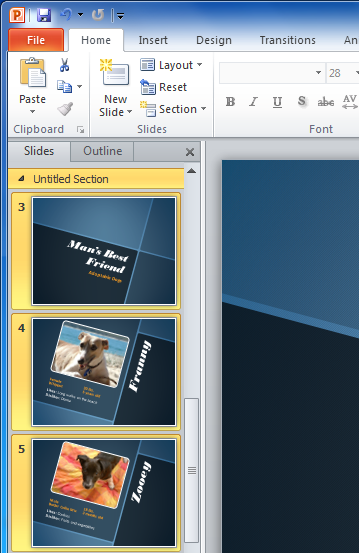
You can organize your slides into sections to make your presentation easier to navigate. Sections can be collapsed or expanded in the left pane and named for easy reference. In this example, we will add two sections: one for dogs that are available for adoption, and another for cats and other pets.
- Select the slide you want to begin your first section.
- From the Home tab, click the Section command.
- Choose Add Section from the drop-down menu.
 Adding a section
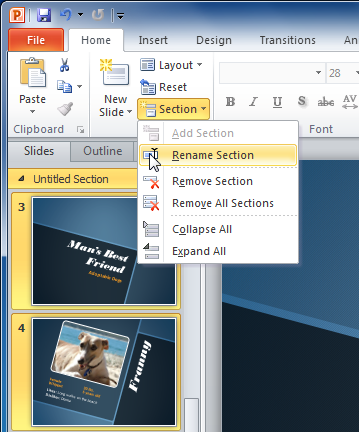
 - An Untitled Section appears in the left pane.
 An untitled section
 - To rename the section while it is still selected, click the Section command, and choose Rename Section from the drop-down menu.
 Renaming a section
 - Enter your new section name in the dialog box. Then click Rename.
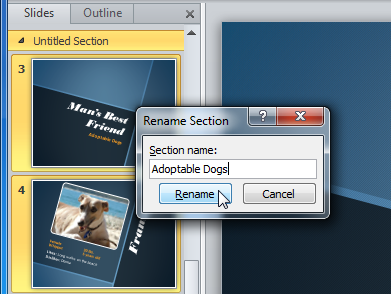 Rename Section dialog box
 - Repeat to add as many sections as you need.
- In the left pane, click the arrow next to a section name to collapse or expand it.
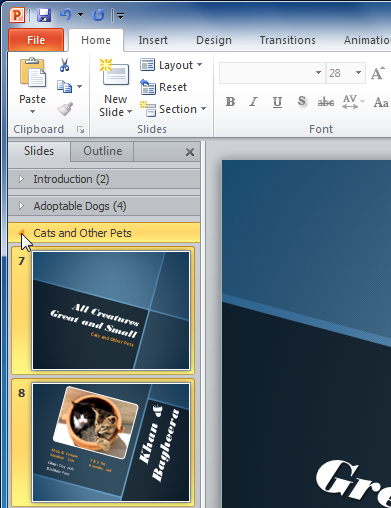 An expanded section


