

OS X Mountain Lion
Camera and Photos
Getting to know Camera
As you already know, the Camera app is different on each device—but there are many similarities when it comes to basic tools and features. Use the interactive below to learn how to perform several common tasks in the iPhone version.

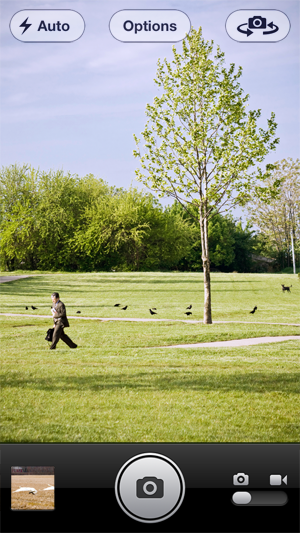
Photo/Video
Use the slider to switch between photo and video.
Font/Back Camera
Tap here to switch between the front-facing camera and the back-facing camera.
Take Photo
To take a photo, tap the camera button.
Alternatively, you can use the volume buttons on the side of your device. Some people find it easier to hold the camera steady this way.
View/Edit
Tap to view the most recent photo you've taken. Here, you can quickly share, delete, or even edit the photo (with options like crop, remove red-eye, and more).

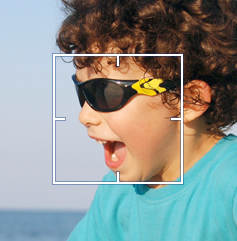
Focus
The app is designed to detect and focus on faces automatically.
If you want to change the focus to something else, tap the area you want to focus on. A small square will flash on the screen, and the camera will adjust.
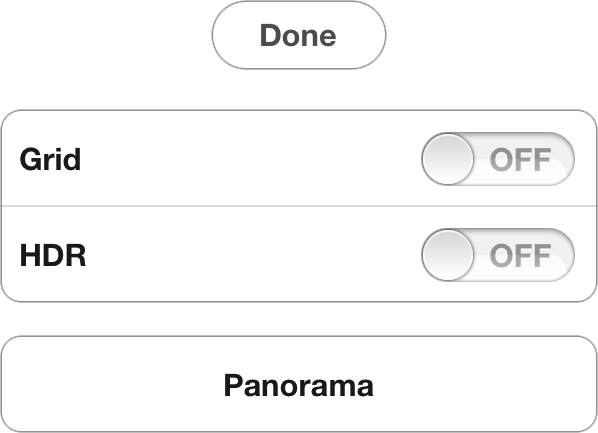
Options
Use Options to turn on a grid, or enable HDR photos.
On newer versions of the iPhone and iPod Touch, you can even take a panorama. Just tap the button, and move your camera across the scene (for example, a landscape or a street scene).
Auto
Tap Auto to turn the automatic flash on or off.


Insider tips
Once you know your way around the app, consider these tips for getting the most out of Camera.
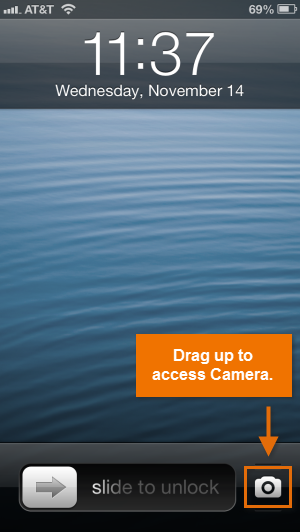
Quick access to Camera
On the iPhone and iPod Touch, you can access Camera even more quickly using the icon on your lock screen. Just drag the icon up, and the app will open instantly—there's no need to unlock your device first.
 Quick access to Camera
Zooming in and out
To zoom in or out in the Camera app, use the pinch gesture. This option is great for taking close-up photos when you can't get close enough to your subject (like in a crowd, at a public event, or when photographing wildlife).
 Zoomed out
 Zoomed in
You may want to use this feature sparingly if image quality is important to you. Because Apple devices don't have an actual zoom lens, the picture will start to appear grainy the more you zoom in.
Taking screenshots
To take a screenshot on an Apple mobile device, all you have to do is press the Home button and the Sleep/Wake button at the same time. This will take a photo of what's on your screen—just like all the images you've seen throughout this tutorial.


