

Access 2013
Designing a Multi-Table Query
Creating a multi-table query
Now that we've planned our query, we're ready to design and run it. If you have created written plans for your query, be sure to reference them often throughout the query design process.
To create a multi-table query:
- Select the Query Design command from the Create tab on the Ribbon.
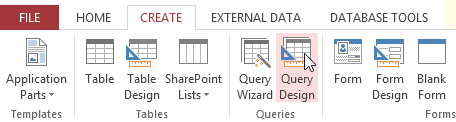 Clicking the Query Design Command
 - In the dialog box that appears, select each table you would like to include in your query and click Add. You can press and hold the Ctrl key on your keyboard to select more than one table. When we planned our query, we decided we needed information from the Customers and Orders table, so we'll add those.
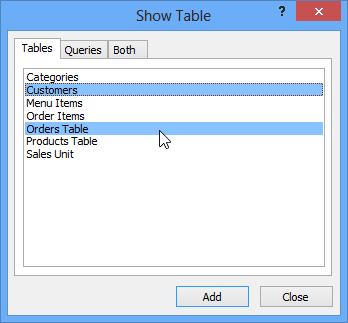 Selecting tables to use in the query
 - After you have added all of the tables you want, click Close.
- The tables will appear in the Object Relationship pane, linked by a join line. Double-click the thin section of the join line between two tables to edit its join direction.
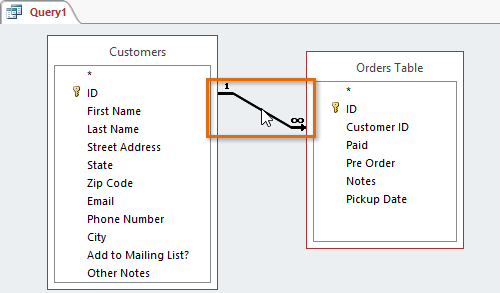 Clicking the join line to edit its direction
 - The Join Properties dialog box will appear. Select an option to choose the direction of your join.
- Choose option 2: for a Left to Right join. In our query, the left table is the Customers table, so choosing this would mean all of the customers who met our location criteria—whether or not they had placed an order—would be included in our results. We don't want to choose this option for our query.
- Choose option 3: for a Right to Left join. Since our right table is our Orders table, selecting this option will let us work with records for all of the orders and only the customers who've placed orders. We'll choose this option for our query because this is exactly the data we want to see.
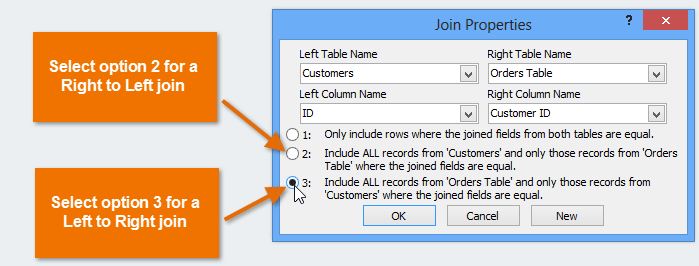 Changing the join direction to Right to Left
 - In the table windows, double-click the field names you would like to include in your query. They will be added to the Design Grid in the bottom part of the screen.
In our example, we'll include most of the fields from the Customers table: First Name, Last Name, Street Address, City, State, Zip Code, and Phone Number. We'll also include the ID number from the Orders table.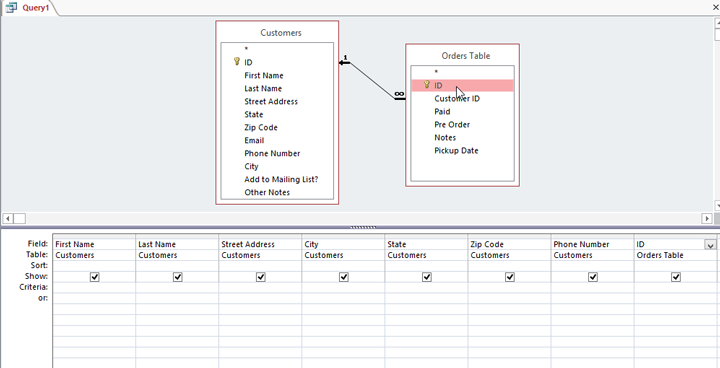 Adding table fields to the query
 - Set field criteria by entering the desired criteria in the criteria row of each field. We want to set two criteria:
- First, to find customers who do not live in Raleigh, we'll type Not like ("Raleigh") in the City field.
- Second, to find customers who have a phone number beginning with the area code 919, we'll type Like ("919*") in the Phone Number field.
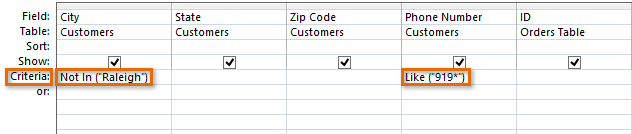 Setting field criteria
 - After you have set your criteria, run the query by clicking the Run command on the Design tab.
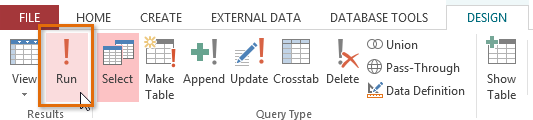 Clicking the Run command
 - The query results will be displayed in the query's Datasheet view, which looks like a table. If desired, save your query by clicking the Save command in the Quick Access Toolbar. When prompted to name it, type in the desired name and click OK.
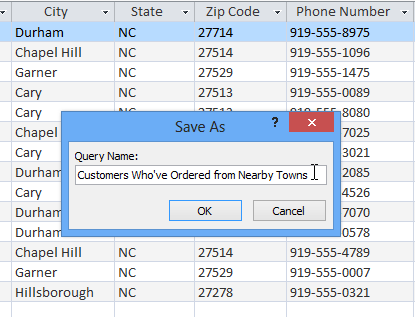 Naming the new query to save it
Now you know how to create a multi-table query. In the next lesson, we'll talk about more query design options that can make your query even more powerful.


