This article was co-authored by Mantas Silvanavicius. Mantas Silvanavicius is a Licensed Electrician and the Owner of M+S Electric based in Las Vegas, Nevada. With more than 20 years of experience, he specializes in home electrical installations, testing, and wiring. Mantas and his team have completed projects for companies such as Seiko and Springhill Suites by Marriott. M+S Electric is licensed, bonded, and insured.
There are 11 references cited in this article, which can be found at the bottom of the page.
This article has been viewed 15,111 times.
If you’re tired of fumbling around in the dark to find things in your truck bed, why not install some truck bed lights to illuminate it? Though it helps to have some familiarity with automotive electrical work to get the job done, it’s something that almost anybody can do relatively safely and easily. All you need is a set of nice bright LED truck bed lights, a few common hand tools, and some basic electrical wiring supplies. The whole thing can cost less than $30 USD!
Steps
Installing an LED Light Strip
-
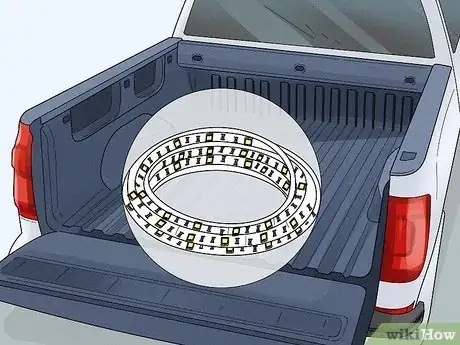
1Purchase a strip of LED truck bed lights long enough for your truck bed. Search online or wherever they sell automotive accessories and. Buy a strip of LED lights that’s long enough to line the walls of your truck bed that you want to illuminate.[1]
- For example, if your truck bed is 7 ft (2.1 m) by 5 ft (1.5 m) and you want to light up the back wall and both side walls, get a strip that’s about 19 ft (5.8 m) long.
- You can choose any type of LED truck bed lights with an adhesive backside for this. Many of these types of light strips have either an automatic on/off switch or a toggle-style on-off switch. There are different colors and brightness available as well.
- You’ll also need a fuse, a fuse holder, red 14-gauge electrical wire, wire protector, heat shrink, 8 in (20 cm) zip ties, electrical terminal connectors, solder, a soldering iron, a screwdriver, a wire stripper, a crimping tool, a socket wrench, isopropyl alcohol, a lint-free cloth, a heat gun, and masking tape for this project.
- There are also easy-to-install truck bed lighting kits available that come with additional supplies like wires and other items you need to hook up the lights in your truck bed.
-
2Lay the LED light strip out along the truck bed walls to position it. Tape 1 end of the lights on top of the truck bed wall with masking tape where you want the lighting to start. Run the lights along the top of the truck bed walls and put a piece of tape at each corner to hold them in place.[2]
- This just lets you visualize the positioning so you can plan where you’re going to stick the lights.
- Peel up the tape and adjust the light strip as needed to position the lights symmetrically along the truck bed.
- For the most illumination, it’s best to put lights along the entire length of each of the 2 side walls and the back wall.
Advertisement -
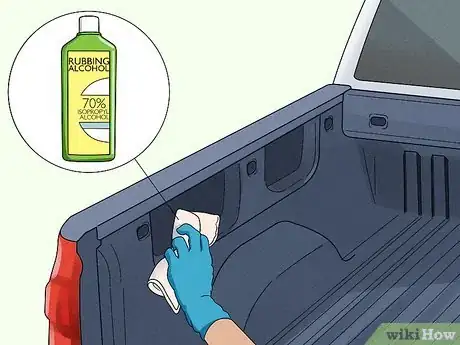
3Wipe down the truck bed with isopropyl alcohol and a lint-free cloth. Decide where exactly you’re going to stick the lights, which is usually under the lips of the bed rails or along the sides of the bed rails. Pour some isopropyl alcohol out onto a clean, lint-free cloth and thoroughly wipe down the surfaces where you plan to stick the lights.[3]
- For example, a microfiber cloth or an old cotton T-shirt work well for this.
- This gets rid of dirt, dust, oils, and other contaminants that can prevent the lights from adhering properly.
-
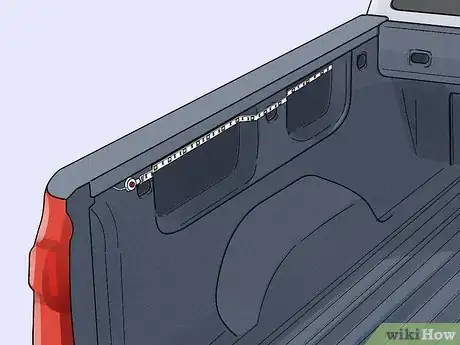
4Stick the light strip to the truck bed’s walls along the bed rails. Start at 1 end of the lighting strip and start peeling off the backing from the adhesive side. Press the lights firmly against the truck bed wall, underneath or along the inside edge of the bed rail. Continue peeling off the backing and pressing the LED strip into place until you reach the other end.[4]
- Adhesive LED truck bed lights stick best to flat, metal surfaces that are either painted or unpainted.
- If you have to stick the lights onto any plastic or textured surfaces, clean them off again with isopropyl alcohol and a lint-free cloth to ensure proper adhesion.
- For the cleanest look, try to tuck the lights up under the bed wall lips as much as possible.
Soldering the Ground Wire
-
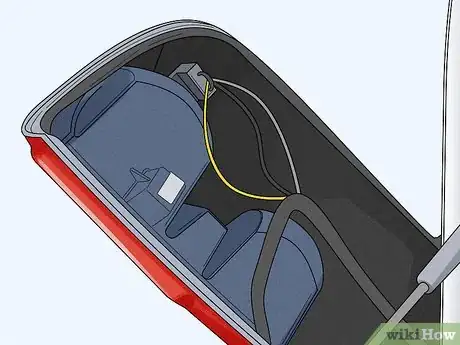
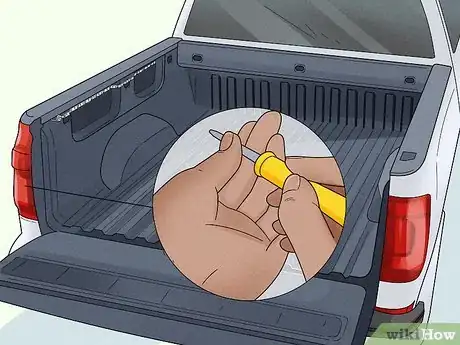
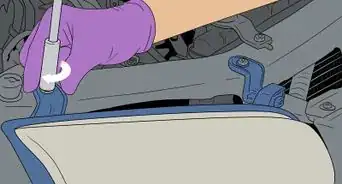
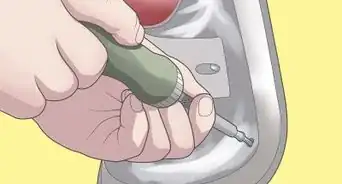
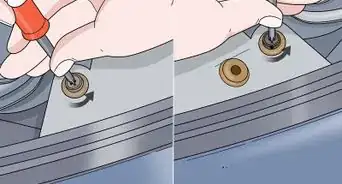
1Remove the driver’s side tail light. Pull down your truck bed’s tailgate to access the tail light’s screws. Use the appropriate screwdriver to loosen and remove the 2 screws holding the tail light in place on the inside corner of the truck bed. Carefully pull the tail light out and let it hang against the side of the truck bed.[5]
- Note that, for the rest of the installation and wiring process, things might look different on different vehicle makes and models.
- Consult your owner’s manual if you’re ever unsure where certain wires and other components are on your specific vehicle.
-
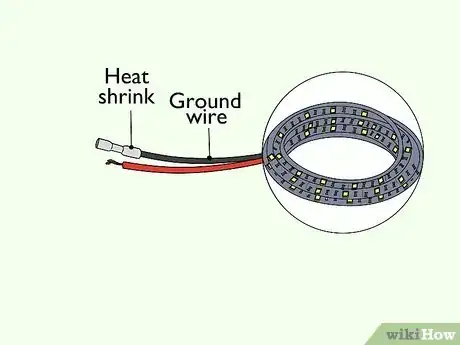
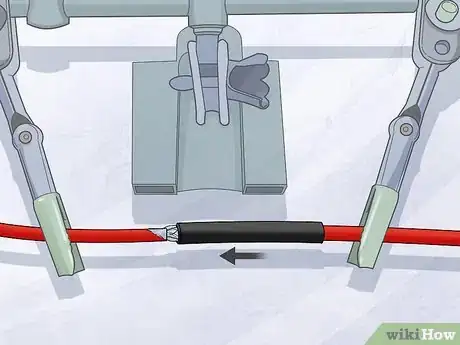
2Slide a piece of heat shrink over the light strip’s ground wire. Pick a piece of heat shrink that’s wider in diameter than the wire. Slip it onto the end of the wire far enough that the exposed wires are poking out again.[6]
- The ground wire is typically black, but it could be another color. Consult the manufacturer’s instructions for the LED lights if you’re not sure which wire is the ground wire.
- Always remember to put the heat shrink on before you connect the ends of 2 wires because you can’t put it on after they’re soldered together.
- Heat shrink insulates and protects the wires once they’re soldered together for a more durable and waterproof connection.
-
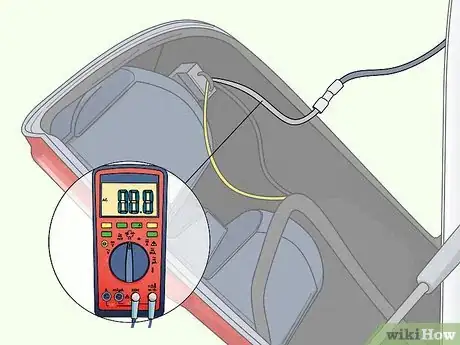
3Connect the light strip’s ground wire to the tail light’s ground wire with solder. Find the ground circuit wire at the back of the tail light you removed. Twist the end of the LED lights’ ground wire onto the exposed metal of the tail light’s ground wire. Use a soldering gun to melt a piece of solder onto the wires to secure them together.[7]
- Ground wires can be different colors, but they’re usually black, brown, or green. Consult the owner’s manual for your vehicle and the instructions for the LED lights if you aren’t sure which wire is which.
- You can also identify the tail light’s ground wire by using a multimeter to test the wires. Ground wires have no electrical current.
- An alternative to soldering the LED lights’ ground wire to the tail light’s ground wire is to solder it to an exposed, unpainted piece of metal somewhere inside the hole where the tail light goes.
-
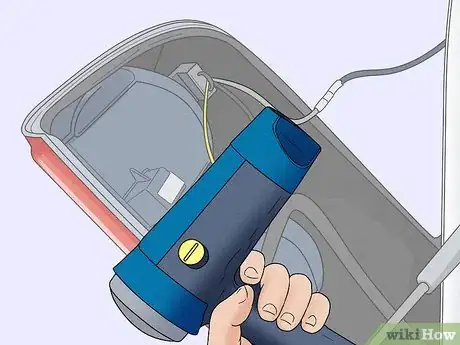
4Secure the heat shrink over the wires by warming it up with a heat gun. Slide the piece of heat shrink over the soldered wires, so the spot where they connect is about in the center of the shrink wrap. Turn on a heat gun and wave the tip back and forth over the heat shrink until it shrinks down tightly around the 2 wires.[8]
- Don’t touch the wires with the tip of the heat gun or you might damage them.
- It only takes a few seconds for the heat shrink to shrink down in size.
Connecting to the Battery
-
1Run a 14-gauge red wire from the battery to the lights’ positive wire. Have a helper hold 1 end of the wire next to the driver’s side tail light. Walk to the battery while holding the spool of wire, unrolling it loosely as you move, until you have a piece of wire that’s long enough to reach from the back of the truck bed to the battery under the hood.[9]
- Don’t stretch the wire out tightly because you want some slack to ensure that the wire still reaches the battery after it’s in its final position.
-
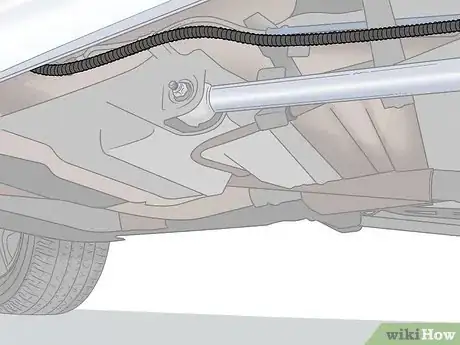
2Cover the wire in a wire protector and snake it under the truck’s body. Press the length of wire into the slit on the side of an equal or slightly shorter length of wire protector. Hold 1 end of the wire by the battery and feed the rest down through the engine compartment. Pull the other end of the wire along the underside of the truck, near the vehicle’s main wire harness, and poke it up through the slot where the tail light goes.[10]
- Wire protector is a flexible shielding for electrical wires that prevents them from directly rubbing against surfaces and potentially fraying.
-
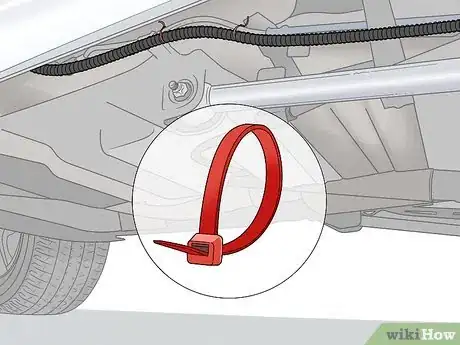
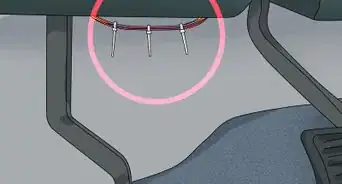
3Zip-tie the wire protector to the vehicle’s main wire harness. Locate the wire harness, which is typically covered in a wire protector itself, running along under your vehicle from the battery to the tail light. Use 8 in (20 cm) zip ties to secure your battery wire to the main wire harness at regular intervals.[11]
- Around 6 zip ties should be sufficient, but use as many as you feel is necessary to secure the wire in place.
- This keeps all your wiring neatly and safely together.
-
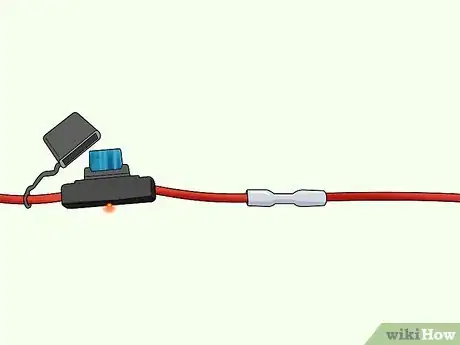
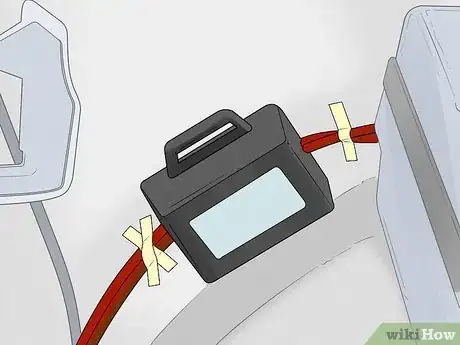
4Solder an in-line fuse holder to the end of the red wire near the battery. Slide a piece of heat shrink over the end of the red wire that you just ran from the engine compartment to the tail light. Twist the red wire onto the wire on 1 side of the fuse holder. Melt a piece of solder down through the twisted wires with a soldering gun to connect them. Use a heat gun to shrink the heat shrink over the soldered connection.[12]
- Take the fuse out of the fuse holder if it already has a fuse in it to be safe.
- Using an in-line fuse holder ensures that if there is ever a short circuit in your LED battery wire, the fuse will blow and it won’t cause an electrical fire in your engine compartment.
-
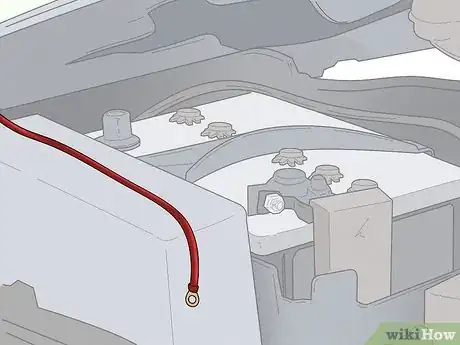
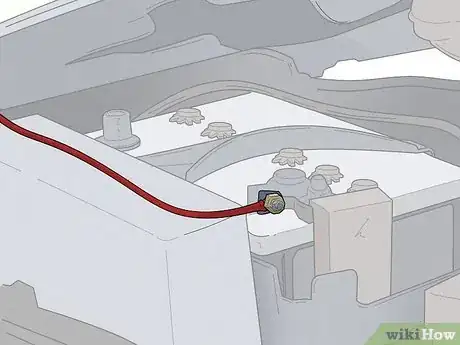
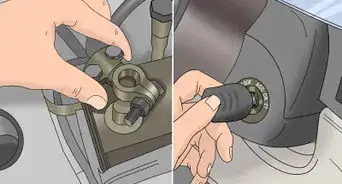
5Connect the open end of the fuse holder to the positive battery terminal. Slide a piece of heat shrink onto the open end of the fuse holder wire. Use a crimping tool to crimp a ring terminal connector onto the wire. Remove the nut from the vehicle battery’s positive terminal and slide the ring over the bolt, then tighten the nut back on with a socket wrench. Shrink the heat shrink over the wire and terminal with a heat gun.[13]
- Tuck the wiring in somewhere around the battery to make everything neat and tidy.
-
6Solder the far end of the battery wire to the LED light strip’s positive wire. Head to the driver’s side tail light and slip a piece of heat shrink over that end of the battery wire. Twist the battery wire together with the positive wire coming from the LED lights. Solder the wires together and shrink the heat shrink over the connection.[14]
- The positive wire is usually red. If you don’t see a red wire coming from the lights or you’re unsure, check the manufacturer’s instructions for the lights.
- If your LED lights don’t have a built-in on/off switch, solder a toggle switch in between the positive wires, so you can easily turn the lights on and off.
Reassembling and Testing the Lights
-
1Re-install the driver’s side tail light. Tuck all the wires neatly in behind the light and press the tail light back into place in its hole. Put the 2 tail light screws back in their holes and tighten them all the way with a screwdriver.[15]
- If there are any wires peeking out between the tail light and the end of the LED light strip, look for discreet areas to tuck them into, such as behind the truck bed liner.
-
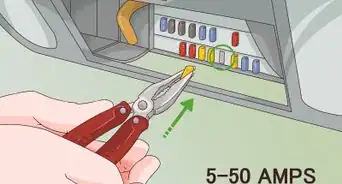
2Put a fuse in the in-line fuse holder near the battery. Use a fuse that’s about twice as big as the amp load of the LED lights. Flip open the cover on the in-line fuse holder and click the fuse into place in the slot. Press the cover back into place over the fuse.[16]
- For example, if the LED lights have an amp load of 5, use a 10-amp fuse.
- The amp load for the LED lights is clearly listed on the packaging and in the manufacturer’s instructions.
-
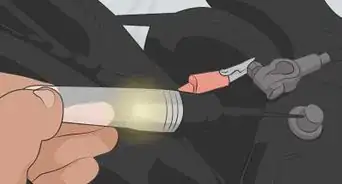
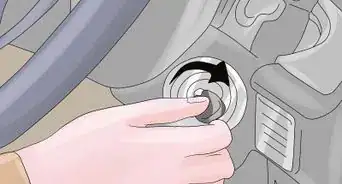
3Test your new truck bed lights. Go back to the driver’s side tail light and flip the on/off toggle switch to the “on” position. Look at the lights to ensure that they’re all on.[17]
- Wait until it’s dark out or do this in a dark garage to really see how the lights illuminate your truck bed!
- If the lights don’t immediately turn on, make sure the on/off switch is toggled to the “on” position. You can also test connections with a multimeter to determine if there are any that aren’t working and re-connect them with more solder and heat shrink.
Warnings
- If you aren’t comfortable performing automotive electrical work, get a professional to do it to avoid any mistakes that could cause an accident.⧼thumbs_response⧽
- Never solder an in-line fuse holder to a positive wire with the fuse in it. That way, there’s no chance of getting shocked.⧼thumbs_response⧽
Things You’ll Need
- LED light strip
- Fuse
- Fuse holder
- On/off switch (optional)
- Wire stripper
- Crimping tool
- Socket wrench
- Red 14-gauge electrical wire
- Wire protector
- Isopropyl alcohol
- Lint-free cloth
- 8 in (20 cm) zip ties
- Heat shrink
- Heat gun
- Electrical terminal connectors
- Soldering iron
- Solder
- Masking tape
- Screwdriver
- Multimeter (optional)
References
- ↑ https://www.autoguide.com/best-led-truck-bed-lights
- ↑ https://www.youtube.com/watch?t=239&v=77t1UW4Qc7g&feature=youtu.be
- ↑ https://www.youtube.com/watch?t=260&v=77t1UW4Qc7g&feature=youtu.be
- ↑ https://multimedia.3m.com/mws/media/616038O/application-guidelines-3m-truck-bed-lighting-kit-standard.pdf
- ↑ https://www.youtube.com/watch?t=397&v=77t1UW4Qc7g&feature=youtu.be
- ↑ https://multimedia.3m.com/mws/media/616038O/application-guidelines-3m-truck-bed-lighting-kit-standard.pdf
- ↑ https://multimedia.3m.com/mws/media/616038O/application-guidelines-3m-truck-bed-lighting-kit-standard.pdf
- ↑ https://www.youtube.com/watch?t=807&v=yebfwewtZjg&feature=youtu.be
- ↑ https://www.youtube.com/watch?t=801&v=77t1UW4Qc7g&feature=youtu.be
- ↑ https://www.youtube.com/watch?t=983&v=77t1UW4Qc7g&feature=youtu.be
- ↑ https://multimedia.3m.com/mws/media/616038O/application-guidelines-3m-truck-bed-lighting-kit-standard.pdf
- ↑ https://www.youtube.com/watch?t=393&v=yebfwewtZjg&feature=youtu.be
- ↑ https://www.youtube.com/watch?t=846&v=77t1UW4Qc7g&feature=youtu.be
- ↑ https://multimedia.3m.com/mws/media/616038O/application-guidelines-3m-truck-bed-lighting-kit-standard.pdf
- ↑ https://multimedia.3m.com/mws/media/616038O/application-guidelines-3m-truck-bed-lighting-kit-standard.pdf
- ↑ https://www.youtube.com/watch?t=1300&v=77t1UW4Qc7g&feature=youtu.be
- ↑ https://multimedia.3m.com/mws/media/616038O/application-guidelines-3m-truck-bed-lighting-kit-standard.pdf







-Step-5-Version-2.webp)


