This article was co-authored by wikiHow Staff. Our trained team of editors and researchers validate articles for accuracy and comprehensiveness. wikiHow's Content Management Team carefully monitors the work from our editorial staff to ensure that each article is backed by trusted research and meets our high quality standards.
This article has been viewed 18,174 times.
Learn more...
Silicone bras are ideal for backless and strapless styles. If you buy a quality silicone bra in a size that works for you, it can create full cleavage while remaining invisible. However, if applied incorrectly, silicone bras can be uncomfortable or ineffective. By taking proper care of your bra, positioning the cups correctly on dry skin, and applying them one by one in an upwards, rolling motion, you can wear a silicone bra comfortably for up to 8 hours.
Steps
Getting Ready
-
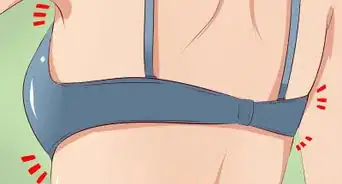
1Buy a bra in your true size. Fit is an important factor to take into account when shopping for a silicone bra. Since you won't have straps or a band to hold the bra in place, the cup size is the biggest factor that will contribute to the fit of your bra. Unlike a regular bra, the cups of a silicone bra won't necessarily cover your entire breast. The bra will cover your nipples and without causing your breast tissue to bulge.[1]
- Many people wear the wrong size bra. Measure your bra size, or go to a fitting, to find out what your true size is. Buying the size you think you are, rather than the size you actually are, can lead to fit problems.[2]
- A silicone bra in a smaller size than your true size will give the effect of more cleavage. Smaller bras are lighter, so they won't weigh your breasts down. They also pull your breasts together more tightly.
- Don't buy a bra more than one size smaller than your true size. If the bra is too tight, it will dig into your breast and create a line underneath your clothing.
-
2Check for leaks. If your bra is older, make sure that none of the silicone is leaking by checking for punctures or moistness on the surface of the bra cup. Although experts don't all agree on the health effects of silicone on bare skin, it could be a health hazard. If you think your bra is leaking silicone, it's safer to get rid of it.[3]
- To prevent leaks, store your bra away from anything sharp.
Advertisement -
3Cleanse your skin and dry it completely. Cleansing your skin will remove any sweat or dirt that could cause irritation. Any moisture will make it difficult for the silicone to stick to your skin. This could include water, deodorant, moisturizers, oils, perfume, or makeup.[4]
- It's best to start with freshly cleansed and dried skin and wait until after putting on the bra to apply anything to your skin.
Placing the Bra Cups
-
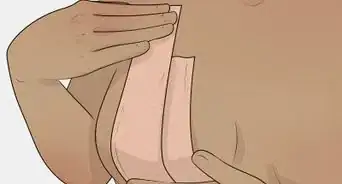
1Separate the bra cups. If your bra came with the cups attached, detach them. Apply the cups one at a time, and then reattach them.[5]
- If you try putting on the cups without detaching them, they won't give enough lift and support.
-
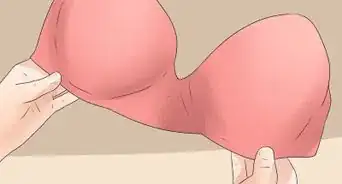
2Turn the cups inside out. You will be applying the cups to your breasts using a peeling motion. Starting with the cups inside out helps prevent any air bubbles from forming, which would make the adhesive less effective.[6]
-
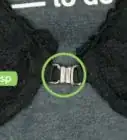
3Position each silicone cup on your breasts with the clasp in the center. The most important part of positioning the cups is making sure the clasp is centered beneath your breasts. With the clasp at the bottom and between your breasts, position the bottom of the cup to follow the underside of one breast. You can also try different variations of positioning the bottom edge to see the different fits you can achieve.[7]
- Stand in front of a mirror to get a better view of where exactly you are applying the cups.
- In general, positioning the cups further away from each other will give the effect of more cleavage.[8]
- Positioning the cups vertically will lift your breasts more.
-
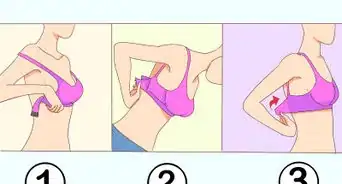
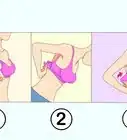
4Stick the cups to your breasts and clasp them together. Starting with the inside-out cup underneath your breast, stick the cup to the breast by rolling it upwards with one hand. Cover most of the underside of your breast and angle it towards your armpit. Use the other hand to lift your breast from underneath. Smooth down the edges of the bra. Repeat on the other side, and clasp the two sides together.[9]
-
5Try again if you need to. If the fit doesn't feel right, simply take the bra off and try again. The adhesive silicone will work for a few tries, so don't be afraid to repeat the process until you get the right fit.[10]
- Your bra should feel snug and your breasts should feel supported. Coverage is a matter of personal preference, but in general, your nipples should be covered and you should feel confident about the amount of coverage the bra provides.
Caring for the Bra
-
1Remove the bra after 8 hours, maximum. It's best not to wear silicone bras for extended periods of time. The material doesn't allow the skin to breathe, and can cause discomfort or irritation if you leave it on for longer.[11]
-
2Wash and dry the bra immediately after removing it. Soapy warm water will do the trick most of the time. Gently rinse the bra under running warm water and rub any dirt or sweat loose with mild soap. Then pat the bra gently with a dry towel to remove moisture. Silicone can attract dust and lint, which can lead to more bacterial growth. Keeping the bra clean will help cut down on irritation when you wear it next.[12]
- If you have sharp nails, be careful not to prick the surface of the bra while you're washing it.
-
3Store your bra safely away from sharp objects. Putting a silicone bra away keeps it from attracting dust and lint, keeping it cleaner for the next time you wear it. Keeping it away from sharp objects will minimize the chance of leaks. Store your bra in a closed drawer with the adhesive side down, separate from other bras with hooks that might scratch the surface.[13]
Warnings
- Many people have a silicone allergy. If your skin gets irritated, you develop a rash, or you feel general discomfort, look for a backless bra made of a different material.⧼thumbs_response⧽
- Don't use silicone on skin with open cuts, sunburn, or skin disorders, as the material can aggravate these conditions.[14]⧼thumbs_response⧽
References
- ↑ https://ultimatebraguide.com/bras/stick-on-bra/
- ↑ https://www.realsimple.com/beauty-fashion/shoes-accessories/lingerie-hosiery/how-to-find-strapless-bra
- ↑ https://makeupandbeauty.com/wear-silicone-bra-safely/
- ↑ https://makeupandbeauty.com/wear-silicone-bra-safely/
- ↑ https://www.popxo.com/2019/05/tips-on-how-to-wear-stick-on-bras/
- ↑ https://www.popxo.com/2019/05/tips-on-how-to-wear-stick-on-bras/
- ↑ https://www.popxo.com/2019/05/tips-on-how-to-wear-stick-on-bras/
- ↑ https://www.popxo.com/2019/05/tips-on-how-to-wear-stick-on-bras/
- ↑ https://www.popxo.com/2019/05/tips-on-how-to-wear-stick-on-bras/
- ↑ https://www.popxo.com/2019/05/tips-on-how-to-wear-stick-on-bras/
- ↑ https://www.india.com/lifestyle/side-effects-of-silicone-bra-is-it-safe-to-wear-a-silicone-bra-heres-how-to-use-it-safely-2276896/
- ↑ https://makeupandbeauty.com/wear-silicone-bra-safely/
- ↑ https://makeupandbeauty.com/wear-silicone-bra-safely/
- ↑ https://makeupandbeauty.com/wear-silicone-bra-safely/

