This article was co-authored by wikiHow Staff. Our trained team of editors and researchers validate articles for accuracy and comprehensiveness. wikiHow's Content Management Team carefully monitors the work from our editorial staff to ensure that each article is backed by trusted research and meets our high quality standards.
This article has been viewed 90,714 times.
Learn more...
Wondering how to use your new Moby Wrap so that your baby is comfortable and secure? Folding and tying the wrap around you and your baby may feel awkward at first, but it gets easier! With a little practice, you and your baby can spend time together moving and bonding in a safe, easy way. In this article, we’ll walk your through the various ways you can tie and wrap your Moby Wrap so that you can choose the ideal option for you.
Steps
Tying the Moby Wrap around Yourself
-
1Fold the wrap in half. You need to begin by wrapping the Moby wrap around yourself before you create a hold for the baby. Hold the wrap in front of your navel with the label in the middle facing away from you. Fold the wrap in half and place it around your waist. The stitched edges from each half should be on top, closest to you.
-
2Cross the ends behind your back. Take the two ends of the fabric and cross them behind your back. This should form an “X” over your back. The logo should still be in front of your navel.Advertisement
-
3Make an “X” across your chest. Choose one of the ends and bring it across the opposite shoulder. Take the other end and bring it across the other shoulder, forming an “X” across your chest.
-
4Tie a knot to secure the Moby wrap. Bring the fabric ends that are leftover around your back, forming a second, smaller “X” just below the larger “X.” Tie it into a knot. Or, you can wrap the excess fabric around to the front of your body, and tie the knot just below your navel.


Newborn Hold
-
1Open a pocket for your baby. This wrap is made for newborn to three-month-old babies. Take the shoulder piece that is closest to your body and open it, creating a pocket. Hold your baby up to the piece of fabric that is opposite from the one that is closest to you.
-
2Spread the fabric over your baby’s body. Slide your baby into the pocket. The baby’s legs should be in the fetal position. Spread the fabric over the baby’s shoulders, back, and bottom. Take the opposite section of fabric and spread over the baby’s body again.
-
3Pull the fabric over the baby’s head. The section with the logo should be leftover. Pull it over the baby’s body for added support. Tuck the baby’s head into the shoulder section of the fabric if you don’t wish for it to be free.


Hug Hold
-
1Slide your baby into the first shoulder hold. This wrap is made for babies 3-5 months that can fully stretch their legs. Take the shoulder piece that is closest to your body, and slide one of the baby’s legs through the hole. Hold the baby up to your opposite shoulder as you do this.
-
2Put the second leg into the other hole. Slide the fabric up over the baby’s shoulder and bottom. Spread it out until it reaches the hollow of your baby’s knee. Then, pull your baby’s second leg through the section with the logo.
-
3Pull the fabric over your baby. Spread the fabric until it covers the baby’s shoulders and back. Make sure that the legs are still free when you do this. You can choose to leave the head free, or tuck the head into one of the shoulder sections.


Hip Hold
-
1Shift the fabric “X” to your side. This wrap is ideal for babies that are 5 months and older. Locate the piece of fabric that is closest to your body. This is the side that you will hold your baby. Shift the fabric so that one “X” is on the side of your body instead of crossing over the front.
-
2Put the first leg through the shoulder hole closest to you. Gently pull one of the baby’s legs through the hole of the shoulder section that is closest to you. Spread the fabric over the baby’s shoulders, back, and bottom, reaching to the hollows of the baby’s knees.
-
3Pull both legs through the holes. Pull both of the baby’s legs through the section with the logo. Pull up the fabric over the baby’s back and bottom. The baby should now be propped up on your hip comfortably.


Kangaroo Hold
-
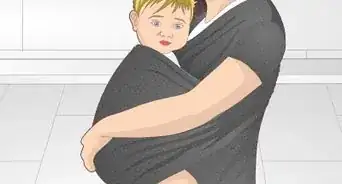
1Lower the baby into the middle section. This wrap is ideal for babies 8 pounds (3.6 kg) and heavier. Hold your baby up to one of your shoulders. Your baby should be in the fetal position. Lower the baby into the section with the logo. Spread the fabric over the baby’s shoulders and bottom.
-
2Bring the ends of the fabric over the baby. Take one loose end of the fabric, and bring it over the baby’s bottom towards your opposite hip. Repeat with the opposite end of the fabric. The baby’s bottom should be completely covered and secure.
- Wrap the loose ends of your fabric, and tie it in a double knot around your hips or back.
-
3Tuck the baby’s head into the shoulder section. Tuck the baby’s head into whichever shoulder section their head is closest to. The baby’s mouth and nose should be visible and not covered. Make sure the chin is lifted off your chest.


Warnings
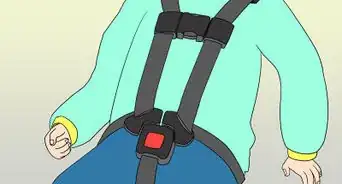
- Make sure to read the instructions carefully and check that your baby is secure before moving around with your baby. Be sure that the baby’s face is visible, and the chin is off of the chest.⧼thumbs_response⧽


About This Article