This article was co-authored by Art Fricke. Art Fricke is a home renovation and repair specialist and the owner of Art Tile & Renovation based in Austin, Texas. With over 10 years of experience, he specializes in bathroom and kitchen renovations. Art focuses on a single contractor approach to customized renovation work, and performs projects such as installing custom tile showers, fixing tiled shower leaks, replacing cracked tiles, and installing floor and wall tile.
This article has been viewed 33,423 times.
Cleaning the bathroom is probably everyone’s least favorite chore. Your bathroom is also one of the most important places to keep clean in your home. In fact, experts suggest that you should clean your bathroom, including the floor, at least once a week.[1] That might sound like a lot, but you’ll find that the more often you clean your bathroom floors, the less work it is. With regular sweeping and mopping you won't have to do deep-cleaning tasks like scrubbing the grout between tiles as often.
Steps
Clearing and Sweeping the Floor
-
1Take any moveable objects out of the bathroom. Remove the bath mat, trash bin, and any moveable pieces of furniture, so the floor is as clear as possible. This will give you plenty of room to work and ensure you don’t miss any areas of the floor when you’re cleaning.
- This would be a good time to wash your bath mat, too. It's recommended to wash your bath mat once a week, especially if you share it with other people.
-
2Sweep dust and dirt towards the center of the bathroom using a small broom. Start in a far corner of the bathroom and sweep along the edges of the room. Collect everything in a pile in the middle of the bathroom, so you can easily collect it.[2]
- Alternatively, if you have a small vacuum that works on hard surfaces, you could use that instead of sweeping.
Tip: Make sure you sweep around the base of the toilet and behind it, if you can reach there. Dust and loose bits of toilet paper tend to gather in the nooks and crannies around the toilet.
Advertisement -
3Collect the dust and dirt you gathered with a damp paper towel. Moisten a paper towel so it is just barely damp. Hold it in one hand and gently scoop up the small pile of dust and dirt, then throw it away in a trash can.[3]
- You could also sweep the pile into a small dustpan and dump it out into the trash.

Mopping and Drying the Floor
-
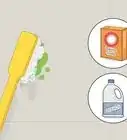
1Fill a bucket with warm water and mix in a commercial floor cleaner. Get a bucket that can hold at least 1 gallon (3.78 L) of liquid and fill it up about 3/4 of the way. Pour in the amount of floor cleaner recommended by the manufacturer, which is usually measured in capfuls.[4]
- Examples of commercial floor cleaning liquid brands are Pledge, Bona, Rejuvenate, Mop & Glo, Nature's Miracle, and Aunt Fannie's. These brands offer all-purpose floor cleaners and floor cleaners made for certain types of surfaces. Look for water-based and natural formulas.
- Read the label of the commercial cleaner you plan to use to make sure it is safe for the type of bathroom floor you have. Acidic cleaners and bleach-based cleaners are not recommended for natural stone floors, for example.
- If you don’t have any commercial floor cleaner, pour 1 cup (236 mL) of white vinegar into a bucket of water instead. This vinegar solution is also a safe way to kill off mold and mildew on your bathroom floor.
- Open up any bathroom windows, leave the door open, and turn on the fan, if your bathroom has one, for ventilation when you mop. Wear rubber cleaning gloves if you plan to wring your mop out with your hands.
-
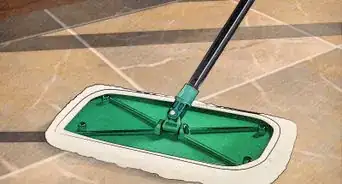
2Dip a mop in the bucket of cleaning solution and wring it out. Submerge the head of your mop all the way in the bucket full of water and floor cleaner. Pull it out and wring out the mop head, so that it isn’t dripping.
- Applying too much water can damage certain types of floors, especially if you have porous tiles. Make sure the mop head is fully damp, but not soaking. The idea is to avoid leaving big puddles of water on the bathroom floor.
- You can use any kind of mop for this, such as a sponge mop or a string mop. Alternatively, you could use something like a Swiffer Wet Jet.
-
3Start mopping from the side of the bathroom furthest from the door. Stand in a corner of the far side of the bathroom and place the wet mop head against the floor. Move the mop across the floor from side to side, walking your way backwards until you reach the door.
- This technique will ensure that you don’t step on any parts of the bathroom floor that you have already mopped and that you don’t get trapped on the other side of the bathroom waiting for the floor to dry.
- If your bathroom is on the small side, you can probably mop the whole floor without re-wetting your mop. If you have a large bathroom, you might need to dunk the mop head and wring it out 1-2 additional times as you mop.
Tip: Remember to mop around the toilet, right up against the base. If it’s too tight of a fit for the mop, you can use a handheld sponge or rag to clean around the base of the toilet.
-
4Push the mop all the way into corners and up against the baseboards. Squeeze the mop all the way into each corner of the bathroom when you reach a corner and wiggle the mop head around to dislodge any accumulated grime in the corner. Run the mop along the floor right up against the baseboards each time you reach a side of the bathroom to ensure you clean the floor where it meets the wall.
-
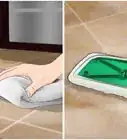
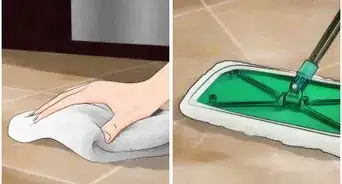
5Push a dry towel across the floor with your feet to dry it off. Lay a towel out flat on the bathroom floor in the doorway and stand on it with one foot. Use your foot to slide it around the whole bathroom floor, moving side to side and working your way forward, to dry up excess moisture from mopping.[5]
- If the towel gets totally saturated, switch it out for a new dry towel. Depending on the size of your bathroom, the size of the towel, and how wet the floor is, you can probably get by with 1-2 towels.
- Drying the floor right away will help prevent mold and mildew, as well as avoid slipping accidents.
-
6Clean any areas you missed with a sponge, paper towel, or wet wipe. Get into any nooks and crannies where you couldn't clean well with the mop, such as corners or around the toilet. Wet the hard-to-reach areas with your floor cleaning liquid or some kind of all-purpose spray cleaner, then wipe them clean.
- A disinfecting spray or wipe is good for cleaning in these areas, specifically around the toilet, where germs and bacteria tend to accumulate more.

Cleaning Tile Grout
-
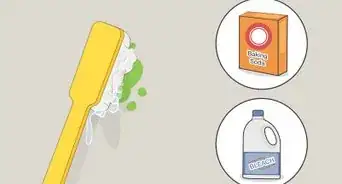
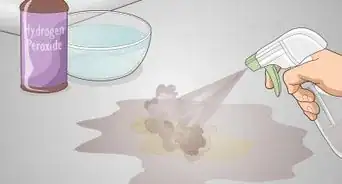
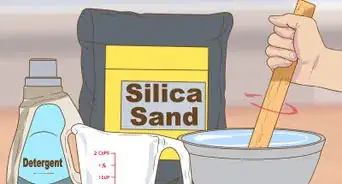
1Make a whitening cleaning solution that includes baking soda. Combine 2 parts baking soda with 1 part hydrogen peroxide or 1 part water in a container. Mix the ingredients together thoroughly until the solution is an even consistency, which will be somewhat pasty.[6]
- This is a safe cleaning solution for all types of tiles. There are harsh commercial tile cleaners and other homemade solutions that you can make, but they might not be safe for certain types of tiles, so it’s best to stick with hydrogen peroxide and baking soda.
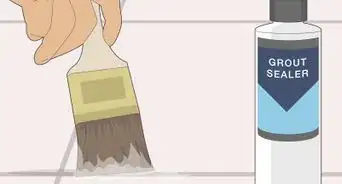
- You can also use oxidizing bleach powder and water to make a whitening paste.[7]
- If you don’t have a tile floor or the grout between tiles doesn’t look dirty, you don’t have to do this part of cleaning your bathroom floor.
Tip: You can use vinegar instead of water or hydrogen peroxide, but only if your bathroom floor is not made of natural stone, which can be damaged by vinegar.
-
2Put the mixture onto dirty grout between tiles and let it sit for 10 minutes.[8] Carefully pour or scoop out the baking soda solution onto any dirty tile grout that you want to clean, so that the grout is completely covered. Leave it alone for at least 10 minutes to let the solution work.[9]
- Always do this after you sweep and mop the floors, so that you have already removed as much surface dirt as possible and are only left with the stained and discolored tile grout.
- You can use your fingers to spread the solution on top of the grout. The mixture is harmless to your skin.
-
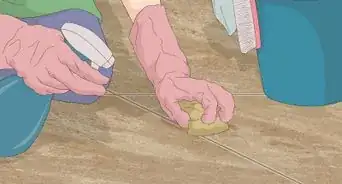
3Scrub the grout with a stiff-bristled brush.[10] Use an old toothbrush or a stiff-bristled cleaning brush. Scrub the cleaning solution into the grout lines using vigorous back and forth motions, going with the direction of the grout.[11]
- This will whiten the grout and can remove stains caused by mold, mildew, rust, and other things that cause discoloration.
-
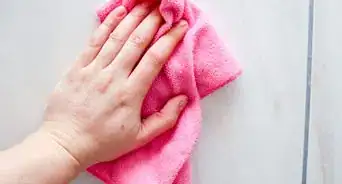
4Wipe the tiles clean with a wet rag. Soak a towel or cloth in plain water and wring it out so that it isn’t dripping wet. Wipe up the baking soda and hydrogen peroxide mixture from the tiles you just scrubbed. Rinse out the rag and repeat this until you clean up all the solution from the floor.[12]
- If the grout between your tiles is still stained or discolored, you can repeat the whole process until you are happy with the results. Try letting the cleaning solution sit for longer on the second go-round and see if it whitens the grout more.
Expert Q&A
-
QuestionHow do I get stains off of my bathroom floor?
 Art FrickeArt Fricke is a home renovation and repair specialist and the owner of Art Tile & Renovation based in Austin, Texas. With over 10 years of experience, he specializes in bathroom and kitchen renovations. Art focuses on a single contractor approach to customized renovation work, and performs projects such as installing custom tile showers, fixing tiled shower leaks, replacing cracked tiles, and installing floor and wall tile.
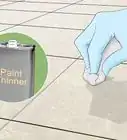
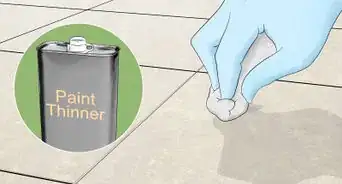
Home Renovation & Repair SpecialistTry applying a paste made from oxidizing bleach powder and water on the stain. Leave it there for 10 minutes before scrubbing the surface with a stiff brush.
Warnings
- Wear rubber cleaning gloves if you plan to wring out your mop with your hands to avoid getting any floor cleaner or germs on your skin.⧼thumbs_response⧽
- Avoid using acidic cleaners and bleach-based cleaners on your bathroom floor if you have a natural stone floor.⧼thumbs_response⧽
- Ventilate your bathroom as much as possible before you start mopping by opening windows and doors and turning on the fan, if there is one.⧼thumbs_response⧽
Things You’ll Need
- Broom
- Paper towel
- Bucket
- Floor cleaner
- Mop
- Towel
- Hydrogen peroxide
- Baking soda
- Container
- Stiff-bristled brush
- Rag

References
- ↑ https://www.theguardian.com/lifeandstyle/2019/feb/21/new-household-rules-ditch-toilet-brush-wash-much-more
- ↑ https://www.bhg.com/homekeeping/house-cleaning/surface/how-to-clean-a-bathroom-floor/
- ↑ https://www.bhg.com/homekeeping/house-cleaning/surface/how-to-clean-a-bathroom-floor/
- ↑ https://ohsospotless.com/how-to-clean-bathroom-floors/
- ↑ https://www.bhg.com/homekeeping/house-cleaning/surface/how-to-clean-a-bathroom-floor/
- ↑ https://www.bhg.com/homekeeping/house-cleaning/surface/how-to-clean-a-bathroom-floor/
- ↑ Art Fricke. Home Renovation & Repair Specialist. Expert Interview. 1 July 2020.
- ↑ Art Fricke. Home Renovation & Repair Specialist. Expert Interview. 1 July 2020.
- ↑ https://www.bobvila.com/slideshow/13-unusual-tips-for-your-cleanest-bathroom-ever-48495#hydrogen-peroxide-cleanses-grout
- ↑ Art Fricke. Home Renovation & Repair Specialist. Expert Interview. 1 July 2020.
- ↑ https://www.bobvila.com/slideshow/13-unusual-tips-for-your-cleanest-bathroom-ever-48495#hydrogen-peroxide-cleanses-grout
- ↑ https://www.bobvila.com/slideshow/13-unusual-tips-for-your-cleanest-bathroom-ever-48495#hydrogen-peroxide-cleanses-grout
About This Article