This article was co-authored by Daniel Stoescu. Daniel Stoescu is a Master Electrician and the Owner and Operator of Home Tech Solutions, LLC in Hampton, Virginia. With over a decade of experience, Daniel specializes in wiring residential, commercial, and light industrial structures. The Home Tech Solutions team has over four decades of combined experience and offers comprehensive solutions for residential electrical needs.
This article has been viewed 680,693 times.
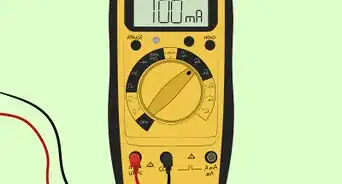
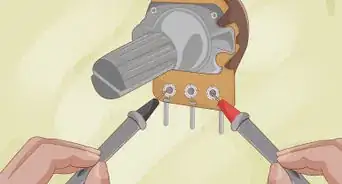
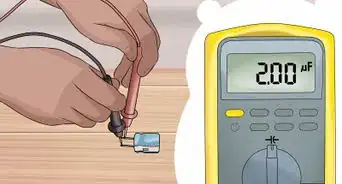
An ohmmeter is an electronic device that measures resistance in an electronic component or circuit. It works by using 2 probes to send a current through the circuit and measuring how much resistance, in ohms, that current encounters. The first step in using an ohmmeter is setting it up. Once you’ve done that, you can use it to measure the resistance of any circuit simply by holding the probes on opposite sides of it.
Steps
Setting up Your Ohmmeter
-
1Make sure your meter has a battery installed or is plugged in. If you just bought an ohmmeter, the battery may have come pre-installed in your unit, or packaged separately with instructions for installing it. You’ll need to do this whether your ohmmeter is digital or analog.
- Analog ohmmeters are very basic and inexpensive and usually range from 0-10 to 0-10,000 ohms. Digital ohmmeters may have similar ranges or “auto-range,” where the device will read a circuit’s resistance and automatically select the best measuring range.
Tip: If you’re investing in an ohmmeter for general use, you probably ought to go ahead and buy a good quality "multimeter" (multi-tester), which can test other electrical values such as voltage and amperage as well.
-
2Plug your test leads into the sockets on your meter. For multi-functional meters, you will see a "common," or negative plug, and a "positive" plug. These may also be color-coded, with the black lead going into the negative plug and the red lead going into the positive plug.
- Ohmmeters are typically sold along with these test leads. If your meter was recently purchased, you should not have to buy your leads separately.
- Be sure to plug the short ends of the leads into the sockets. The longer ends, with the grips and probes, are the ends you’ll use to actually test a circuit’s resistance.
Advertisement -
3Touch the 2 ends of the leads together to make sure the meter is zeroed. When you touch the probes together, the needle on an analog ohmmeter should point all the way to the right.[1] If the needle doesn’t do this, turn the adjustment knob on your ohmmeter until the needle reads 0 ohms when the probes are touching each other.
- Note that the scale reads in the reverse direction of most conventional measuring scales: that is, less resistance is to the right and more resistance is to the left.
- If yours is a digital ohmmeter, the screen should read “0” when you touch the 2 probes together.
-
4Test your ohmmeter on a store-bought resistor, if you can. Get a resistor (or several resistors) whose resistance is already known. Then, use your ohmmeter to measure the resistor’s resistance and see if you get the reading that you expect to.[2]
- You can technically use anything that conducts electricity, from a piece of aluminum foil to a pencil mark on a sheet of paper, to test your ohmmeter, as long as you know that object’s resistance value ahead of time. Place the meter’s probes on opposite ends of the conductor and look to see if the correct resistance reading shows up on the meter’s screen.
Measuring Resistance
-
1Disconnect all power to the circuit you’re testing. If you’re measuring the resistance inside a circuit or wire, it has to be completely dead in order for you to get an accurate reading.[3] This is also very important for your own safety.[4]
- Another source of power isn't necessary since your ohmmeter will supply all of the voltage and current for your circuit.
- Trying to use an ohmmeter on a powered circuit can cause damage to the meter, the circuit, and you.
Warning: When testing an electronic circuit, be sure it is not live. This means not only unplugging it, but also discharging any capacitors in the circuit. Televisions and other electronics with cathode ray tubes and microwave ovens can have capacitors charged with thousands of volts even when unplugged.[5]
-
2Set your ohmmeter to the appropriate scale, if possible. Turn the dial in the center of your ohmmeter to change the scale of the reading, from tens, to hundreds, to thousands, and so on. For best results, turn your meter to the lowest scale that is higher than the resistance of what you’re measuring.[6]
- For example, if you expect the circuit you’re measuring to have a resistance of 1100 ohms, then your ohmmeter should be set to X100. This means, a reading of “11” on your ohmmeter would be equal to 1100 ohms.
- Note that you can only do this if you have an idea of what the resistance of what you’re measuring ought to be.
-
3Touch the 2 probes to oppose ends of the circuit. Place 1 probe on 1 end of the circuit and place the other probe on the other end. Note that it doesn’t matter which probe is touched to which end of the circuit.[7]
- Because you’re measuring the resistance in the circuit and resistance doesn’t change with the direction of current flow, the positive probe and the negative probe can be on either end of the circuit to get an accurate resistance reading.
-
4Read the number on your ohmmeter to find the circuit’s resistance. This number, multiplied by the scale that your meter is set to, is equal to the circuit’s resistance in ohms. The lower the resistance, the easier it is for current to flow through the circuit.[8]
- For example, if a circuit has 0 ohms, current would be able to flow through the circuit completely unimpeded.
-
5Isolate the components of an electrical circuit to test them individually. Remove the resistor you want to measure from the circuit board by unsoldering the pins with a soldering iron. This will ensure that you’re not getting an inaccurate reading through another path in the circuit.[9]
- In other words, by testing a resistor while it’s still in a circuit board, you can’t be sure that the resistance you’re measuring is only coming from that particular resistor.
-
6Turn the ohmmeter off when you’re done using it. Occasionally the test leads will become shorted while the device is stored, draining the battery. The best way to prevent this is turn off the ohmmeter and disconnect the wires before you store it.
Expert Q&A
-
QuestionWhat is the first thing to do when using the ohmmeter?
 Daniel StoescuDaniel Stoescu is a Master Electrician and the Owner and Operator of Home Tech Solutions, LLC in Hampton, Virginia. With over a decade of experience, Daniel specializes in wiring residential, commercial, and light industrial structures. The Home Tech Solutions team has over four decades of combined experience and offers comprehensive solutions for residential electrical needs.
Master Electrician Before taking any measurements, make sure the ohmmeter works by touching the leads together.
 -
QuestionCan you use an ohmmeter on a live circuit?
 Daniel StoescuDaniel Stoescu is a Master Electrician and the Owner and Operator of Home Tech Solutions, LLC in Hampton, Virginia. With over a decade of experience, Daniel specializes in wiring residential, commercial, and light industrial structures. The Home Tech Solutions team has over four decades of combined experience and offers comprehensive solutions for residential electrical needs.
Master Electrician No, you can't. You should never use your ohmmeter to test any live circuits.
 -
QuestionHow do you use measured ohmmeter resistance directly?
 Community AnswerYou can use it by determining if a device is shorted or open. This type of test is called OUT-OF-THE -CIRCUIT test. Examples are: Testing a fuse, breaker, switch, filaments etc.
References
- ↑ Daniel Stoescu. Master Electrician. Expert Interview. 21 June 2021.
- ↑ https://circuitdigest.com/tutorial/how-to-test-if-multimeter-is-working-or-not
- ↑ Daniel Stoescu. Master Electrician. Expert Interview. 21 June 2021.
- ↑ https://www.youtube.com/watch?v=ocvaqGzvE2I#t=47s
- ↑ Daniel Stoescu. Master Electrician. Expert Interview. 21 June 2021.
- ↑ https://www.youtube.com/watch?v=aJ_4Xb_fOCA
- ↑ https://sciencing.com/use-ohmmeter-test-ac-transformer-7812347.html
- ↑ https://www.youtube.com/watch?v=ocvaqGzvE2I#t=20s
- ↑ https://sciencing.com/use-ohmmeter-test-ac-transformer-7812347.html
About This Article
To use an ohmmeter, start by disconnecting all power to the circuit that you're testing. Next, turn the dial in the center of your ohmmeter to change the scale of the reading from tens, to hundreds, to thousands, and so on. Use the lowest scale available on the meter that is higher than the resistance of what you’re measuring. Then, touch the 2 probes to opposite ends of the circuit and read the number on the ohmmeter to find the circuit’s resistance. Keep in mind that the lower the resistance, the easier it is for current to flow through the circuit! For tips on setting up your ohmmeter properly, read on!


