This article was co-authored by wikiHow staff writer, Amy Bobinger. Amy Bobinger has been a writer and editor at wikiHow since 2017. She especially enjoys writing articles that help people overcome interpersonal hurdles but frequently covers a variety of subjects, including health and wellness, spirituality, gardening, and more. Amy graduated with a B.A. in English Lit from Mississippi College in 2011 and now lives in her hometown with her husband and two young sons.
This article has been viewed 138,316 times.
Learn more...
Manual typewriters have plenty of vintage charm, but there are practical reasons for using them, too. Typewriters can create neat type on oddly-shaped envelopes or papers, and they can be fun to tinker with. If you’ve never used a manual typewriter before, there are a few things you need to know before you can begin.
Steps
Setting the Margins
-
1Slide the margin set on the right-hand side of the typewriter. Before you start typing, you’ll want to make sure that your margins are set correctly. The right-hand margin set is usually located next to the larger carriage release lever at the top right of the typewriter. The margin sets usually look like metal brackets at the very top of the typewriter. They may have a button you have to press before you can move them.[1]
-
2Move the margin set on the carriage until it is located at your desired right margin. Some typewriters have a ruler built in for measuring an exact margin. If yours doesn’t, you may want to use a tape measure or a ruler to get accurate margins. Standard margins for a typewriter are 1 inch (2.5 cm) all the way around the paper, although some people prefer 1.25 inches (3.2 cm) on the sides.[2]Advertisement
-
3Repeat the process for the left-hand side. Once you get your right margin, set the left-hand margins to match by sliding the left margin set along the carriage. The margins should remain set until the next time you press the margin-set levers.[3]


Typing
-
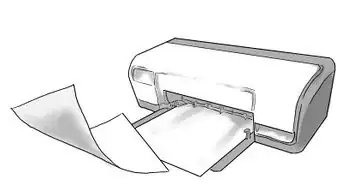
1Flip up the paper guide and place a piece of paper behind the cylinder. When you’re ready to type, you’ll need to put paper in your typewriter. You can use regular copy paper in your typewriter, although some writers prefer a heavier stock. Look for the paper lock (or paper guide), a bar located above the keyboard. Flip it up and slide your paper behind the roller, or cylinder.[4]
-
2Turn either cylinder knob until the paper comes up under the guide, then secure it. Once the paper appears, keep rolling until the carriage is located where you want to start typing. Remember that for most papers, your top margin should be 1 inch (2.5 cm). When the paper is where you want it to be, push the paper lock back into place.[5]
-
3Adjust the paper, if necessary, by pressing the paper release lever. If you need to make a small adjustment to the alignment of your paper, pull the paper lock forward again and press the paper release lever. Fix the paper, then push back the paper lock and the paper release lever.[6]
-
4Push the carriage to the right as far as it will go to begin typing. To start typing, use the carriage-return lever to push the carriage all the way to the right. When you have finished typing your first line, you should hear a bell.
-
5Return the carriage to its original position with the carriage-return lever. This will automatically drop you down to a new line. The line space lever is generally on the left side of the carriage.[7]


Changing the Ribbon
-
1Change the ribbon when the type begins to fade. The ribbon is what transfers the ink to the paper when you strike a key. If you notice that your typing is starting to fade, it’s probably time to change the ribbon.
-
2Press the shift-lock key and move the color control lever to the red dot. For most typewriters, engaging the shift-lock key, shifting the color control lever, then depressing 2 central keys at the same time will release the type bars and raise the ribbon carrier. If this doesn’t work for yours, you may need to consult your user manual.
- If your typewriter didn’t come with a user manual, look online to see if you can find a copy. There are websites designed by typewriter enthusiasts containing manuals for almost every typewriter model that has been produced.
-
3Pay careful attention to how the ribbon is threaded through the carrier. Once your ribbon carrier is raised, look carefully to see how the ribbon is threaded so you’ll be able to put it back in the same way. If you need to, draw a diagram to help you remember.
-
4Lift the spools straight up or press the release lever for a cartridge. Most vintage typewriters use ribbon spools. If this is the case, you will lift the spools straight up to remove the old ribbon. Some later models, however, used cartridges. If this is the case, you should see a cartridge release lever. Press this, then remove the old cartridge and discard it.
-
5Slide the new ribbon spools into place or snap in the new cartridge. Once you’ve discarded the old ribbon, carefully place the new ribbon in the ribbon carrier exactly how the old one sat. If you’re using spools, the ribbon should wind from the back of the spools. A cartridge should easily snap into place.
-
6Remove slack from the ribbon. Once your ribbon is correctly installed, you’ll re-engage the type bars to hold it in place. Release the shift-lock key, then carefully turn either spool to take up any slack in the ribbon.


Maintaining Your Typewriter
-
1Clean the machine each time you use it. Use a small brush or a can of air duster to remove any dust and other debris that might build up on your typewriter. Dirt can get down into the type mechanisms, clogging them up and causing your keys to stick.[8]
-
2Cover your typewriter when it’s not in use. Covering your typewriter will extend its life by protecting it from dust that’s in the air. If you don’t have a cover, try laying a pillowcase or a small blanket across your typewriter when you’re not using it.[9]
-
3Oil your typewriter occasionally. You don’t need to use much oil on your typewriter, but a little oil can help keep the parts functioning. How often you oil your typewriter depends on how often you use it — if you use it every day, oil it about once a week. Use the end of a pin or paper clip to apply a lightweight oil (such as gun oil) to the carriage rails.[10]


References
- ↑ http://site.xavier.edu/polt/typewriters/Royalportables1930.pdf
- ↑ https://practicaltypography.com/page-margins.html
- ↑ http://site.xavier.edu/polt/typewriters/Royalportables1930.pdf
- ↑ https://typewriters.ch/files/manuals/royal_portable_manual.pdf
- ↑ https://typewriters.ch/files/manuals/royal_portable_manual.pdf
- ↑ https://typewriters.ch/files/manuals/royal_portable_manual.pdf
- ↑ http://www.machinesoflovinggrace.com/manuals/Underwood3-5manual.pdf
- ↑ http://typewriterdatabase.com/1945-FWIP_Typewriter_Care.index.manual
- ↑ http://typewriterdatabase.com/1945-FWIP_Typewriter_Care.index.manual
Community Q&A
-
QuestionDo I have to put anything in before I get started besides the paper?
 Community AnswerAs long as the typewriter has an ink ribbon in it, then the paper is all you need.
 -
QuestionHow do I load the typewriter ribbon?
 Community AnswerLook online for precise directions regarding your exact model. Most have a top panel that lifts easily. You can then easily access the location of the ribbon.
 -
QuestionDoes a typewriter needs a technique to type?
 Community AnswerThe normal technique is to press down on the keys quickly, and with significant force.


About This Article

To use a manual typewriter, first move the margin set on the carriage to 1 inch, or your desired measure. Then, flip up the paper guide and feed your paper in, turning the cylinder knobs until your paper re-appears. Once the carriage is located where you want to start typing, push it as far right as it will go and begin typing. When you hear a bell, return the carriage to its original position with the carriage-return lever to start a new line. For more tips, such as how to change the ribbon and maintain your typewriter, keep reading!