This article was co-authored by Tiffany Carnevale-Russo. Tiffany Carnevale-Russo is a Licensed Cosmetologist and Salon Manager at Jaxson Maximus, a men’s salon and custom clothiers based in southern Florida. With over 19 years of beauty industry experience, she specializes in haircuts and hairstyling for men and building salon brands. Tiffany received her Cosmetology License from Paul Mitchell the School Rhode Island.
There are 7 references cited in this article, which can be found at the bottom of the page.
This article has been viewed 71,255 times.
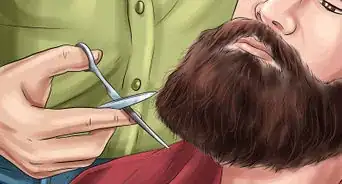
A huge part of maintaining a well-groomed and attractive beard is trimming your neckline, that area where your chin and your neck intersect. Many people let their beard hair grow down onto their neck, but that can make you look unkempt. To fix this problem, you simply need to determine where your neckline is and then trim up to, but not over, that point with a pair of clippers. Once you know how to do it, it shouldn’t take you more than a couple of minutes to maintain.
Steps
Determining Where to Trim
-
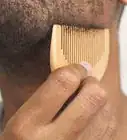
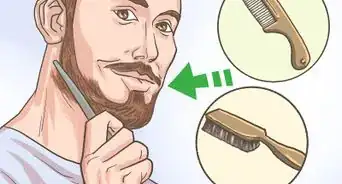
1Wash, condition, and dry your beard to prepare it for trimming. Starting with a clean slate is important for several reasons: your hair will be softer and easier to trim, and you’ll be less likely to cause any infections because all your sweat and grime will be washed away. You don’t need to take a full shower—simply washing your beard and neck at the sink will be sufficient. Make sure to fully dry your beard with a towel or a hairdryer before you start to trim it[1]
- Never trim your neckline when your hair is wet. If you do, it’ll inevitably be shorter than you want once it dries.
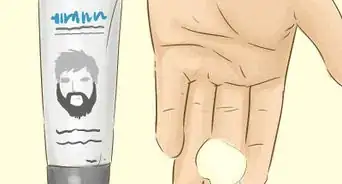
Tip: Use a special conditioner made just for beards called beard oil. It’s formulated to moisturize coarse hair, making it much better for your beard than your typical conditioner.
-
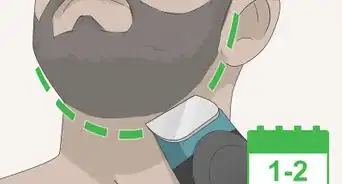
2Visualize your neckline by imagining a curved line going from ear to ear. Imagine that there is a point below each ear that is connected in the middle by an additional point right above your Adam’s apple.[2] Tilt your head side-to-side to observe where your skin naturally creases between your chin and your neck. This line is generally where you’ll want to create your neckline.[3]
- Many people think their neckline should be in line with their jawline, but that’s not the case. Trimming to the jawline will make your beard look too small for your face.
Advertisement -
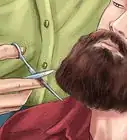
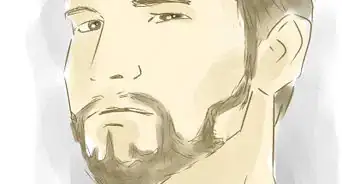
3Hold your head upright and look straight into the mirror. Take note of any hair you can see below your chin, especially if there is hair creeping down your neck. Look at your face from an angle to see what needs to be trimmed on the sides.[4]
- A 3-way mirror is really helpful for the entire trimming process, and it’ll help you find your neckline much more easily. If you don’t have a 3-way mirror, use a handheld mirror instead.
-
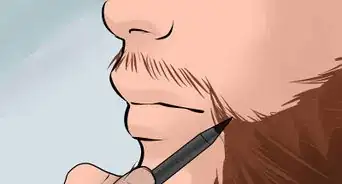
4Place 2 fingers on your Adam’s apple to find how high you should trim. Place 1 finger directly on your Adam’s apple, and place the other finger just above it. This is generally the highest point to which you should trim your neckline, as it creates a natural delineation between your chin and your neck.[5]
- For a tighter trim, you might go slightly higher than this point. But when you’re first starting out, it’s better to err on the side of caution and trim lower at first and then take it higher. You can always trim more hair, but it takes a while for hair to grow back.


Trimming Along the Neckline
-
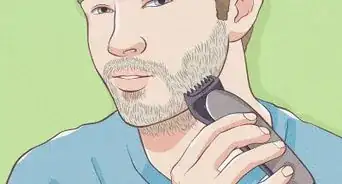
1Remove the guard from your clippers to get the closest shave possible. Most hair clippers and beard trimmers come with an adjustable guard so that you can change how short your trim will be. To create a crisp, clean neckline, remove the guard.[6]
- Hair clippers may have the low settings you need, but if not, you’ll want to invest in a beard trimmer if you don’t already have one.
-
2Start trimming at your Adam’s apple and work your way out to the sides. Relocate the spot above your Adam’s apple, which is the highest point to which you want to trim.[7] Turn on the clippers, and shave up your neck until you get to that point, then stop. Continue shaving your neckline around the edge of your face until you’ve gone out to each ear.[8]
- Keep in mind that you never want to trim on your actual jawline.
-
3Create a square look if you like a more angular, masculine style. From your earlobes, trim a vertical line in your beard until it intersects with the trimmed horizontal line above your Adam’s apple. Keep the lines as straight as possible so that there is a clear angle where the 2 lines meet.[9]
- This look is very stylized and is currently very popular. It’s a great option if you like to regularly trim your beard, groom your hair, and look very put together.
-
4Trim your neckline into a round shape for a softer, less nuanced look. Instead of creating straight lines in your neckline, create a rounded border where your horizontal neckline merges with the hair on your actual face. Make sure to check that both sides of your face are trimmed to the same points so they look even.[10]
- This is a wonderful look if you want to present a more laid-back, yet still well-groomed, appearance.
-
5Remember to trim any other stray hair on your neck for a clean finish. After you’ve trimmed your neckline, take a moment to spot-check the rest of your neck. Look for stray hairs that are growing anywhere on the sides or front of your neck and buzz them off.[11]
- Don’t forget to wipe all the stray hairs off of your face, neck, and chest once you’re finished trimming your neckline.
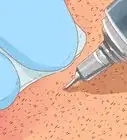
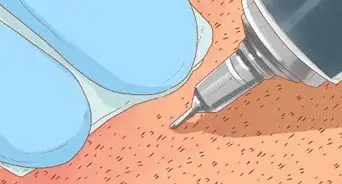
Tip: For an even cleaner look, use shaving cream and a razor to clean up your neckline after using the clippers. This will also delay any five o’clock shadows a little longer.


Things You’ll Need
- Shampoo and conditioner
- Towel or hairdryer
- Electric trimmer
- Towel

References
- ↑ https://www.esquire.com/style/grooming/a4429/how-to-trim-a-beard/
- ↑ Tiffany Carnevale-Russo. Licensed Cosmetologist. Expert Interview. 14 September 2021.
- ↑ https://youtu.be/HBcFFOw6x2E?t=21
- ↑ https://youtu.be/HBcFFOw6x2E?t=79
- ↑ https://youtu.be/ofALWHT4v-Q?t=51
- ↑ https://www.thetrendspotter.net/trim-fade-beard-neckline/
- ↑ Tiffany Carnevale-Russo. Licensed Cosmetologist. Expert Interview. 14 September 2021.
- ↑ https://www.thetrendspotter.net/trim-fade-beard-neckline/
- ↑ https://ruggedfellowsguide.com/trimming-a-beard-neckline/