This article was co-authored by wikiHow Staff. Our trained team of editors and researchers validate articles for accuracy and comprehensiveness. wikiHow's Content Management Team carefully monitors the work from our editorial staff to ensure that each article is backed by trusted research and meets our high quality standards.
There are 14 references cited in this article, which can be found at the bottom of the page.
This article has been viewed 338,587 times.
Learn more...
Tie dyeing is a favorite fabric craft for kids and adults of all ages. By using a variety of tying methods, you can create interesting patterns with your tie dye. Speaking of dye, there are many pre-made kinds you might use, most of which you can find at your local craft store or on Amazon. You could make your own dye out of natural materials as well! Whether using commercial dyes or your own homemade type, the procedure will be mostly the same. You'll need to tie your fabric to create cool patterns with your dye, prepare the fabric for dyeing, and then soak your fabric in the dye to create your tie dye masterpiece.
Steps
Using a Basic Spiral Pattern
-
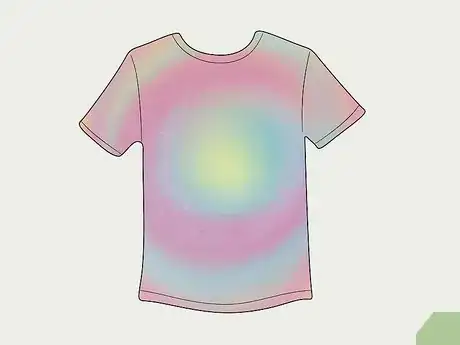
1Make a basic spiral. The spiral pattern is a classic tie dye look. The basic spiral collects all your fabric together into a single coil. Using this method of tying, you'll create a design with your design that corkscrews out from the middle point of your spiral.
-
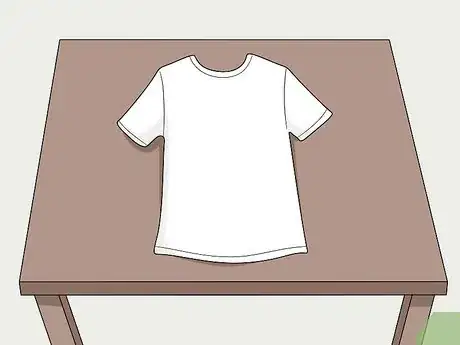
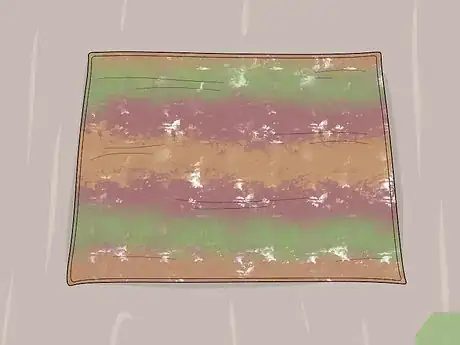
2Spread your material out on a flat surface. But before you do, make sure the surface is clean! If you are working on a commonly used surface, like a table you eat meals at, leftover food or oil can get on your fabric and ruin your consistency of the pattern made by your dye.
- Crumbs wound in your fabric could create light spots in your dye or flecks of white. Take a damp cloth and wipe off your surface before laying your fabric on it.
- You may want to protect the surface on which you are working by laying down a dye resistant mat or disposable cover to work on. Some common options include cardboard, plastic, and tarps.
Advertisement -
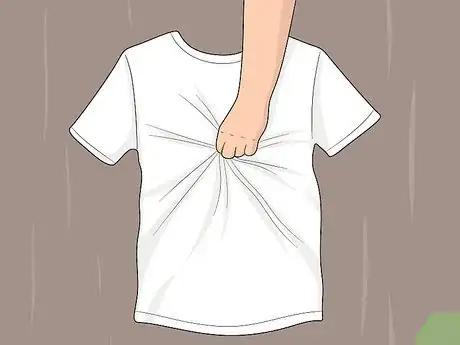
3Pinch the center of the fabric with your thumb and two fingers. You only want to gather a very small amount of fabric between your fingers at this point. The fabric you grasp in your fingers will form the center point of your fabric. Gathering too much fabric can lead to a large, blob-like center of your spiral.[1]
-
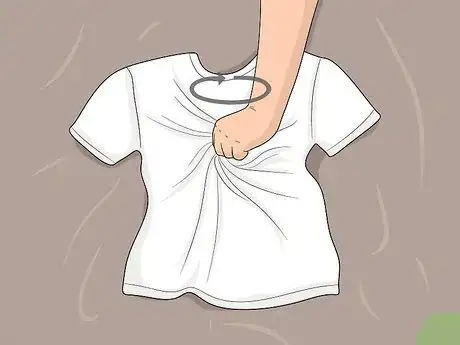
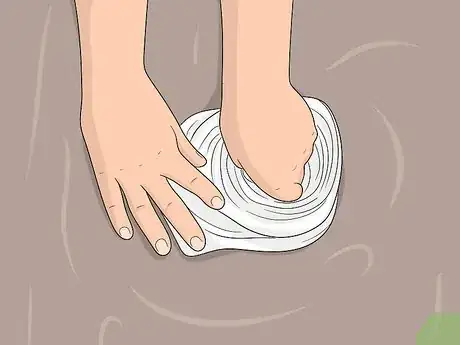
4Twist the fabric while holding it down with your fingers. Keep your spiral as tight and flat as possible. To help create a regular spiral, you should flatten your fabric against your surface with each full twist of your hand. As you continue to twist, the fabric should begin to form a spiral shape.
- You may want to use a tool to help you coil your fabric to give you the tightest spiral possible. A tighter spiral will result in more coils in the pattern, making it more elaborate. Some tools you might use to wind your spiral include a blunt fork or the eraser end of a sturdy pencil.[2]
-
5Close your spiral with your free hand. Bring the loose end of your spiral and hold it to the main coiled part with the free hand you aren't using to twist the fabric. Pull the outside end of your coil tightly so that your spiral is wound as tightly as possible.[3]
-
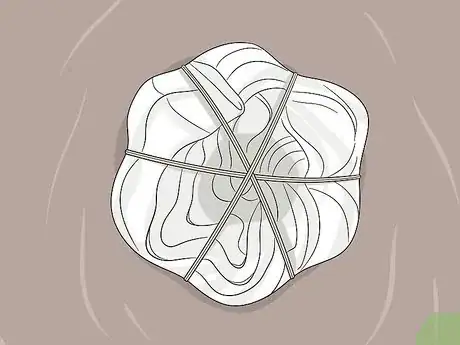
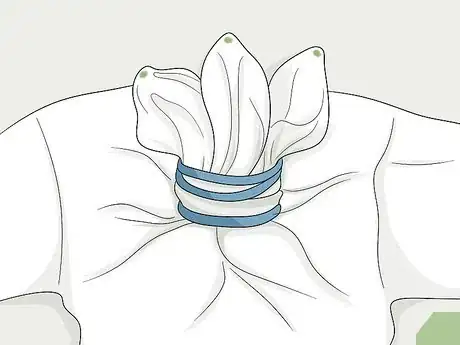
6Band your spiral together. Continuing to hold your spiral together with one hand, use your other hand to slide several large rubber bands around the fabric. You'll want to position them so that they cross at the center of the bundle, stretching from one end of the coil to the opposite side.
- Start with four rubber bands and increase the number as you find necessary. Larger pieces of fabric, fabric wound especially tight, or thicker fabric might need more rubber bands to maintain the spiral.
Utilizing Knots
-
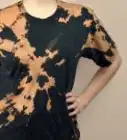
1Know the effect of knotting tie dye. An advantage of knotting your tie dye is that you can tie as many knots as you want. This is especially useful for long strips of fabric. Dyeing knotted fabric creates a design where fine lines of white, like the irregular shape of cracked glass, run throughout your dye colors in random directions.
-
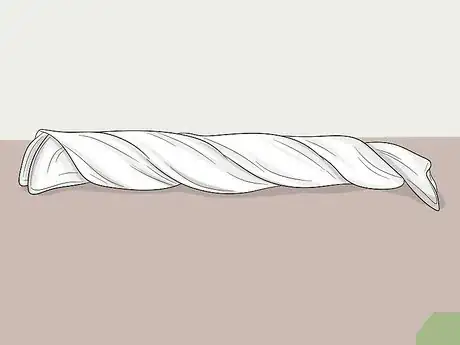
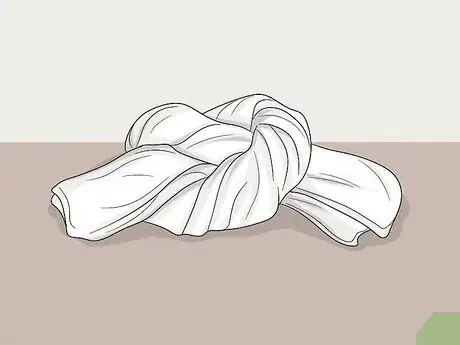
2Twist the fabric into a long rope. Hold each end of your fabric in your hands so the length of it is stretched between. Then twist each hand in opposite directions in a wringing motion. Continue twisting until the fabric cannot be twisted any more.
-
3Tie the rope into a knot. You might want a large, central knot at the center of your fabric to create a focal point in your design. You could also tie many knots to create a series of burst-like points throughout your fabric.
- Be careful while twisting and knotting your fabric. You'll want it to be tight, but knotting it too tightly can cause the fabric to rip or warp.
-
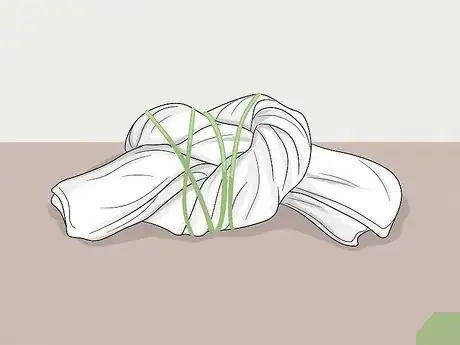
4Hold the knots in place with rubber bands. After you tie each knot, pull it tight. Hold the tightened knot with one hand to keep it from loosening. Then, with your free hand, reinforce each knot by looping rubber bands over them.[4]
Randomizing with Electric Bunching
-
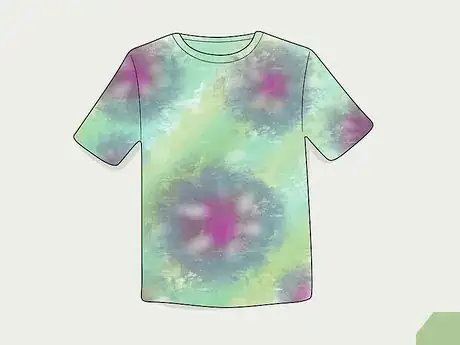
1Understand the effect. The electric bunching technique is easy to form but hard to predict. After dyeing the fabric, you should be left with several "shocks" of color dispersed at random through the cloth.
-
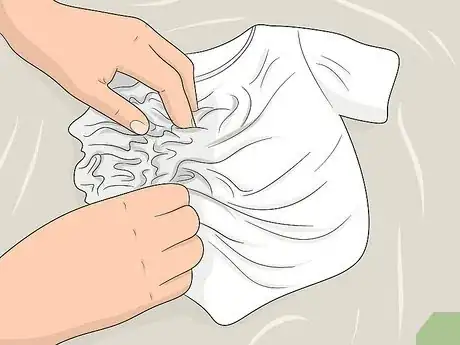
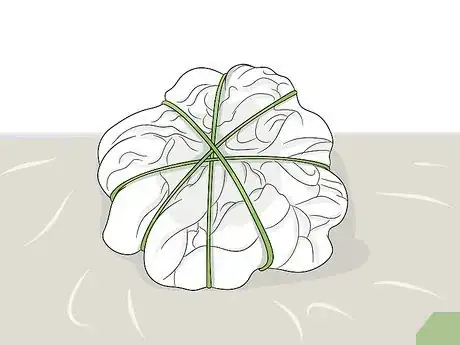
2Bunch up the fabric. You'll want to do so in small, random portions. Use one hand to hold your bunch together so they do not come loose and then draw the entire piece of fabric together into the shape of a ball. Keep as much of the cloth "face," or outer side of the fabric, exposed as possible.[5] [6]
-
3Fasten your ball together. With one hand, hold the ball of fabric together. With your free hand, wrap several rubber bands around it to hold it together. You could also use twine or string to fasten your ball together, but in both cases, fasten your ball loosely.
- Fastening your ball too tightly can make it difficult for the dye to work its way into the core of the bunched fabric. This can create gaps in your dyed design. Use the minimum number of fasteners secured as loose as possible while still retaining the ball's shape.
- If you plan on using twine or string, it may be easiest to have a friend help you hold the bunched fabric while you tie, or vice versa. If no friends are available, lay of the string on the surface, set your ball atop the middle of the string while still holding the ball together with one hand, cross the ends of the string at the top of your ball, and use your free hand to tie a simple knot.
Creating Rosettes
-
1Know the pattern rosettes will create. The rosette pattern creates a series of small, overlapping circles that can be linked together in a variety of patterns. You'll create this pattern by gathering together several points along your fabric and tying them together.[7]
-
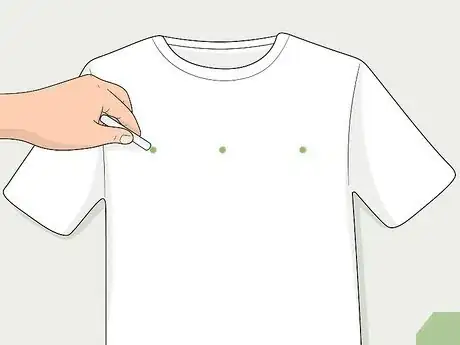
2Plot out the pattern for your rosettes. You might want an arc of rosettes beneath the top of your fabric, above its bottom hem, up and down its sides, or any number of other variations. When you've decided where you want your rosettes to be, use a piece of chalk to draw a dots along the fabric where the center of each rosette will be.
- You can even create more elaborate shapes with your rosettes. For example, you could make a circle of rosettes around the middle of your shirt or gather them into the shape of star. Your imagination is the limit!
-
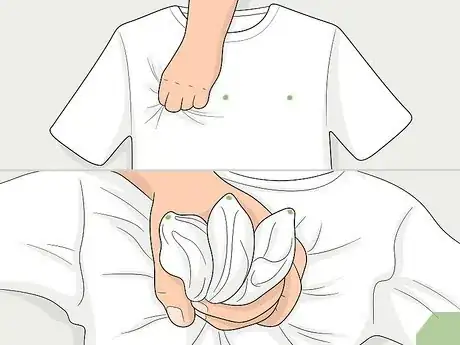
3Gather the points together. Using your thumb and pointer finger, pinch each point and draw it together with its neighbor. Use one hand to hold your gathered points together and your free hand to continue adding points. Continue doing this until all your points are gathered together.[8]
-
4Fasten your gathered rosettes. Wrap a string or rubber band about 2 inches (5 cm) below the topmost point, which should be where you first marked your dots. You'll want your rosettes fastened very tightly. This may require using more than one fastener.[9]
-
5Gather and fasten the remaining fabric. Hold your fabric just below where you have fastened your rosettes and, with your other hand, draw together the loose end and hold it firmly. Pull the fabric so it is tight and then use rubber bands or string to fasten it at regular intervals.
Tying a Striped Pattern
-
1Understand the effect. This technique creates a series of white or lighter colored stripes vertically (top-to-bottom) through the color of your dye by rolling the fabric and tying it with fasteners. Horizontal stripes can also be made by rolling your fabric left-to-right instead of top to bottom.[10]
-
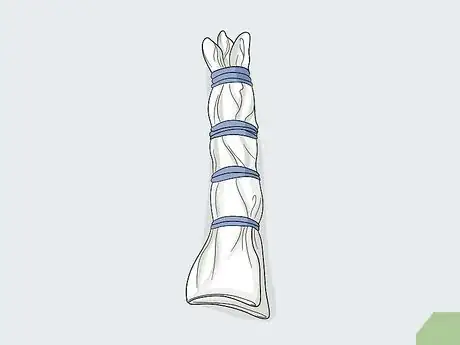
2Roll your fabric into a long tube. To create vertical (top-to-bottom) stripes, you should roll your fabric from its bottom to the top in a loose tube. For horizontal (left-to-right) stripes, you should roll your fabric in a loose tube from the left to the right.
-
3Fasten your tube at regular intervals. Use rubber bands or string to tie the cloth tube off at even intervals. If the spacing between your fasteners is uneven, the distance between your stripes will also be uneven.
- Your stripes will form along the orientation of your rubber bands.
- To ensure even striping, you might want to measure the space between your fasteners with a ruler and adjust as necessary. You could also measure out and mark your spacing beforehand.[11]
Soaking the Fabric in Fixative Solution
-
1Understanding how a fixative helps. Over time, your dye will fade and loose its vibrancy, but a fixative will help the dye to last longer. The kind of fixative you use will vary depending on the dye you are using, but by soaking your fabric in a fixative solution before dyeing, the color of your dyed shirt will stay brighter longer.[12]
-
2Prepare a soda ash bath for most chemical dyes. Chemical dyes, even commercial ones that can be purchased at a craft store, will usually be most effective if you first soak your fabric in a solution made from soda ash and warm water. Take a large plastic bucket and:
-
3Create a salt fixative for natural, berry-based dyes. If you plan on using a natural dye made with some type of berry, the generally recommended fixative is one made from salt and cold water. You can make this solution easily by combining in a large bucket:
-
4Prepare a vinegar fixative for other natural, plant-based dyes. If you plan to use a natural dye made from plant material other than berries, a solution made from water and vinegar will likely work better than one made from salt. To create your vinegar fixative solution, mix in a large bucket:
- 1 cup (250 ml) white distilled vinegar with 4 cups (1 L) cold water. Stir well to distribute the solution evenly.
-
5Soak the tied fabric in the corresponding solution. Immerse the bundle of tied-up fabric in the fixative solution long enough to soak thoroughly. When using soda ash, soak the fabric for 5 to 15 minutes. When using salt or vinegar, heat the liquid to a simmer and let the garment sit in the simmering liquid for 1 hour.[17]
-
6Squeeze out excess moisture. You will need to wait for your fabric to cool before handling it if it has been soaking in a simmering solution. After the fabric has finished soaking/cooling, remove it from the fixative and wring it out so that it feels damp.
- If using vinegar or salt, rinse the material before squeezing out the excess moisture.
- A pair of tongs can be used to remove the fabric from the simmering solution so you can rinse the fabric immediately with cool water. This will save you time spent waiting for it to cool. Then, wring out the fabric until it is damp.[18]
Using Commercial Dye
-
1Follow the package instructions to mix chemical dye. Different kinds of commercial dyes are made from different substances. This means that you'll need to follow the label instructions carefully in order to create the best color.
-
2Handle the dye using plastic or rubber gloves. This will prevent it from staining your hands and will limit your chances of spreading dye. Sometimes wet dye can remain in the cracks or folds of the skin on your hands and be transferred to clothing, furniture, or other things that way. Plastic or rubber gloves will prevent this.
-
3Use a large plastic bucket as your dye bath. The water should be hot, usually with a recommended temperature around 140 degrees Fahrenheit (60 degrees Celsius). For some dyes, hotter water produces stronger colors. For other dyes, extremely hot water can actually cause the color to fade. Verify which type you have before pressing forward.[19]
-
4Stir the dye until completely and thoroughly dispersed. Usually, you will need one packet of powder dye or ½ cup (125 ml) liquid dye for every 2 to 3 gallons (7.6 to 11 L) water. More dye will create stronger colors.[20]
- You can use a normal kitchen spoon or ladle to stir your dye. You may want to avoid using wooden spoons; your dye could stain these.
Making Natural Dye
-
1Boil, simmer and strain plant material when mixing natural dyes. Many plants found in nature can be used to create a homemade, natural dye. You will need to follow the same basic procedure when separating the dye from the plant matter. To do so you should:
- Chop up the plant or dye material into small pieces using a kitchen knife.
- Place two parts water and one part dye material in a large pot and boil it over high heat.
- Reduce the heat and let simmer for 1 hour.
- Strain the plant material out and pour the now colored liquid into a large bowl for you dye bath.[21]
-
2Boil and strain berry-based material to make natural dyes. Berries also carry rich pigments that give them color. These pigments can be separated from the fruit of the berry to create a potent, natural dye. To create your dye from berries you should:
- Boil the berries for approximately 15 minutes or until the color of the berries mixed in with water.
- Separate the berry chunks by using a strainer and pour the colored liquid into a large bowl. Discard the berry chunks leaving only the colored solution to be used in dyeing the fabric.[22]
-
3Choosing the right natural substance to make your dye. Using different plant materials, you can extract different color dyes. The following list is by no means exhaustive, but some popular colors and the plants they are made from include:
- Orange: Onion skin and carrot roots
- Brown: Coffee, tea, walnuts, and dandelion roots
- Pink: Red raspberries, cherries, and strawberries
- Blue/purple: Red cabbage, mulberries, elderberries, blueberries, purple grapes, cornflower petals, and purple irises
- Red:Beets, rose hips, and St. John's Wort soaked in alcohol
- Black: Iris roots
- Green: Artichokes, spinach leaves, sorrel roots, lilac flowers, snapdragon flowers, black-eyed Susans, and grass
- Yellow: Celery leaves, turmeric, willow leaves, marigold blossoms, paprika, peach leaves, yarrow, and alfalfa seeds[23]
Dyeing Fabric in Dye Baths
-
1Soak the fabric for the appropriate amount of time. Every dye is different, so the exact amount of time you need to soak your fabric in the dye will vary. For commercial products, you should always follow the listed instructions. Generally you can expect:
- A chemical dye will usually require you to soak your fabric for 4 to 10 minutes. Soaking your fabric too long could result in the color becoming too dark.
- A natural dye will yield the best and brightest color when simmering. Soak your fabric in the heated water for roughly one hour. For a stronger, more vibrant color, soak the fabric overnight.
-
2Dye from the lightest color to the darkest. If you plan on dyeing your fabric multiple colors, soak your fabric in the lightest color first. You can do this by dipping the part of your fabric you want dyed in a shallow bowl so only that part of the collected fabric takes on that particular color. Then immerse the fabric in progressively darker shades until all your colors have been used.[24]
-
3Rinse with cool water after each dye application. Use cool, running water after applying each dye application. This will remove excess dye and seal the color in the fabric. Excess dye could splash or bleed to other parts of your shirt where you don't want it! Rinse thoroughly to prevent this.
Dyeing Fabric with Squirt Bottles
-
1Understand the difference in effect. Perhaps the easiest way of tie dyeing is to soak your fabric in a single colored solution called a dye bath. If you want multi-colored designs to create a rainbow, swirl effect, or some other kind of colorful pattern, squirt bottles are the way to go!
-
2Prepare your dye in the bottles. You should always follow the directions that come with your dye or dye bottle kit for best results.However, generally you can expect that for every packet of powdered dye or ½ cup liquid dye you'll need to add two cups of warm to hot tap water to your squirt bottle.
- You can improve the dyeing process by adding salt to your dye solution. You should use the amount of salt recommended on the packaging of your dye, but typically you can expect to need one tablespoon of salt per squirt bottle. Stir or shake the solution until it is consistent throughout.[25]
-
3Lay your fabric on a protected surface. If your dye soaks through the fabric, it could cause a stain to form on the surface on which you're dyeing. There are many ways you can protect your work area. You might use overlapping pieces plastic wrap, a tarp, thick cardboard, or many other kinds of material. After protecting the area you'll be dyeing, lay your fabric on top of the protected surface.
-
4Apply your dye. Take your squirt bottles and, in whatever pattern you desire, apply the dye to the fabric. You might want to put primary colors, like red, yellow, and blue, next to each other to create sharper contrast.
- It's a good idea to keep some paper towel on hand during this process. If you apply too much dye, it could puddle on the fabric and run, creating a runny design! You can prevent this by blotting excess dye with paper towel.
-
5Read directions carefully before finishing. Some dyes may require you to seal your fabric in a plastic baggie and then heat it in your microwave. When doing this, you should put down a layer of paper towel on the bottom of your microwave in case your plastic baggie leaks.
- When removing your fabric from the microwave, be careful you don't burn yourself. A pair of gloves or tongs can protect you from burns.
- Watch your fabric carefully when it is in the microwave. If you notice the plastic baggie inflate, this is completely normal. However, microwaving your bagged fabric for too long could melt the plastic and ruin your fabric.
Finishing Your Tie Dye
-
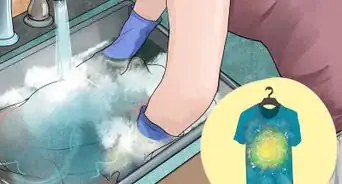
1Rinse your fabric again in cool water. When you have finished all of your dye applications to your fabric and rinsed each part individually, rinse the whole thing one more time thoroughly under cool, running water. To ensure you've done this completely, you should:
- Continue rinsing the fabric until the water runs clear. Be thorough; you don't want dye to spread to other clothing.
- This process could take several minutes.
-
2Remove your fasteners. Use a pair of scissors to carefully cut the string or rubber bands from the fabric. You should cut carefully to avoid damaging your newly tie dyed fabric. After that, you can unravel the fabric to reveal the pattern.
- Alternatively, you could save your fasteners for later use by untying your string or unwrap the rubber bands.
-
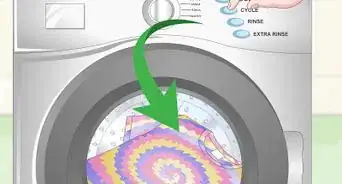
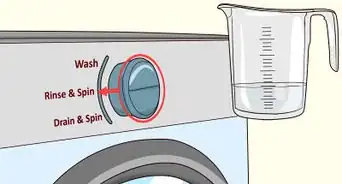
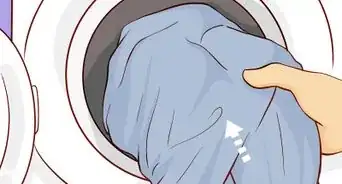
3Wash the fabric in warm water. Use warm water and a mild, dye-free detergent to wash the fabric. You could do this in your washing machine or you could hand wash it in a tub or bucket. Once you are finished washing, rinse the fabric will cool water.
- If you decide on using a washing machine, you may want to run your tie dyed fabric through a cycle alone. This way, dye you might have missed won't transfer to other clothes.[26]
-
4Gently squeeze out extra water after the rinse. Wring any extra water from your fabric, but be careful not to wring too hard, as this can stretch out and deform your fabric. To prevent your fabric from deforming from excess wringing, you can:
- Lay your dyed fabric flat in an old towel that is larger than it. Roll up your fabric inside the towel, and then wring out the towel along with the fabric inside.
-
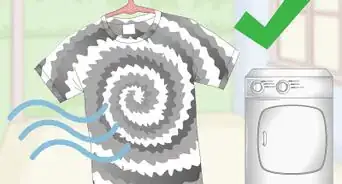
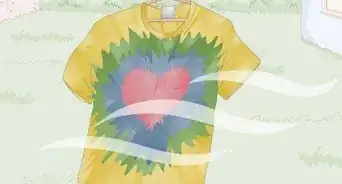
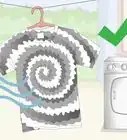
5Dry as desired. You can machine dry or hang dry the fabric. The best method for drying will depend on the kind of fabric you have dyed. Follow the tag instructions on the tag for best results, or, if there is no tag, allow your shirt to hang dry.
-
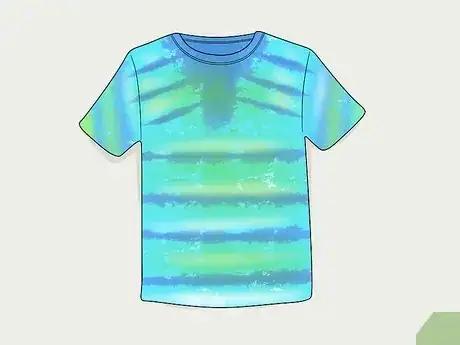
6Enjoy your finished tie dye. You might want to try each of the three kinds of dye, plant, berry, and chemical, to find which you like best. Additionally, there are many differences depending on which plant/berry/chemical you choose to dye your fabric. You may find you enjoy some natural methods more than chemical, but other instances might be best suited for chemical dye.
Community Q&A
-
QuestionCan I tie dye a rubber ball?
 Community AnswerMost likely not, the dye would probably just run off. If it were made of foam, it would probably be possible. You might stain the rubber a little.
 -
QuestionCan we use soda ash and salt together during dye?
 Community AnswerUsing both soda ash and salt is not advised unless you are directed to use both on your dye instructions. In some cases, salt could negatively change the pH levels of your solution. A soda ash soak is intended to raise the pH levels to improve the effect of the dye.
 -
QuestionFor how many hours do we need to wait after it is dyed?
 Community AnswerAbout 24 hours for the t-shirt.
Warnings
- Wear gloves and an apron to protect your skin and clothes from being stained by dye.⧼thumbs_response⧽
- Wear a dust mask to protect your mouth, nose, and lungs when working with soda ash.⧼thumbs_response⧽
Things You'll Need
- Chemical dyes
- Fabric
- Large plastic buckets
- Large stirring spoon or stirring rod
- Mild detergent
- Old, clean towel
- Pot
- Plant material for natural dyes
- Rubber bands, thread, or twine
- Salt
- Scissors
- Sink with running water
- Soda ash
- Squirt bottles (optional; for squirt bottle method)
- Tea kettle
- Vinegar
- Water
References
- ↑ http://www.dharmatrading.com/gifts/the-spiral-tie-dye-basics.html
- ↑ http://www.skiptomylou.org/how-to-spiral-tie-dye/
- ↑ http://www.dharmatrading.com/gifts/the-spiral-tie-dye-basics.html
- ↑ http://craftbits.com/project/tie-dye-effects/
- ↑ http://craftbits.com/project/tie-dye-effects/
- ↑ http://www.westminster.edu/about/community/sim/documents/STie-dyechemistry_000.pdf
- ↑ http://craftbits.com/project/tie-dye-effects/
- ↑ http://craftbits.com/project/tie-dye-effects/
- ↑ http://www.westminster.edu/about/community/sim/documents/STie-dyechemistry_000.pdf
- ↑ http://www.bystephanielynn.com/2015/06/tie-dye-folding-techniques-16-vibrant-tie-dye-patterns-tiedyeyoursummer.html
- ↑ http://www.bystephanielynn.com/2015/06/tie-dye-folding-techniques-16-vibrant-tie-dye-patterns-tiedyeyoursummer.html
- ↑ http://www.bio.brandeis.edu/fieldbio/Survival/Pages/dyeandmordant.html#Anchor-25112
- ↑ http://www.dharmatrading.com/tie-dye/instructions.html
- ↑ http://www.earthguild.com/products/riff/rmordant.htm
- ↑ http://www.pioneerthinking.com/crafts/crafts-basics/naturaldyes.html
- ↑ http://www.earthguild.com/products/riff/rmordant.htm
- ↑ http://www.bio.brandeis.edu/fieldbio/Survival/Pages/dyeandmordant.html#Anchor-25112
- ↑ http://www.westminster.edu/about/community/sim/documents/STie-dyechemistry_000.pdf
- ↑ http://www.dharmatrading.com/dyes/dyes-for-dyeing-cotton-rayon-hemp-linen.html
- ↑ http://www.ritdye.com/dyeing-techniques/tie-dyeing
- ↑ http://pioneerthinking.com/crafts/natural-dyes#more-254
- ↑ http://pioneerthinking.com/crafts/natural-dyes#more-254
- ↑ http://pioneerthinking.com/crafts/natural-dyes#more-254
- ↑ http://www.westminster.edu/about/community/sim/documents/STie-dyechemistry_000.pdf
- ↑ http://www.pburch.net/dyeing/FAQ/salt.shtml
- ↑ http://www.westminster.edu/about/community/sim/documents/STie-dyechemistry_000.pdf
- Videos provided by Fanshirt | It Fits.
About This Article
To tie-dye, start by choosing a basic pattern like spirals, rope knots, electric bunching, rosettes, or stripes, then prepare your fabric as needed to reflect that design. Next, create a dye bath, then soak your fabric in it until you achieve the color richness you want. Rinse the fabric with cool water, then remove any fasteners. Finish up by washing the fabric in warm water and hanging it up to air-dry! If you want to learn how to tie-dye your fabric using squirt bottles, keep reading the article!
