wikiHow is a “wiki,” similar to Wikipedia, which means that many of our articles are co-written by multiple authors. To create this article, volunteer authors worked to edit and improve it over time.
This article has been viewed 38,863 times.
Learn more...
Stenciling concrete is an inexpensive way to add style to an otherwise utilitarian floor. Stencils may be used to make an outdoor patio surface look like brick or stone, or incorporate elaborate patterns onto indoor flooring; the process is essentially the same. Field forms are laid down over a newly poured concrete surface or an overlay, then the exposed concrete is dyed to the desired colors and finally sealed for a long-lasting finish. The exact steps you use to stencil concrete will depend on the products you choose. These steps outline the process of using brick and stone stencils that you can purchase on a roll.
Steps
-
1Measure the area where you will stencil concrete to determine how long your forms must be, and how many pieces you need to cover the surface's width.
-
2Cut the stencils from the roll before you pour the concrete so you can place them quickly once it is formed.
- Stencils that are not symmetrical, such as those that mimic stone, repeat every so many inches and line up when placed side by side in the right spot.
- You have the choice of cutting symmetrical stencils to align, or you can offset them.
Advertisement -
3Block off the space where you will install the concrete surface. Cover existing flooring and structures.
-
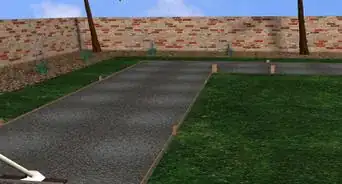
4Pour the concrete, then screed and float it to the right level.
- You can use self-floating concrete to expedite this process.
-
5Mark the center line of the concrete surface with tape.
- Locate the center by measuring from the edge of the concrete surface.
- Have two people, one on either side of the surface, place a length of tape through the center to the edge.
-
6Lay out the lengths of stencil, starting from the center and working toward the edges.
-
7Use a trowel or stencil roller to fix the stencil to the concrete to create a raised pattern.
-
8Tint the exposed concrete with a color hardener.
- Sprinkle a color hardener over the exposed areas.
- Use a bull float to float the color to the edges of the form.
- Use a trowel to close the surface, or apply a decorative finish using a roller, wood, sponge or cork.
- Follow the manufacturer's instructions – you may have to apply 2 coats.
-
9Apply a release agent according to the manufacturer's instructions.
-
10Remove the stencil when the concrete is dry enough that the form does not adhere to the surface.
- As you remove the stencil, you'll also pull up concrete chips and dust around the edges.
-
11Rinse the surface to wash away the larger pieces of concrete.
-
12Clean away the finer debris.
- For smaller surfaces, apply a muriatic acid solution to the concrete and scrub the sand away with a brush.
- You can use a buffer to clean large surfaces once the concrete has had time to cure.
-
13Put down 2 coats of sealer according to the manufacturer's instructions.
- The first, lighter coat should be 15 to 20 percent acrylic.
- The second, heavier coat should be 25 to 35 percent acrylic.
Community Q&A
-
QuestionHow do I make stencil forms?
 Community AnswerI'm not positive, but I think you can buy them online. Try searching "Decorative Concrete Stencils."
 -
QuestionWhere can I purchase a stencil?
 Community AnswerYou can buy a stencil at a store like Home Depot or Target, or your local hardware store.
 -
QuestionCan I stencil a decorative pattern in an existing concrete pool deck without having to pour new concrete?
 Community AnswerYou may be able to, but it really depends on what type of decorative pattern you are looking to add.
Things You'll Need
- Measuring tape
- Stencil forms
- Utility knife or scissors
- Concrete
- Screed
- Bull float
- Masking tape
- Trowel
- Stencil roller
- Color hardener
- Release agent
- Muriatic acid solution
- Brush with stiff bristles
- Floor buffer
- Sealer
