This article was co-authored by wikiHow Staff. Our trained team of editors and researchers validate articles for accuracy and comprehensiveness. wikiHow's Content Management Team carefully monitors the work from our editorial staff to ensure that each article is backed by trusted research and meets our high quality standards.
There are 15 references cited in this article, which can be found at the bottom of the page.
This article has been viewed 14,775 times.
Learn more...
DoorDash is a food delivery app that is available in the USA, Canada, and Australia. Just like other delivery-on-demand apps, customers order food through the app, then nearby drivers accept their order, pick up the food, and deliver it to them. Working for DoorDash as a driver, or “Dasher,” is relatively straightforward. Ensure you meet the basic eligibility requirements, then complete the signup process on the DoorDash website and mobile app. Wait to get approved and have your account activated, then start using the app to schedule shifts, take orders, and make deliveries!
Steps
Meeting Eligibility Requirements
-
1Wait until you are at least 18 years old. You must be at least 18 years of age to begin driving for DoorDash. Wait until after your eighteenth birthday to sign up for DoorDash if you are under 18.[1]
- Note that you must be 21+ to deliver alcohol in the United States or of the legal local drinking age in other countries.
-
2Make sure you have an iPhone or Android smartphone to use with the app. The DoorDash app is available for both the iOS and Android operating systems. Acquire either one of these types of smartphones if you don’t currently have one.[2]
- You won’t be able to take orders or make deliveries without a valid smartphone.
Advertisement -
3Ensure you have access to a working vehicle. There are no requirements for DoorDash drivers’ vehicles, other than that they must run and drive. Any type of car, truck, or van from any year is fine as long as it functions.[3]
- Motorcycles, scooters, and bicycles also qualify in certain markets. There is no list of these markets, but you can see what options are available in your area once you start signing up in the “Info on Your City” section.
-
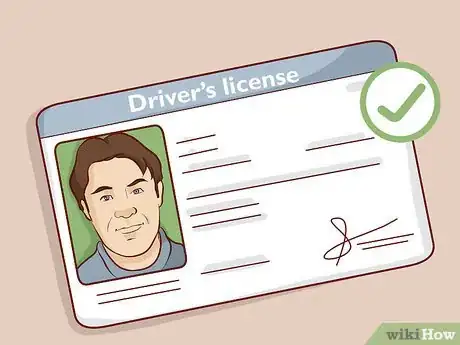
4Have a valid driver’s license and insurance for your vehicle. Make sure your driver’s license has not expired and that you have an active insurance policy for the vehicle you plan to drive. These are both required in order to begin driving for DoorDash.[4]
- DoorDash has commercial insurance that protects drivers when they are on active delivery, which means when they are in possession of the goods to be delivered. However, you must have personal insurance as well.
-
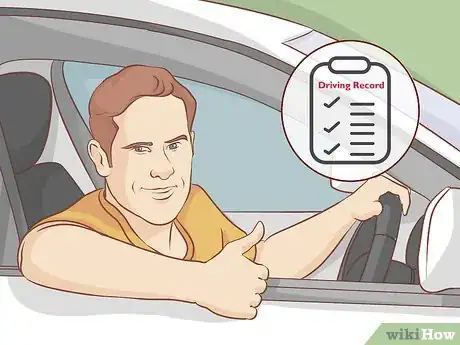
5Ensure you have a clean driving record. You must have no major traffic violations in the past 7 years and no more than 3 accidents in the past 3 years to qualify to work for DoorDash. DoorDash will run a driving record test after you sign up, so make sure you can pass it before you go through the process.[5]
- Note that this only applies to drivers who are going to be using a motorized vehicle.
Signing up and Becoming a DoorDash Driver
-
1Go to https://dasher.doordash.com/en-us?internal-referrer=legacy-signup and sign up. Enter your email and click “Get Started,” then fill out the rest of the profile information. Signup takes only 1-2 minutes and it takes about 1-2 weeks to get your account fully activated.[6]
- If you have to stop filling out your profile in the middle of it for any reason, you can revisit it and finish at any time by clicking “Already started signing up?” and entering the email address you used originally.
-
2Consent to a background check and driving record check. You will be prompted to consent to a background check as part of submitting your online application. DoorDash states that the background checks usually take 5-7 days to process, but can take longer in some cases.[7]
- If you want to check the status of your background check, there is information on how to do so for both residents of the USA and Canada on this page: https://help.doordash.com/dashers/s/article/How-can-I-check-the-status-of-my-Background-Check?language=en_US. You will receive an email once you have been cleared to proceed.
- If you are going to be making deliveries on a bicycle, you don’t need to get a driving record check done.
-
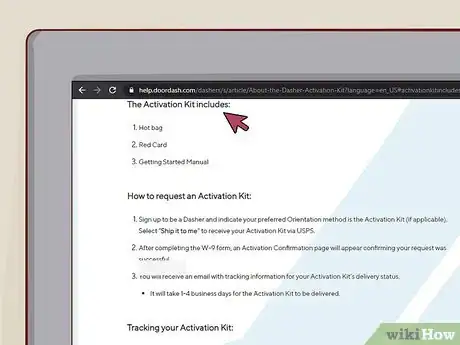
3Request an activation kit or schedule an in-person orientation. Revisit your driver profile after you have been notified that your background check has cleared and click “Schedule Orientation” to see available orientation locations, dates, and times, then select your preferred orientation. Choose an activation kit as your preferred orientation method if you can’t attend an in-person orientation and click “Ship it to me” to receive a kit by mail.[8]
- Activation kits replace an in-person orientation and contain all the required driver materials that you would receive at an orientation. In some markets, there are no in-person orientations available, in which case you will only see the option to request an activation kit in your profile.
- If you request an activation kit, you will receive a confirmation email with tracking information. DoorDash states that the kits typically arrive in 1-4 days.[9]
-
4Activate the Red Card that you received in your kit. Download the DoorDash driver app for iOS or Android. Tap “Account” if you have the iOS app, then hit “Did DoorDash give you a payment card?” and enter the card’s delight number, which is the number next to where it says “delight”, and last 4 digits of the number at the top of the card. Tap “Menu” then “Red Card” if you have the Android app, then enter the card’s numbers.[10]
- The Red Card is a credit card that you will use to pay for certain orders whenever the app prompts you to do so.
- If you have any difficulty activating your new Red Card, visit this help page for some troubleshooting tips: https://help.doordash.com/dashers/s/article/How-do-I-setup-and-use-the-Dasher-Red-Card?language=en_US.
-
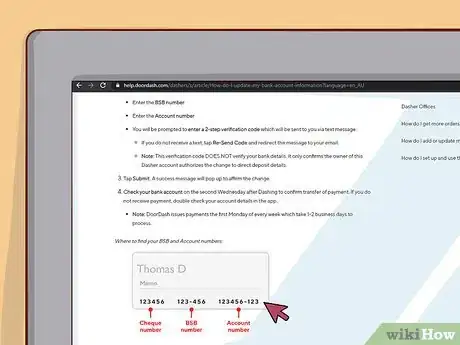
5Connect your bank account to DoorDash to receive direct deposits. Open up the DoorDash driver app on your mobile device and click on the “Earnings” tab on the bottom bar. Click the red bank symbol in the top right-hand corner of the screen and hit “Add Bank Account.” Follow the on-screen instructions to set up your direct deposit information.[11]
- You will have to take a picture of your photo ID in order to add a bank account, so make sure you allow the app access to your camera.
- You will need your checking account’s 9-digit routing number and 10- to 12-digit account number.
Warning: You must have a checking account to receive direct deposits. DoorDash can’t make deposits into savings accounts.
Scheduling and Starting Shifts
-
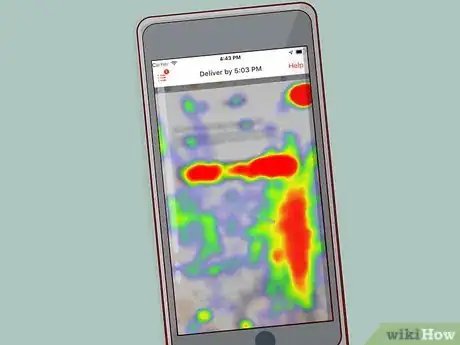
1Look at the heat map in the app to see where the most orders are being placed. The driver app will show you a map of your city or area divided into red and gray zones. The red zones are where the most orders are coming in, so you might be better off driving in those areas. Gray zones have less orders being placed, but there is still a demand for drivers in them.[12]
- Note that you typically have to schedule the zones and times you want to work ahead of time. If there is extremely high-demand, you might be able to sign up for a current shift and start working right away.
-
2Schedule your shifts ahead of time in the areas you want to drive in. Tap the menu icon in the top left-hand corner, then click “Schedule.” Select different days by clicking the dates along the top bar of the screen, then select available shifts that you want to work.[13]
- Shifts are typically shown in blocks of 30-minute increments. You may be able to choose from different end times for a specific shift. For instance, if a shift starts at 5:30 and DoorDash needs drivers until 7:00, you might be able to choose to end driving at either 6:30 or 7:00.
- You can change what delivery zones show up on the scheduling screen by clicking the settings icon that looks like a little control board at the top right-hand side of the scheduling screen.
-
3Drive to the area your scheduled shift is in before the shift starts. You must be in the correct geographic area to check-in to your shift. Make sure you get there on time to make the most out of your shift.[14]
- If it’s your first shift, you might want to choose an area you are familiar with and are comfortable driving in, even if it’s not one of the most high-demand areas.
-
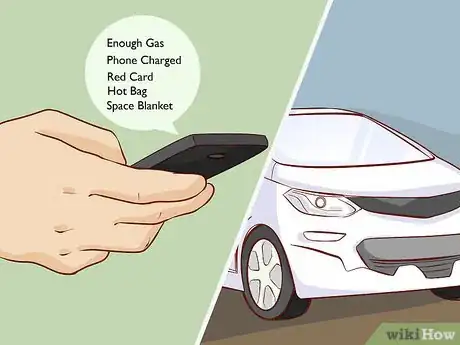
4Fill out the pre-shift checklist to check-in to a scheduled shift and start driving. The app will show you a checklist with reminders of everything you need when your shift is scheduled to start. Check the boxes for “Enough Gas,” “Phone Charged,” “Red Card,” and “Hot Bag & Space Blanket,” then click “Start Your Dash” at the bottom of the screen.[15]
- The items on the checklist are all the things you need to successfully make deliveries, so make sure you actually have them all as you go through the check boxes.
- If you aren’t in the right geographic area for your shift, you will receive an error message when you click “Start Your Dash” and won’t be able to check-in yet.
Taking Orders and Making Deliveries
-
1Wait for an order to come in and tap “Accept Order.” You’ll receive a notification and a text message any time a nearby order comes in. Look at the order in the app, then click “Accept Order” if it’s a delivery you want to make.[16]
- If you don’t want to take a certain order, you can click “Decline” in the top right-hand corner of the order information screen.
Tip: The app will show you the total price of the order and the driving route, which allows you to evaluate if the order is worth it. You might not want to take an order if it has a low price with a long driving time, for example.
-
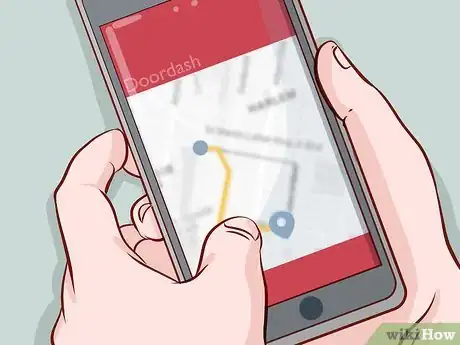
2Click on “Route” to choose a navigation app to get you to the restaurant. Tap the “Route” button in the bottom right-hand corner of the screen after you have accepted an order. Choose from popular navigation apps like Google Maps or Waze to start navigating and drive to the restaurant to pick up the order.[17]
-
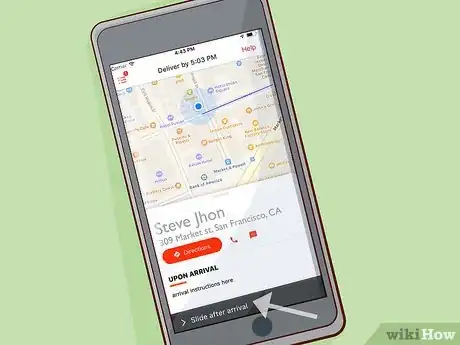
3Slide the slider bar at the bottom of the screen when you get to the restaurant. Slide your finger across the bar that says “Slide after arrival” once you have successfully made it to the restaurant. This will bring up a checklist of items for the order.[18]
- If you have to pay for the order with your DoorDash Red Card, a prompt to do so will also appear on the screen when you’re at the restaurant.
-
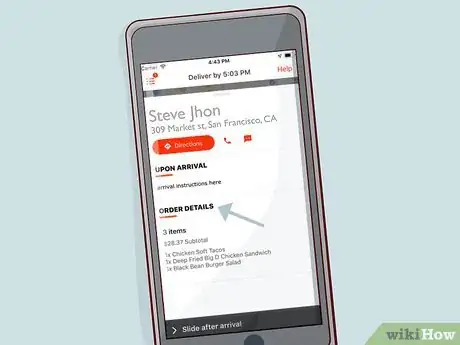
4Check the order’s items off and slide the slider bar at the bottom of the screen. Go through the whole on-screen checklist when you receive the food in the restaurant to make sure the customer’s items are all there. Slide your finger across the bar at the bottom of the screen where it says “Slide after pickup” when you are sure you have all the items.[19]
- The app will also let you know if there are multiples of certain items so you can count how many are there.
-
5Deliver the order to the customer. Tap the “Route” button to start navigating towards the customer’s address. Give the items to the customer when you arrive, then slide the bar at the bottom of the screen that says “Slide after delivery” to complete the delivery.[20]
- If you have any trouble getting to where the customer is located, you can hit “Contact Customer” in the top right-hand corner of the delivery screen to talk to them.
- The top of the screen will show the estimated delivery time for the customer. Do your best to get there on time, without driving unsafely, so the customer is satisfied and gives you a good rating.
- Don’t expect to necessarily receive any cash tips for orders when you make a delivery. Customers can choose to tip when they place their order and the tip is included in your guaranteed earnings for an order. However, it’s fine to receive a cash tip if a customer offers it.
References
- ↑ https://help.doordash.com/dashers/s/article/Requirements-for-Dashing?language=en_US
- ↑ https://help.doordash.com/dashers/s/article/Requirements-for-Dashing?language=en_US
- ↑ https://www.ridesharingdriver.com/doordash-driver-requirements-how-to-become-a-delivery-driver/
- ↑ https://help.doordash.com/dashers/s/article/Requirements-for-Dashing?language=en_US
- ↑ https://help.doordash.com/dashers/s/article/Requirements-for-Dashing?language=en_US
- ↑ https://help.doordash.com/dashers/s/article/Dasher-Signup-Process?language=en_US
- ↑ https://help.doordash.com/dashers/s/article/Dasher-Signup-Process?language=en_US
- ↑ https://help.doordash.com/dashers/s/article/Dasher-Signup-Process?language=en_US
- ↑ https://help.doordash.com/dashers/s/article/About-the-Dasher-Activation-Kit?language=en_US#howtorequestakit
- ↑ https://help.doordash.com/dashers/s/article/How-do-I-setup-and-use-the-Dasher-Red-Card?language=en_US
- ↑ https://help.doordash.com/dashers/s/article/How-do-I-update-my-bank-account-information?language=en_US
- ↑ https://www.youtube.com/watch?v=Q6RKvF4bqyI&feature=youtu.be&t=31
- ↑ https://www.youtube.com/watch?v=Q6RKvF4bqyI&feature=youtu.be&t=60
- ↑ https://www.youtube.com/watch?v=Q6RKvF4bqyI&feature=youtu.be&t=120
- ↑ https://www.youtube.com/watch?v=Q6RKvF4bqyI&feature=youtu.be&t=130
- ↑ https://www.youtube.com/watch?v=Q6RKvF4bqyI&feature=youtu.be&t=155
- ↑ https://www.youtube.com/watch?v=Q6RKvF4bqyI&feature=youtu.be&t=180
- ↑ https://www.youtube.com/watch?v=Q6RKvF4bqyI&feature=youtu.be&t=185
- ↑ https://www.youtube.com/watch?v=Q6RKvF4bqyI&feature=youtu.be&t=281
- ↑ https://www.youtube.com/watch?v=Q6RKvF4bqyI&feature=youtu.be&t=292









-Step-9.webp)




-Step-9.webp)
