This article was co-authored by wikiHow staff writer, Hunter Rising. Hunter Rising is a wikiHow Staff Writer based in Los Angeles. He has more than three years of experience writing for and working with wikiHow. Hunter holds a BFA in Entertainment Design from the University of Wisconsin - Stout and a Minor in English Writing.
There are 18 references cited in this article, which can be found at the bottom of the page.
The wikiHow Video Team also followed the article's instructions and verified that they work.
This article has been viewed 204,434 times.
Learn more...
A viola is a stringed instrument that has a larger size and lower sound than a violin. While it may take some time to master the viola, you can pick one up and learn to play the basics easily. Once the viola is tuned, maintain good posture to play the instrument with your bow. As you learn notes and scales, start practicing other playing techniques. With a lot of hard work, you'll know how to properly play!
Steps
Holding the Viola
-
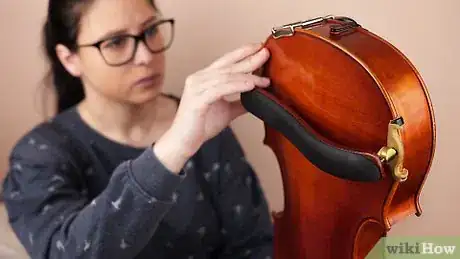
1Put a shoulder rest on the viola to make it more comfortable. Hold the viola upside down so its back is facing you. Hold one side of the shoulder rest against the edge of your viola so it looks like a smile. Lift the other side of the rest and slide it on the opposite side of the viola. Keep pushing it down until it has a tight fit.[1]
- You can buy a shoulder rest at a music supply store or online.
- You don’t need to use a shoulder rest if you don’t want to.
-
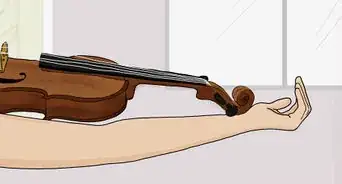
2Balance the viola on the left side of your collarbone. Stand with your feet shoulder-width apart or sit on a firm chair, making sure to keep your back straight. Grab the viola at the base of its neck and bring it up to your left shoulder. Point the pin on the bottom of the viola toward the center of your neck. Keep the viola at a 45-degree angle so it balances easily on your collarbone. Shift the viola slightly until the shoulder rest feels comfortable.[2]
- If your viola is too far forward or back on your shoulder, it will be difficult to hold and support.
Tip: Avoid sitting on soft furniture since it could affect your form.
Advertisement -
3Rest your chin and jaw on the chin rest. The chin rest is at the bottom of your instrument and provides extra support while you play. Once the viola is balanced on your collarbone, tilt your head down so it’s on the chin rest. Use the bottom of your jaw and chin to support the viola.[3]
- Don’t grip the instrument between your head and shoulder or else you could develop neck problems over time.
-
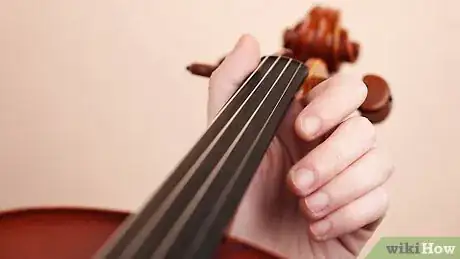
4Hook your left thumb around the back of the viola’s neck. Slide your left hand from the base of the neck toward the scroll, or the top of the neck near the tuning pegs. Keep your thumb on the left side of the neck closest to the C string. Squeeze your thumb against the side of the viola to hold it in place.[4]
- Don’t rest the neck of the viola against your wrist.
- Make sure your elbow is under the center of the viola.
-
5Curl the rest of your fingers over the neck. The rest of the fingers on your left hand are used to press down on the strings and play notes. Curl your fingers so your thumb and index finger make a backward C-shape. Rest your fingers on the edge of the fingerboard for now.[5]
Holding the Bow Properly
-
1Tighten the bow before using it. Look at your bow to see if the hair almost touches the main stick. Rotate the screw at the end of the bow clockwise to tighten the bow. Count how many times you rotate the screw while you tighten the screw. Once you can fit your pinky between the hair and the stick, stop tightening the bow.[6]
- Always loosen your bow by the same number of rotations whenever you’re finished playing.
Warning: Be careful not to overtighten the bow or else the hair may break.
-
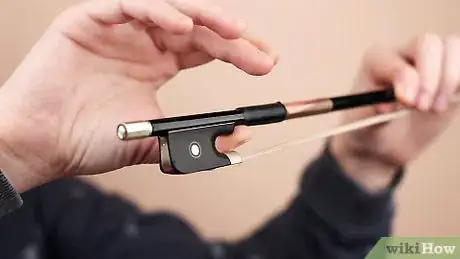
2Put your right thumb between the leather and the frog on the bow. The frog is the part on the bottom of your bow that holds the hairs in place. Hold your bow so the tip points to the left and so the frog is on the right. Place your thumb on the small space between the frog and the black leather wrapped around the bow’s stick.[7]
- Don’t put your thumb in between the hair and the stick.
-
3Place your middle and ring finger on the flat side of the frog. Wrap your middle and ring finger around the bow so they’re on the side opposite of your thumb. Keep your 2 fingers together as you hold the bow or else it could fall.[8]
- A good rule to remember is placing your ring finger on the dot that’s on the frog.
-
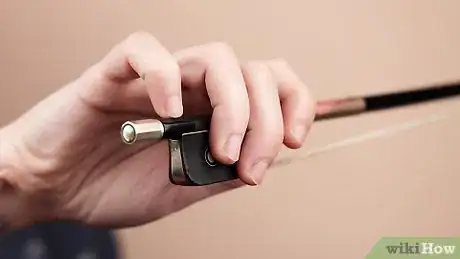
4Curl your pinky on top of the bow’s stick. Set your pinky down on top of the stick to help support the bow’s weight. Keep your pinky curved by pressing down on the back of the bow. Apply a small amount of pressure to make sure you have a firm grip.[9]
- If you ever move your pinky, your bow will easily drop and be difficult to play.
-
5Wrap your index finger around the bow’s stick. After all your other fingers are in place, hook your index finger around the bow’s stick. Press the pad of your finger down on the side of the stick so you have a firm grip.[10]
- Don’t touch the hair with your fingers since you could leave fingerprints on them and cause your bow to slip while playing.
Playing Notes with the Bow
-
1Set the bow on the A string just above the bridge. Place the bow in between the fingerboard and the bridge. The bridge is the arch-shaped piece that the strings rest on near the bottom of your viola. your bow on the A string so it’s on the side of the bridge closest to your hand. Use the hair on your bow that’s closest to the frog and keep it at a near vertical angle.[11]
- The A string is the easiest one to start on since it’s the closest to the bow.
-
2Slide the bow across the string to play it. Move your hand down to pull the bow across the string. Don’t press hard on the bow while you’re playing or you could damage the hair. The bow will vibrate the string and play an A note. Once you reach the end of your bow, move your hand back up to keep playing the note. The note will continue playing as long as you move the bow across the string.[12]
- Use shorter strokes to play notes faster and long strokes to play notes slower.
-
3Try playing the other strings. Lift the bow up and set it on the string you want to play. Make sure the bow is only touching 1 string at a time. Otherwise, lift your arm to adjust the angle of your bow. Practice long back and forth strokes with your bow followed by shorter notes. Work your way across the strings until you’ve tried them all.[13]
- Once you’ve played all of the strings, switch the string you’re playing on with every stroke. For example, play A, D, G, and C in 4 strokes.
-
4Press down on the strings with the tips of your fingers to change notes. Once you’ve practiced playing the open strings, use the tips of your finger to hold down a string around the neck. Keep your fingers curled while you hold down the string. When you play the string, the note will be higher pitched than what the string normally is. Experiment with each string to hear what notes you can play on your instrument.[14]
- The position of each note varies for each person since your finger shape will affect the notes you play.[15]
- Don’t press the string down with your nail or pad of your finger since you won’t get as clear of a sound.
Tip: Purchase fingering tape when you’re starting off to label where specific notes are played along your strings.
Using Advanced Techniques
-
1Tune the strings with the fine tuning pegs. From left to right, the strings are C, G, D, and A, with C being the thickest. Tune along to another instrument that’s in key or use a digital tuner. Set the tuner to C and lightly pluck the C string with your finger. Locate the fine tuning pegs near the bottom of strings. Rotate the fine tuning pegs counterclockwise to go down in pitch or clockwise to go up until your string matches the tuner. Continue tuning the other strings to G, D, and A respectively.[16]
- If the string doesn’t sound close to the tuner’s pitch right away, use the pegs at the top of the viola’s neck to adjust the strings.
-
2Wiggle your finger on the neck to give the note slight variations. Press down on a string with your finger so you’re pointing toward your body. Keep your finger completely curled while holding onto the string. Wiggle your finger forward and backward without moving it along the string. Pull your bow across the string so you can hear the pitch change while your finger moves.[17]
- This technique is called vibrato.
Tip: If you find it hard to wiggle your finger, start by moving your arm forward and back first. When you start feeling comfortable, move your wrist back and forth. Then, use just your fingers.
-
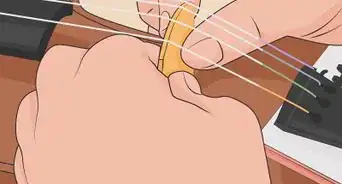
3Pluck the strings with your right index finger for shorter staccato notes. Set your bow aside while you’re plucking. Place the pad of the index finger on your right hand against the string. Pluck the string by pulling the pad of your finger across it. The note will be short and sharp.[18]
- Many pieces have plucking sections in between parts where you use your bow. Practice switching between using your bow and plucking to create a smooth transition.
-
4Bounce the bow on the strings to rapidly play short notes. Instead of pulling the bow across the string in a single movement, let the bow gently bounce off them. Use the middle of your bow since it’s the bounciest area. Once your bow hits the string, lift it off immediately. The note played will feel short and energetic.[19]
- This technique is known as spiccato.
- You can bounce on the string multiple times to play notes close together.
-
5Practice scales. Start by playing your C string without pressing down on it. The C is your starting note for the scale. Press down on the C string with your index finger near the top of the neck to create the next note. Use a tuner to ensure you’re playing the next note in the scale, which is D. Use your tuner to find the next 3 notes, E, F, and G, and play them with your middle finger, ring finger, and pinky. To finish your scale switch to the G string and use your tuner to find A, B, and high C.[20]
- You can find a fingering chart for the notes on your viola here: https://www.violaonline.com/violafingeringchart.htm.
- The notes will slightly vary in location since the size of your fingers affects the pitch.
Community Q&A
-
QuestionMy daughter is learning to play the viola. How do I teach her to read the notes?
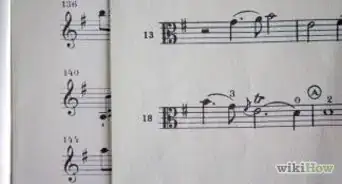
 Community AnswerOn a music staff, the very bottom line is the F on the C string, the line above that is the A on the G string, the third line is the C on the G string, the fourth line is the E on the D string, and the top line is the G on the D string. Remember that when your daughter is reading music, there should never be a treble clef on it; treble clef is for violins.
 -
QuestionI've been playing violin for 7 years, are viola fingerings a similar to violin?
 Community AnswerYes. The G, D, and A string fingerlings on a viola are all the same as a violin. The C string (thickest), however, is different (because there is not C string on a violin). On the low 1 (index finger, between 1 and the nut) fingering spot is C sharp/D flat. 1 (index finger, between low 1 and low 2) is D natural. Low 2 (middle finger, between 1 and 2) is D sharp/E flat. 2 (middle finger, between low 2 and 3) is E natural. 3 (ring finger, between 2 and high 2/low 4) is F natural. High 3/Low 4 (ring finger or pinkie/little finger can be used, it's just preference, between 3 and 4) is F sharp/G flat. 4 (pinkie/little finger) is always the next open string (in this case): G natural.
 -
QuestionHow do I play a B note?
 Annika JohnsonCommunity AnswerYou can put one finger down on the A string, or you can put 2 fingers down on G.
Warnings
- Don’t tighten your strings too much or else they could break.⧼thumbs_response⧽
- Avoid touching the hair on the bow since you could damage them.⧼thumbs_response⧽
Things You’ll Need
- Working Viola
- Bow
- Shoulder Rest
- Tuner
References
- ↑ https://youtu.be/VOkOwfFFpfg?t=24
- ↑ https://youtu.be/3mxBRQM3yr8?t=55
- ↑ https://youtu.be/3mxBRQM3yr8?t=55
- ↑ https://www.violaonline.com/howtoholdtheviola.htm
- ↑ https://www.violaonline.com/howtoholdtheviola.htm
- ↑ https://youtu.be/VOkOwfFFpfg?t=69
- ↑ https://youtu.be/Jg-6AV4wogQ?t=7
- ↑ https://youtu.be/VOkOwfFFpfg?t=390
- ↑ https://youtu.be/Jg-6AV4wogQ?t=21
- ↑ https://youtu.be/Jg-6AV4wogQ?t=25
- ↑ https://youtu.be/VOkOwfFFpfg?t=472
- ↑ https://youtu.be/VOkOwfFFpfg?t=484
- ↑ https://youtu.be/VOkOwfFFpfg?t=487
- ↑ https://youtu.be/MAzIsk5u4Z4?t=95
- ↑ https://www.violaonline.com/fingerplacement.htm
- ↑ https://youtu.be/_Cwa5BqTw3k?t=213
- ↑ https://youtu.be/pgD10rQRDwk?t=47
- ↑ http://www.get-tuned.com/how-to-play-the-viola.php
- ↑ https://youtu.be/Om9kYk75YcY?t=10
- ↑ https://youtu.be/V1SxUBekCDA?t=10
