This article was co-authored by wikiHow Staff. Our trained team of editors and researchers validate articles for accuracy and comprehensiveness. wikiHow's Content Management Team carefully monitors the work from our editorial staff to ensure that each article is backed by trusted research and meets our high quality standards.
There are 10 references cited in this article, which can be found at the bottom of the page.
This article has been viewed 41,739 times.
Learn more...
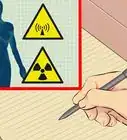
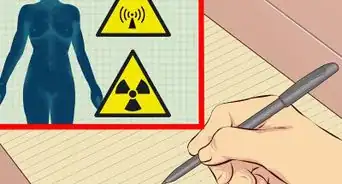
While the units of measurement are a little tricky, with attention to detail and the right tools, you can measure ionizing radiation quickly and easily. Learn the ins and outs of using detection devices, and familiarize yourself with the various ways of measuring radiation. The first is count rate, or the detected number of particles released by unstable atoms in a specific amount of time, measured in counts per minute (cpm). You can’t tell how dangerous radiation is from measuring count rate alone. To assess health risk, you’ll need to measure radiation dose and identify the specific type of radiation present.
Steps
Learning How to Use Detection Devices
-
1Purchase a detection device online or at a lab supplier. Look for radiation meters online or at a laboratory supplier. Devices that detect radiation include Geiger counters, ionization chambers, and personal dosimeters. In general, devices detect contamination, measure dose, or do both.[1]
- Generally, Geiger counters are the easiest way to find radioactive contamination and measure exposure. Some Geiger counters only measure radioactivity, some just measure radiation exposure, and others measure both factors.
- While those used professionally can cost thousands of dollars (U.S.), you can find accurate digital devices that measure both values for $300 to $500. Meters with analog displays that only measure one factor are available for around $100.
- People who work around radiation, such as x-ray technicians, usually track radiation dose with wearable personal dosimeters. These devices sound an alarm when radiation dose levels reach unhealthy levels, but they can't be used to locate radioactive material.[2]
-
2Turn on the device and, if necessary, set it to the lowest scale. Radiation detectors with analog displays have a switch or button that adjusts the display’s scale. Before you conduct your survey, set the scale to “x1” to help ensure an accurate reading.[3]
- Analog devices that measure radioactivity display a scale of counts per minute in intervals of 100. For meters that measure both radioactivity and exposure, there'll be an additional scale in mSv/h (milliSieverts per hour, the international unit for dose rate) or mR/h (milliroentgen per hour, a unit for dose rate sometimes used in the U.S.).
- Suppose you’re measuring radioactivity and take a reading of 100 cpm. If the scale is set to “x10” instead of “x1,” the actual count is 10 times 100, or 1,000 cpm. Say you're measuring dose rate and get a reading of 0.01 mSv/h, which looks safe. If your scale is set to “x100,” the dose rate is actually 1 mSv/h, which is extremely dangerous.
- Setting the scale is a must for meters with analog displays. However, it’s unnecessary for most meters with digital displays. Check your device’s manual for specific operating instructions.
Advertisement -
3Perform a battery check if you have an analog meter. Find a switch labeled “range” or a “bat” button. Press the button or flip the switch, then check the display. The needle of an analog display should jump to an area on the scale marked “bat test” or “bat.” If the needle doesn’t move to the “bat test” or “bat” area, replace the battery.[4]
- Check your manual for battery replacement instructions for your specific meter.
- For meters with digital displays, you’ll see an icon or an indication such as “low bat” when it’s time to replace the battery.
- A low battery will lead to inaccurate results, so performing a test or checking a digital display first is essential.
-
4Hold the probe within 1⁄2 in (1.3 cm) of the surface you’re surveying. You’ll either pass a wand or the device itself over the surface to take a reading. Hold the meter by its grip, and don’t touch the end. Don’t allow the end of device or wand to touch anything while in use, including the object or person you’re surveying.[5]
- If your device has a wand, check the cable that runs between the wand and the main body. Look for nicks or loose connections at either end. With the device on, gently wiggle the cable at both connectors. If the readings start changing erratically, the cable is defective.[6]
-
5Move the probe about 1 to 2 in (2.5 to 5.1 cm) per second. Watch the display and listen to the audio response as you slowly pass the device or wand over the surface. Stop moving the probe if the needle or digital display number spikes, or if the audio response ticks faster. Pause over the area where your numbers spiked for about 5 to 10 seconds to get an accurate measurement.[7]
- If you’re scanning a person, start at their head, then pass the probe over their chest and back in overlapping “S” shapes. Pass the meter straight up and down their arms and legs, and be sure to scan their hands, feet, and soles of their feet.[8]
-
6Adjust the scale, if necessary. If you’re using a meter with an analog meter face, it'll likely have list cpm numbers in increments of 100 up to 500. A meter that measures both cpm and mSv/hr or mR/hr will also have a scale that lists these units in increments of 0.5. If the needle jumps to the end of the display, you’ll need to set the meter to the next highest scale in order to get an accurate reading.[9]
- Say you’re measuring radioactivity and the actual count is 1,300 cpm. If the meter is set to “x1,” it can only display counts up to 500 cpm. If you set it to “10x,” the needle will hover over 130, and you'll get an accurate measurement.


Measuring Radioactivity
-
1Use a Geiger counter that measures counts per minute or second. To measure radioactivity, use a device that counts the number of subatomic particles emitted by a radioactive substance. The standard unit for this measurement is called the becquerel (Bq), which is equal to 1 particle, or count, per second.[10]
- Geiger counters that detect radioactivity usually display readings in cpm, but you might find one that displays Bq or counts per second (cps).[11]
- Radioactive atoms are unstable, and they release matter or energy to try to become stable. This process is called radioactivity. Geiger counters that only detect radioactivity are useful for finding radioactive contamination, but they can’t provide precise information about exposure or dose.[12]
-
2Conduct a background reading. Turn on your device, check the battery, and ensure it’s working properly. Hold the device or wand over a cold spot, or something you don’t suspect to be radioactive. Background radiation is everywhere, so you should get a reading of anywhere between 5 and 100 cpm.[13]
- Look online to find the average background radiation in your area. Compare your readings with this range to make sure your device is working.
- Recall that 60 cpm equals 1 Bq, since 60 counts per minute equals 1 count per second. If your meter measures in Bq, multiply the reading by 60 to convert it to cpm. A reading of 0.4 Bq, for instance, would be 24 cpm.
- Background radiation depends on several factors. For example, higher elevations receive more radiation from space, so the count would be higher on a mountain or in a plane.
-
3Pass the meter over the object’s surface slowly. Hold the wand or device about 1⁄2 in (1.3 cm) over the object or person you’re scanning. Background radiation levels change randomly, so don’t be surprised if you see readings jump by 5 cpm then suddenly drop by 10 cpm.[14]
- If the audio response ticks faster or if the needle or displayed numbers spike dramatically, stop moving the probe for 5 to 10 seconds.
-
4Check for counts more than twice the background reading. Keep your background reading in mind as you scan. Generally, a count more than twice or 100 cpm higher than the background reading indicates radioactive contamination.[15]
- Suppose your background reading is 10 to 20 cpm. A count of 160 cpm would indicate contamination, but not necessarily enough to pose immediate danger. On the other hand, a reading of 3,000 or 10,000 cpm might be a cause for concern.
- In the U.S., a background reading of 100 cpm is considered an alert level. Guidelines vary by location, so look online to find the standards for your state or province.
- Keep in mind a cpm measurement doesn’t tell you about the type or dose of radiation present. Some types of radiation are more harmful than others, so a cpm measurement alone can’t tell you if a radioactive substance is dangerous.


Calculating Radiation Dose
-
1Estimate your annual dose with an online calculator. You can get a rough estimate of your annual radiation exposure without using any devices. Calculate your annual dose by entering the area you live, how long you’ve spent on a plane, whether you’ve had a CT scan or x-ray, and other information into an online tool.[16]
- Estimate your annual radiation dose at https://www.epa.gov/radiation/calculate-your-radiation-dose.
-
2Identify radiation dose with a device that measures Grays or sieverts. Some Geiger counters and other detection devices can measure dose, or the amount of radiation a body or object absorbs. In the U.S., the unit for this measurement is called the radiation absorbed dose (rad). The standard unit used internationally is called the Gray (Gy); 1 Gy equals 100 rad.[17]
- A device that detects dose may display measurements in rad, Gy, milliSieverts (mSv), or milliSieverts per hour (mSv/h). The Sievert is a unit that measures the effective dose, or the health risk of an absorbed dose of radiation. A millisievert equals 0.001 Sievert.
- Geiger counters don’t measure ambient radiation as accurately as ionization chambers. However, ionization chambers are more expensive, generally harder to use, and must be precisely calibrated.[18]
-
3Set your device to detect a particular type of radiation, if necessary. Some meters measure exposure rate, and need to be calibrated for a specific type of radiation. For a device with a digital display, you’ll use buttons to toggle between alpha, beta, gamma, and x-radiation (x-ray) settings. Check your user guide for specific instructions on calibrating the type of radiation.[19]
- Some devices use beta radiation shields, which must be manually opened and closed in order to switch between radiation types.[20]
- Your device may automatically make adjustments for specific types of radiation. Check your manual to be sure.
-
4Move the meter over the object or person slowly. Pass the wand or device over the surface at a rate of 1 to 2 in (2.5 to 5.1 cm) per second. Be sure not to let the end of the wand or detection device touch anything. Keep your eye on the meter, and stop for 5 to 10 seconds if the meter spikes.[21]
- Remember that Gy and rad measure a dose, and mSv measures health risk. If your device measures radiation dose in mSv or mSv/h, you’ll know the biological risk and won’t have to make any further calculations.
- The average person is exposed to 2 to 4 mSv/a (mSv annually), which equals about 0.002 to 0.0045 mSv/h (mSv per hour). Levels above 1 mSv/h, such as inside a nuclear power plant, are considered high radiation areas.
-
5Multiply the dose by a quality factor to assess the biological risk. If your device doesn’t measure mSv/h, you can use a Gy or rad measurement to calculate biological risk. Each type of radiation has a quality factor (Q), or a number that describes its effect on organic tissue. Using your meter to scan for specific types of radiation in Gy or rad, multiply your measurement by the type’s quality factor.[22]
- Alpha particles are the most harmful type of radiation and have a quality factor of 20: Gy x 20 = Sv.
- For proton and neutron radiation, use the formula Sv = Gy x 10.
- Gamma and x-rays have a quality factor of 1: Sv = Gy x 1.
- In the U.S., the unit roentgen equivalent man (rem) is sometimes used instead of the Sievert. If your measurements are in rad, use the formula rem = rad x Q.


Warnings
- Unless you are authorized and are wearing protective gear, don’t enter known high-radiation areas to explore and take measurements.⧼thumbs_response⧽


References
- ↑ https://www.remm.nlm.gov/ss_mod08_sg.pdf
- ↑ https://www.cdc.gov/nceh/radiation/energy.html#dose
- ↑ https://www.remm.nlm.gov/howtosurvey.htm
- ↑ https://emergency.cdc.gov/radiation/screeningvideos/pdf/GM_DetectorsJobAid_ac.pdf
- ↑ https://www.remm.nlm.gov/ss_mod08_sg.pdf
- ↑ https://emergency.cdc.gov/radiation/screeningvideos/pdf/GM_DetectorsJobAid_ac.pdf
- ↑ https://www.remm.nlm.gov/ss_mod08_sg.pdf
- ↑ https://emergency.cdc.gov/radiation/screeningvideos/pdf/GM_DetectorsJobAid_ac.pdf
- ↑ https://www.remm.nlm.gov/ss_mod08_sg.pdf
- ↑ https://www.cdc.gov/nceh/radiation/energy.html#amount
- ↑ http://hps.org/publicinformation/ate/faqs/radiation.html
- ↑ https://www.remm.nlm.gov/ss_mod08_sg.pdf
- ↑ https://emergency.cdc.gov/radiation/screeningvideos/pdf/GM_DetectorsJobAid_ac.pdf
- ↑ https://www.remm.nlm.gov/ss_mod08_sg.pdf
- ↑ https://emergency.cdc.gov/radiation/screeningvideos/pdf/GM_DetectorsJobAid_ac.pdf
- ↑ https://www.cdc.gov/nceh/radiation/ionizing_radiation.html
- ↑ https://ieer.org/resource/classroom/measuring-radiation-terminology/
- ↑ http://hps.org/publicinformation/ate/faqs/radiation.html
- ↑ https://www.nrc.gov/reading-rm/basic-ref/students/science-101/what-is-a-geiger-counter.html
- ↑ https://www.remm.nlm.gov/ss_mod08_sg.pdf
- ↑ https://www.remm.nlm.gov/howtosurvey.htm
- ↑ https://www.nrc.gov/reading-rm/doc-collections/cfr/part020/part020-1004.html
About This Article

To measure radiation with a detection device, choose a meter, like a Geiger counter, ionization chamber, or personal dosimeter, if you have access to any of these devices. When you have your device, turn it on and, if it has an analog display, set the scale to “x1” to ensure an accurate reading. You’ll also want to perform a battery check by pressing the button labeled “range” or a “bat.” Make sure the needle jumps to an area on the scale marked “bat test” or “bat.” If the needle doesn’t move, replace the batteries. Once your device is ready, hold the probe within ½ inch of the surface you’re surveying, move it about 1 to 2 inches per second, and wait for any audio or visual indication that there’s radiation, such as a needle spike or a sound. To learn how to understand radioactivity readings, keep reading!