X
wikiHow is a “wiki,” similar to Wikipedia, which means that many of our articles are co-written by multiple authors. To create this article, 20 people, some anonymous, worked to edit and improve it over time.
The wikiHow Video Team also followed the article's instructions and verified that they work.
This article has been viewed 473,630 times.
Learn more...
Do you have a bunch of old candles lying around your home? Or do you just throw away an almost whole candle because the wick is gone? Are you a crafty person who wants to learn something new?
Steps
-
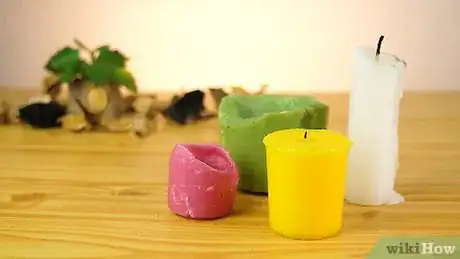
1Obtain some old candles. If you have a bunch of old candles lying around the house, then it'll be easier for you do this project. But don't worry if you don't. You can go to a thrift store and buy bags of candles that are very cheap. You could also talk to friends that you have and see about getting their old candles. Some churches give away old candles.
-
2Find an old saucepan or something similar that can get wax on it. It is easier if the saucepan has a pouring spout to it. You can also try to fill a pot with water and then put an old can which you will later fill with wax into it. This method will most likely not get the pot as full of wax.Advertisement
-
3Break up the old wax and stick a few pieces in the saucepan over low heat.[1]
-
4Stir the candles until they have melted.
-
5Prepare the container for the wax while you are waiting for the candles to melt.[2]
- Attach the end of the wick to the bottom with a drop of paraffin.
- Take an old pencil or something similar that is round and long, even a straw and place it over the top of your container.
- Place your wick in the middle of the container so that it drapes over the pencil.
- Optionally use a piece of tape to hold the wick to the pencil.
-
6Pour. After the wax is completely melted, pour the melted wax into your container. Keep a little bit of the wax in the saucepan to use later. It could take from a few minutes up to a few hours for the candle wax to completely harden. Once the wax is almost completely hard, you will notice that the wax is dipped in right around the wick.
-
7Take the little bit of wax that you left in the saucepan and make sure that it is completely melted.
-
8Pour the extra wax into the dip to make the dip fill in.
-
9Let this little bit of wax completely harden.
-
10Remember depending on what type of container you used, either light the candle directly in the container or you can slip it right out of the container.
-
11Keep in mind that if you are having a hard time getting the candle out of the container, stick the container in the freezer for about five to ten minutes. This should help the candle let go of the container and help it slide right out.[3]
-
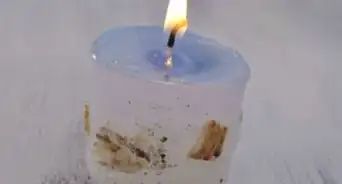
12Decorate your new candle with glitter, sand, flowers or any other idea you might have to make your candle pretty.
-
13Finished.
Advertisement
Community Q&A
-
QuestionWhat is the best material to make candle wicks?
 Community AnswerCotton. Take 2-3 threads off of a cotton undershirt, twist together, dip in melted wax, and tie a paperclip or something with a little weight to the waxed string to ensure the wick stays centered and it goes all the way through the candle.
 -
QuestionCan I use the old container the candle came in?
 Community AnswerIt depends on the container. With jar candles, it is recommended that you don't reuse in case of breakage. For any other, use your best judgement.
 -
QuestionCan I use pure essential oils for making candles?
 Community AnswerYes, you can. It will make a lovely smell. Make sure you put enough in so you can smell the oil, but don't put too much in because it can create a really strong smell and sting your lungs.
Advertisement
Warnings
- Don't EVER heat wax over a direct heat source (like a stove burner). WAX DOES NOT BOIL! If it gets too hot, it simply *flashes* into flame without warning. Always use a "double boiler" method putting the wax in a container suspended above boiling water. That way, the wax cannot get hotter than the water.⧼thumbs_response⧽
- Don't mix different types or brands of candles. Wax is NOT all alike. Different candles have different melt points and additives. Combining different types of wax will result in a poor-looking, poor-burning candle. It's just a waste. Not all types of candles burn the same kind of wick either.⧼thumbs_response⧽
- If you are using a gas stove, make sure that you clean any and all spilled wax from the surface. If you don't, you could catch your stove on fire.⧼thumbs_response⧽
- The wax is going to be hot when you pour it. Make sure you take care to protect your hands and face. Rubber gloves may melt onto your arms. Thermal hand mitts are better.⧼thumbs_response⧽
- Do not walk away from the stove with melting wax in the pan since it may start a fire. Be patient. Watch carefully.⧼thumbs_response⧽
- Make sure that the container you are using will hold up to melted wax. Thick canning jars are great for the project. You can also use old punch bowls that are made of really thick glass.⧼thumbs_response⧽
Advertisement
Things You'll Need
- Old saucepan
- Spoon
- Candle wicks from a craft store or old candle wicks
- Needle-nose pliers
- Tape
- Pencil or something similar
- Punch bowl, thick glass jars, metal molds, etc.
References
About This Article
Advertisement


