wikiHow is a “wiki,” similar to Wikipedia, which means that many of our articles are co-written by multiple authors. To create this article, 22 people, some anonymous, worked to edit and improve it over time.
The wikiHow Video Team also followed the article's instructions and verified that they work.
This article has been viewed 303,574 times.
Learn more...
There are several different ways you can make a birthday card, but that doesn't mean you need to spend a lot of time on something complicated. Making a simple homemade birthday card is quick and easy. Take just a few minutes to let your creative juices flow and whip up the perfect birthday card just in time for the occasion. Making the card yourself allows you the freedom to create a more personal card than you would likely find at the store. Make a simple and lovely birthday card in just a few minutes.
Steps
Making a Simple Handmade Birthday Card
-
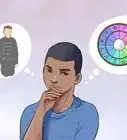
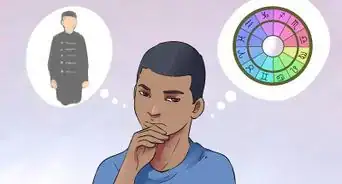
1Think about who the card is for. Is this card for a child or an adult? How long have you known the recipient? Do you want to make a silly card or a sophisticated one? Take a moment to think about this person, what they like, and what you enjoy about being their friend.
-
2Gather your materials. Set up a workstation with all your tools and supplies. For a simple handmade birthday card, you'll need:
- Construction paper, cardstock, or any paper you have.
- Coloring utensils such as markers, crayons, and coloured pencils.
- Glue (optional)
- Stickers (optional)
- Glitter (optional)
- Ribbon (optional)
- Pom-poms (optional)
- Other add-ons (optional)
Advertisement -
3Choose your paper. The paper possibilities are virtually endless. You can use any paper you have around the house or use colored paper. Pick whatever kind of paper is easiest and most fun. Here are some options to consider:
- Printer paper is easy to work with and you might have some on hand.
- Cardstock or construction paper is heavier and will feel more like a store-bought card.
- Scrapbook paper might include patterns or borders to start you off with more than just a blank slate.
-
4Decide on a format. You can create a traditional folded card, or a flat postcard style card. You can even fold your card in half and then half again. Here are a few things to think about:
- If you are using printer paper, you will probably want to make a folded card. Printer paper is thin and flimsy, so folding it will make it a bit sturdier.
- If you are using cardstock or construction paper you can easily fold it or cut it into a flat postcard style birthday card.
-
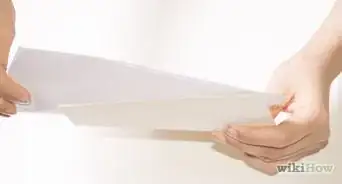
5Create your template by folding your paper (optional). If you decide to fold your card, place your paper on a table in profile layout and fold it in half to bring the top and bottom edges together.
- Line up the edges of the paper and make the fold slowly to keep the edges as even as possible.
- If you'd like, you can take your folded card in profile layout and fold it in half again, bringing the top and bottom edges together to make a sturdier card.
- Make a sharp clean crease if you are folding construction paper.
- If you decide to use scrapbook paper, decide whether or not to fold it based on its thickness.
-
6Create your postcard style template (optional). Take a ruler and measure out a card between 3 1/2 and 4 1/4 inches high and between 5 and 6 inches long.[1] This is the size of a standard postcard.
- You can get creative with the dimensions of your card and make the edges curvy.
- If you want to make a postcard style birthday card and have thin scrapbook paper, you can glue it to a piece of cardstock to make it stronger.
-
7Write "Happy Birthday!" Once you have selected your paper and your card format, it's time to get started on creating your simple birthday card. You can use a thick marker or a combination of different colors to write, "Happy Birthday!" on the front of your card. If you prefer not to hand write it, you can also print the words using a word processor and cut them out for your card, or use the printed piece of paper as your template.
- You can make the words big and center them on the front of your card, or write them small based on your preference. There is no wrong way to do it, but since it is a birthday card, it should say, "Happy Birthday" somewhere!
-
8Design the card. The great thing about making cards by hand is that you can create them specifically for their recipient. Print out a picture of the two of you. Draw a birthday cake with the appropriate amount of candles. You can even write the beginning of a phrase that will end on the inside or back of your card. Try something like:
- I hope you have a great day today. Celebrate! It's your birthday!
- Happy birthday to a great friend. I like your birthday. Without it, I would not have such a great friend. Have an awesome birthday!
- I want to wish a happy birthday to one of the coolest people I know. Happy birthday to you!
- Add a fun memory that you and your recipient share. Use the front of your card to start the story and finish it in the inside or back of the card. For example, "Remember last year when we went rock climbing on your birthday? I can't wait for our next adventure, Happy Birthday!"
-
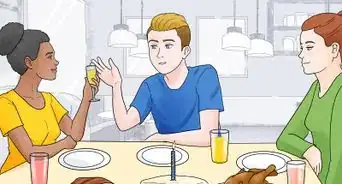
9Include a personal message on the inside or back of your card. Think about your relationship with this person and some of the fun memories you share. You can write an inside joke or congratulate them on accomplishments they have made in the last year.
- Use this space to tell them something light and fun that you would like them to know.
- Wish them the best for next year too!
-
10Decorate the inside or back. Depending on how much room you have, you may want to draw some more pictures or include another photo. Draw pictures of candles, balloons, birthday cakes, or cartoon characters of you and your recipient.
- Look up a line from your favorite poem, or find a funny riddle to include.[2]
-
11Sign the card. Include your full name, first name, or whatever name your recipient knows you by. Include a phone number, email address, or mailing address if you would like to offer your recipient an easy way to keep in touch with you.


Adding a Creative Touch
-
1Decorate the edges of the paper. You can use a hole punch to punch some holes along the side of your card and string a ribbon through the holes or use craft scissors to cut a patterned shape along the edges of your card.
- Craft stores sell scissors in the scrapbooking section that have shaped blades. They can give you a scalloped, wavy, or zigzag edge when you cut with them.
- If you don't want to cut the paper, draw a pattern on it with glitter glue. For example, you can make a combination of wavy lines and dots.
-
2Add some layers to your card. Cut out different shapes in colored paper and glue them onto the top of your card to add a splash of color and a thicker surface.
- This is a great way to make use of scrap paper.
- You can tie a ribbon around an additional piece of paper that you glue down to your template for a fun and fancy creative touch.
-
3Make a story. If you have a little bit of extra time, you can turn the card into a mini graphic novel. Divide the card into a grid and tell a little story. Draw pictures of you and your recipient using a fun memory from your past.
- You can put the story on the outside of the card or on the inside. If you are putting it on the inside, it can take place of the message!
-
4Add embellishments like stickers, stamps, glitter, or fabric. Tailor the card’s decorative details to the recipient. For example, if it’s your mom's birthday and she loves gardening, add a stamped flower image or draw the outline of a flower with glue and cover it in glitter.
- Visit your craft store's scrapbooking section. There, you'll find all sorts of embellishments, including cabochons, stickers, buttons, and washi tape.
- If you don't know what the recipient likes, consider tailoring the card to the theme of the party instead. For example, if the party's theme is "ocean," add some fish stickers!


Community Q&A
-
QuestionIs it easy for kids to make a handmade birthday card?
 Community AnswerYes! Making handmade cards can be very easy and fun.
 -
QuestionIs it okay to buy a card and add my own things to it?
 AlanaCommunity AnswerYes. Your friend or family member will love your card no matter if it is handmade or bought or a combination of both.
 -
QuestionHow can I make a pop-up card for my mom?
 Community AnswerCheck out the wikiHow articles Make a Pop Up Card, Make a Pop Up Birthday Card, and Make a Pop Up Flower Greeting Card for some great ideas!
Things You'll Need
- Paper (Card-stock, copy paper, scrapbook paper or normal card)
- Scissors
- Computer and printer
- Pen
- Glue
- Markers, crayons, colored pencils or felt tips
- Ribbon (optional)
- Stickers (optional)
- Glitter (optional)


References
About This Article
To make a simple handmade birthday card, fold your paper in half twice if you're using printer paper, which will make the card more sturdy. Place the paper flat on the table, then carefully fold it lengthwise and widthwise so the edges match up neatly. If you're using cardstock or construction paper, you can create a flat postcard design or just fold it in half once for a folded card. When you're ready to decorate your card, write a personalized message in it using a marker pen. Alternatively, use different colored pens for different letters for a fun look. You can also glue photos or glitter onto the front of the card to give it a creative touch. For tips on how to decorate the edges of the paper for your card, read on!