This article was co-authored by Ndeye Anta Niang. Ndeye Anta Niang is a Hair Stylist, Master Braider, and Founder of AntaBraids, a traveling braiding service based in New York City. Ndeye has over 20 years of experience in African hair including braiding box braids, Senegalese twists, crochet braids, faux dread locs, goddess locs, kinky twists, and lakhass braids. Ndeye was the first female of her tribe in Africa to move to America and is now sharing her knowledge of African braids passed on from generation to generation.
wikiHow marks an article as reader-approved once it receives enough positive feedback. In this case, 94% of readers who voted found the article helpful, earning it our reader-approved status.
This article has been viewed 600,528 times.
A crown braid (or halo braid) is a beautiful style that can be dressed up or down and worn anywhere. Crown braids have become especially popular over the last few years for girls who are going to a dance, or prom. Although it may look daunting to create, it's actually quite simple. In no time you will be able to create a crown braid, and have everyone else feeling jealous about how beautiful your hairstyle looks.
Steps
Creating a Crown Braid
-
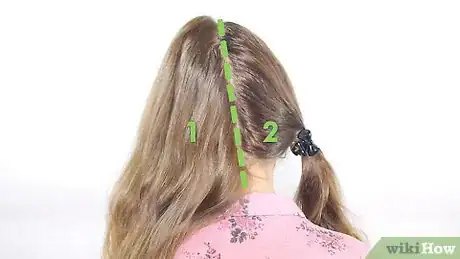
1Part your hair in the middle. Separate your hair into two sections, the left and right side. Secure one side while you work with the other, so they don't get mixed up. You can do this by adding a scrunchy or a hair clip, so that the one side doesn't get in the way. Try your best at containing any loose hairs which might pop out.
-
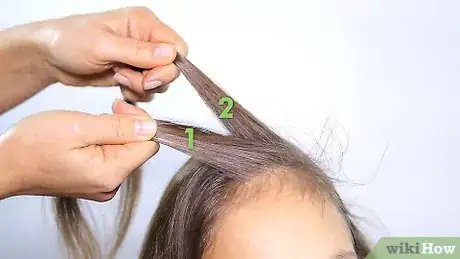
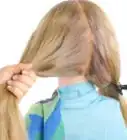
2Take the loose side and start at the nape of the neck. Split this section into three strands. If you want, you can also add a hair clip to each of these while you are preparing for the next step. Sometimes it can be hard to separate three strands all at once.[1]Advertisement
-
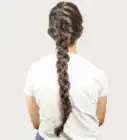
3Do an Dutch Braid or reverse-French braid. Cross each of the strands underneath each other instead of over one another. Work your way around the side of the head, keeping the braid fairly tight. If the braid comes loose, it won't appear as a tight "crown."
-
4Work across the top of the forehead until you finish the braid. Secure the end with an elastic band in order to keep the braid secure. Just let it hang down until you complete the other side. If you are afraid the braid might come undone, you can clip it to the top of your head until the "crown" is ready to be made.
-
5Take the opposite side of your hair in hand. Start at the top of the head, instead of the bottom. Split this section into three parts and do the same inside-out braid you did before. Work around the side of the head, finishing near the nape of your neck. You can add a hair clip or an elastic band when you are done to secure the braid.[2]
-
6Create the "crown." Pull one of the braids from left to right, over top of your head. The bread should rest a few inches from your forehead. Secure this braid with a Bobbi pin. Now pull the other braid from right to left, pushing it up against the previous braid. Secure this braid with a Bobbi pin as well. You now have a hairstyle that should look like a "crown."
Braiding a Half-Crown
-
1Grab a 1-2 inch section of your hair. Do this on the left side of your head, right above your left ear. Split this section into three parts. If you need to separate the sections by using elastic bands, feel free to do so.[3]
-
2Braid the left side of your hair. Make an 'inside-out' French braid or Dutch Braid. You want to make sure that the braid is tight, otherwise it will not look like a "crown." After you have completed the braid, tie an elastic band around the end to secure it in place. Let it hang down until the next step.[4]
-
3Repeat the braid on the other side. Take 1-2 inches of your hair above your right ear. Split this section three equal ways. Braid an inside-out braid, and make sure that it is tight. Finally, tie the end with an elastic band.[5]
-
4Take one of the braids in hand. Pull it around the back of your head. The braid should rest about 2 inches above the back of your neck. Pin this braid into place using a Bobbi pin. The "crown" should appear circular, so do not pull the braid straight back.[6]
-
5Take the other braid in hand. Pull it around the back, in the same circular motion. Rest it against the other braid. You should tuck the end of that braid, under the initial braid. Finally, pin it down using a Bobbi pin. You may want to use a few extra pins, sealing both braids together.[7]EXPERT TIPNdeye Anta Niang is a Hair Stylist, Master Braider, and Founder of AntaBraids, a traveling braiding service based in New York City. Ndeye has over 20 years of experience in African hair including braiding box braids, Senegalese twists, crochet braids, faux dread locs, goddess locs, kinky twists, and lakhass braids. Ndeye was the first female of her tribe in Africa to move to America and is now sharing her knowledge of African braids passed on from generation to generation.Professional Hair Stylist & Master Braider

 Ndeye Anta Niang
Professional Hair Stylist & Master BraiderTry these variations for a different half-crown look. To do a half-crown braid, make a large box braid around your ear, then take it across to the other ear area from the front top of your hair. For a more complex but more secure way to do a half-crown, make large cornrow from one ear to the other, making the front of the hair look like it's pulled back.
Forming a Twisted Crown Braid
-
1Let your hair fall to one side of your face. Your hair should fall to where your hand strength is(right handed, let your hair fall to the right). Pick up two small pieces of hair at the hairline. Hold one in each of your hands.[8]
-
2Begin to braid your hair. Twist them so that one piece of hair goes to the bottom, while the other goes to the top. After this initial move, add a few strands of hair to the lower piece. Continue again, moving the bottom piece up, and the top piece down.[9]
-
3Follow this pattern all the way around. Continue the braid, adding hair to the bottom piece, and flipping each of the pieces as you go along. Make sure the braid begins to look twisted. If not, curl your hands slightly as you braid. The braid should follow from your forehead, around your right ear, to your neck, to your left ear, and then to your forehead again. Make sure the braid remains tight, otherwise you won't get that nice "crown" look.[10]
-
4Continue for as long as you have hair to incorporate. You will likely have more hair than you need. Simply continue over the existing braid until you run out of hair. Do not add hair to the bottom piece once you begin crossing over onto the existing braid.[11]
-
5Finish off your twisted crown braid. Twist the very end of the braid, until it is like a rope. Then tuck the rope under the existing braid underneath. Finally, add a few Bobby pins around the braid to secure it into place.[12]
Community Q&A
-
QuestionDo you have another way to hold hair in place without bobby pins?
 Community AnswerYes. You can tuck it under the other braid tightly after wrapping it around your head. As long as the braid is tight enough, it should hold even without bobby pins.
 -
QuestionMy hair is waist length. Is that too long for me to make a crown braid?
 Community AnswerJust keep wrapping it around your head. You'll need quite a few hairpins, but you'll be fine.
 -
QuestionCan you do this without doing an inside-outside French braid?
 Community AnswerYes. Just do two normal braids (plaits) on either side of your head and cross them over the top or the back of your head and secure. This just won't look quite as impressive as French or Dutch plaiting, though.
Things You'll Need
- Medium-long hair
- Small hair elastics
- Bobbi pins
- Hairspray
- Experience with braiding hair
References
- ↑ http://www.howcast.com/videos/511494-how-to-do-sienna-millers-braided-crown-braid-tutorials/
- ↑ http://www.howcast.com/videos/511494-how-to-do-sienna-millers-braided-crown-braid-tutorials/
- ↑ http://www.theguardian.com/fashion/fashion-blog/2014/nov/19/create-half-crown-braid-two-minutes
- ↑ http://www.hairromance.com/2013/04/hairstyle-tutorial-half-crown-braid.html
- ↑ http://www.theguardian.com/fashion/fashion-blog/2014/nov/19/create-half-crown-braid-two-minutes
- ↑ http://www.hairromance.com/2013/04/hairstyle-tutorial-half-crown-braid.html
- ↑ http://www.theguardian.com/fashion/fashion-blog/2014/nov/19/create-half-crown-braid-two-minutes
- ↑ http://www.divinecaroline.com/beauty/hair/braided-hairstyles/easy-updo-twisted-crown-braid
- ↑ http://www.twistmepretty.com/2015/02/twisted-crown-braid-tutorial.html
About This Article
To make a crown braid, start by parting your hair down the middle. Then, take three strands on one side from the nape of your neck, and do an inside-out french braid, crossing the strands underneath each other and working your way around the side of your head. Next, continue braiding tightly across the top of your forehead, and secure the end with an elastic. Finally, repeat on the other side and create the crown by pulling one of the braids over the top of your head and securing it with a bobby pin. To learn how to create a half-crown braid, keep reading!
