wikiHow is a “wiki,” similar to Wikipedia, which means that many of our articles are co-written by multiple authors. To create this article, 28 people, some anonymous, worked to edit and improve it over time.
The wikiHow Video Team also followed the article's instructions and verified that they work.
This article has been viewed 875,760 times.
Learn more...
Steps
Tying the Knot
-
1Make a U-shape. Pull a long cord into a "U" or horseshoe shape. so that the ends are close together.
-
2Pull the cord into a loose loop. Pull one end past the other so that they overlap by about four inches (10 cm). The overlapping ends should lie parallel to one another.Advertisement
-
3Double back the outer cord end. Bend the tip and bring it back along the outside of the loop. You don't need to do anything with the inner parallel end.[1]
-
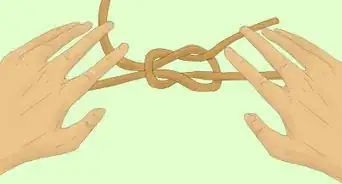
4Pinch the ends together to form a small loop. Hold the inner end of the cord together with the looped-back outer end. You should be holding three parallel "layers" of the cord at the thickest point. Make sure that you have plenty of extra cord at the outer end: you will use this to finish the knot. Pull the end of the cord with one hand, and pinch the loops together with the other.[2]
-
5Wrap the loose outer end of the cord around all three "layers." Wrap it over, then under – not under, then over. It might help to use your dominant or most dexterous hand.
-
6Coil the cord around the loop. Keep wrapping the loose end around all three other layers of cord. Wrap at least 2-3 times, until you either run out of cord or cover almost all of the "three-layered" section. Be careful not to cross the coil over itself, or you will tie a messy knot.[3]
-
7Feed the end of the cord through the loop at the end of the coil. You don't need much – the knot is almost finished. Make sure that there is enough cord protruding that it is not in danger of slipping out.
-
8Secure the knot. Slide the "coil" over the remaining bit of loop to secure it. You may need to pinch the right side of the large loop with the ring and pinkie fingers of one hand.

Testing and Expanding the Knot
-
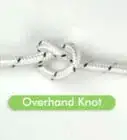
1Slide the finished knot to test it. It should move easily. Be careful not to slide it right off the free end of the cord. Consider tying a sturdy knot at the very tip of the sliding end. This way, the length of the rope will be adjustable, but you will not be able to accidentally slide the rope out of the knot.
-
2Make two sliding knots. Consider flipping the cord over and repeating the knot on the non-knotted end. This will leave you with two sliding knots that can be pulled together or apart as needed, making a large closed loop. This is the design that people use for making jewelry.
-
3Adjust the cord. Pull the two knots closer together to loosen the cord. Pull the two knots further apart to tighten.
-
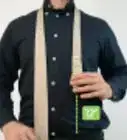
4Consider making a necklace or bracelet. The sliding knot is great for creating simple jewelry that is meant to be tightened. Try slipping beads or charms onto the cord before you tie it.


Community Q&A
-
QuestionIs that a candy cane attached to the leather?
 Community AnswerIt looks like a piece of formed clay to represent a bead to me, or maybe a purchased bead.
 -
QuestionHow do I tie the second knot?
 Community AnswerThe same as the first. Pull the untied end through the knotted end and proceed to knot the same way as the first one.
 -
QuestionDid you tie this knot with a huge Tootsie Roll? Where can I get one?
 Community AnswerThis size Tootsie Roll doesn't exist. This person probably just used something such as a shiny brown rope.


References
About This Article
To make a Chinese sliding knot, start with the two ends of a string together so the rope makes a “U” shape. Curl one end around the other end so they overlap by about 4 inches. Then, create 2 more bends in the outside end. Next, pinch the bottom 3 strands together and loop the top strand underneath the other 3 so it points upward. Wrap it around another 2-3 times and push it through the loop left by the other strands. Finally, slide the coil towards the loop to secure the knot. For more tips, including how to use the Chinese sliding knot to make jewelry, read on!