wikiHow is a “wiki,” similar to Wikipedia, which means that many of our articles are co-written by multiple authors. To create this article, volunteer authors worked to edit and improve it over time.
This article has been viewed 166,001 times.
Learn more...
Postcards have a variety of uses from staying in touch with friends to effectively marketing your business. Microsoft Word allows you to make your own custom postcards quickly and easily. There are many different methods for making postcards in Word, but the two most straightforward options are by making them as "Labels" or through starting from a premade "Template."
Steps
Using Labels
-
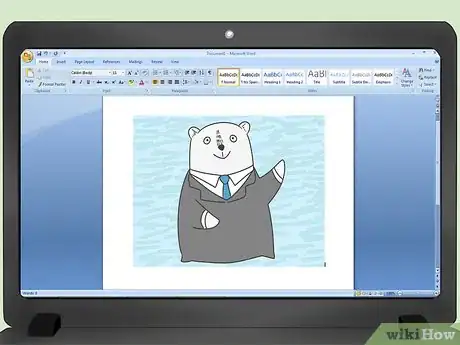
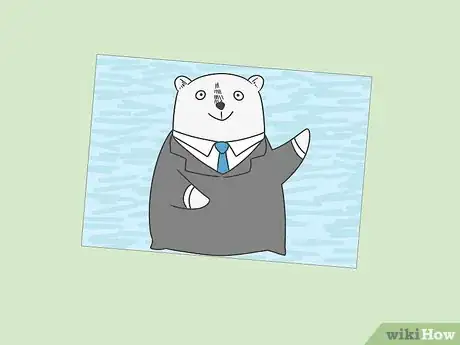
1Create a blank Word Document and paste in the picture you'd like to use. Simply right click anywhere on the blank space and select "Paste." Click on the picture to select it. Your picture doesn't have to have typical postcard dimensions (six inches long and four inches high) to work.
-
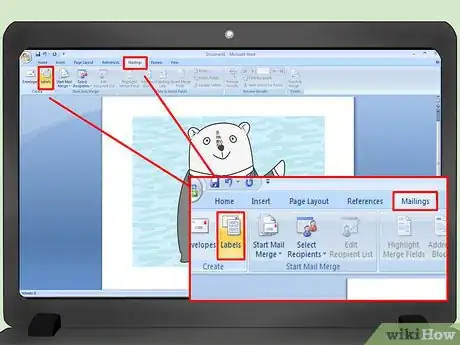
2Navigate to the "Mailings" tab. Mailings will be between "References" and "Review" in all recent versions of Word (2007, 2010, 2013).[1] [2] Select the "Labels" icon. This icon will appear on the leftmost section of the toolbar next to "Envelopes."Advertisement
-
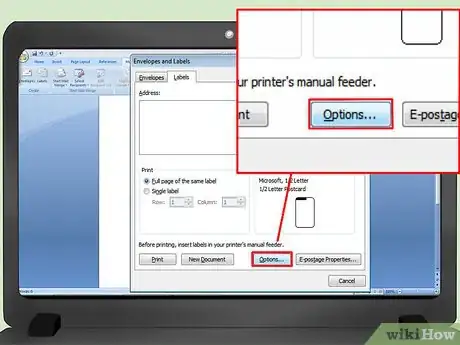
3Click on "Options." Selecting Labels will bring you to the "Envelopes and Labels" window. From there, click the button labeled "Options..." towards the bottom right of the window. This will bring up the "Label Options" window.
-
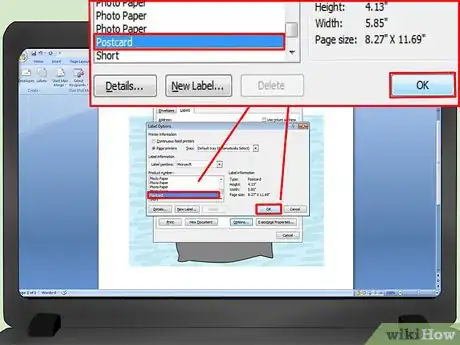
4Select the "Postcards" label. Make sure the "Label vendors:" is set to "Microsoft." If not, click the arrow and find Microsoft in the vendor drop down menu. Scroll through the "Product number:" menu until you find "Postcard." Click "Postcard" to highlight it before pressing "OK" at the bottom right.
- If you've purchased blank postcards, check to see if their manufacturer has a special template to use instead. Look for the manufacturer under "Label vendors:" and the template labeled with the correct product number.
-
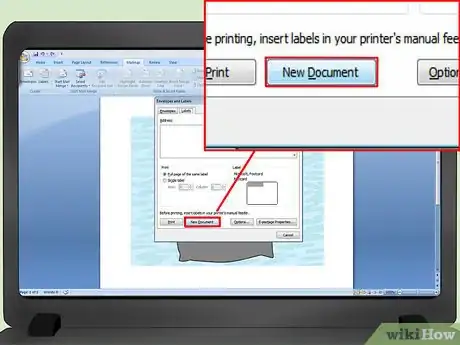
5Click "New Document." A new page should now display with four copies of your picture in a grid. Each of the four sections is the front of its own postcard. You can resize and move the picture within its section or add text Save this document when you're finished.
Using Templates
-
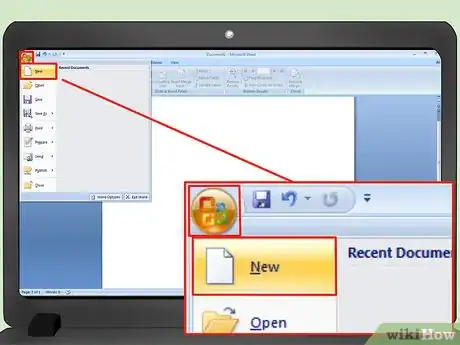
1Create a new Word Document. Instead of creating a blank document, you will be working from a template.
- In Word 2007, click the Office icon at the top left of the screen and select "New."
- In Word 2010 and 2013, click "File" and then "New."
-
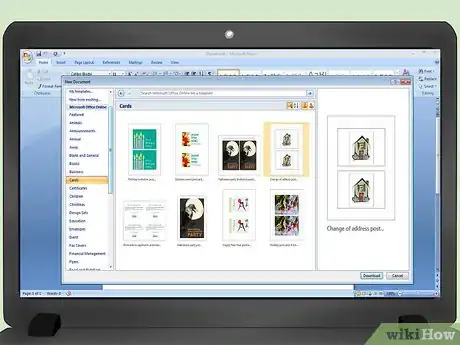
2Find the postcard template you'd like to use. You will have dozens of different ready-made postcards to choose from. Select the one that's closest to what you want.
- In Word 2007, the easiest method will be to type "postcards" into the search bar at the top of the new document window. This will pull up templates for you to download.
- In Word 2010 and 2013, there are special sections for postcard templates. Click "Cards" and then select "Postcards."
- If you purchased blank postcards, search for their manufacturer. If you cannot locate a pre-installed template, check the manufacturer's website for available downloads.
-
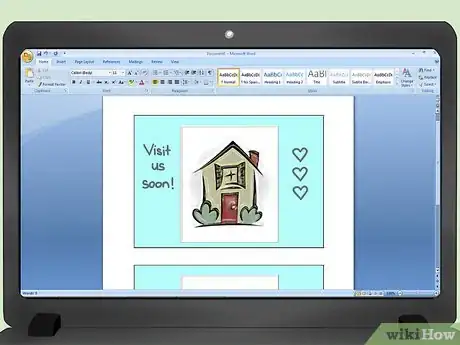
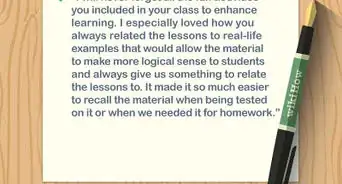
3Edit the postcard. Many postcard templates will be easy to edit with each picture and textbox as its own discrete object. Move objects to different areas of your postcard or delete them entirely. If you want to use a custom picture, right click a picture on the template and replace it. Change the text by clicking the textbox. The text's font, size, and color can also be altered using the Font toolbox, just like in a normal Word document. Save your document once you're finished to avoid losing your work.
Preparing Your Cards for Mailing
-
1Print out your cards. Make sure your home printer can print on cardstock. Load a sheet of cardstock (or blank postcards) into your printer's paper tray. Print out however many copies of your postcard that you want.
- If you are printing both the front and back of your postcards, print a page of "fronts" first. Then, load the cardstock back into your printer's paper tray before printing the "backs." If you're unsure which side your printer prints to, try doing this using a test page on normal printer paper first.
-
2Cut out each card. Unless your postcard takes up the entire sheet of paper, you will need to cut your printout into separate cards. If you have a paper cutter, use that to quickly make consistent cuts into multiple copies at once. Otherwise, hand cut them one at a time with a pair of scissors. Some blank postcards are perforated so that all you will need to do is tear where necessary.
-
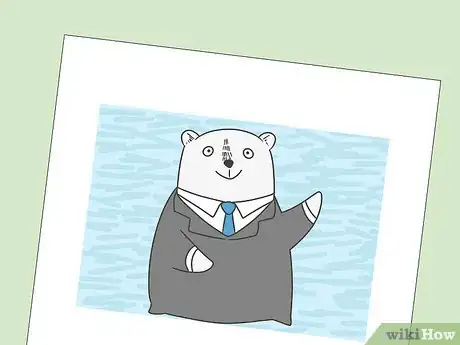
3Ready your cards for mailing. If your Word document didn't include addresses, write them in. You can also add a handwritten message to any available blank space. Affix a stamp to the top right corner of the addressed side, and your card is ready to post.
Community Q&A
-
QuestionHow can I print on US postcards?
 Community AnswerScan the back of the postcard onto your computer then paste it into Word. Make a text box and write in it. Print out the page then cut and glue/tape/adhere it to the back of the card. Also, you could just print out what you want to say and stick it on.
References
- ↑ http://www.techrepublic.com/blog/10-things/-10-things-you-should-know-about-printing-labels-in-word-2010/
- ↑ https://support.office.com/en-ca/article/Create-return-address-labels-be712991-16dd-4b9e-810e-35b5320c922b
- ↑ http://www.creatingreallyawesomefreethings.com/how-to-make-postcards-in-microsoft-word
About This Article
To make a postcard in Microsoft Word, all you need to do is use a postcard template when you create a new document. Word has dozens of different postcards to choose from. Then, you’re free to change the images and text to anything you want. Alternatively, you can create a postcard using Word’s label feature. To do this, first open a blank document and paste the image you want on your postcard. After that, click on the “Mailings” tab, then “Label,” then “Options.” Select the “Postcards” label, then “New document.” This will create 4 copies of your picture on the page. For more tips, including how to print your postcard out, read on!



-Step-17.webp)
