This article was co-authored by wikiHow Staff. Our trained team of editors and researchers validate articles for accuracy and comprehensiveness. wikiHow's Content Management Team carefully monitors the work from our editorial staff to ensure that each article is backed by trusted research and meets our high quality standards.
There are 7 references cited in this article, which can be found at the bottom of the page.
The wikiHow Video Team also followed the article's instructions and verified that they work.
This article has been viewed 166,875 times.
Learn more...
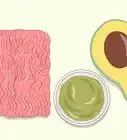
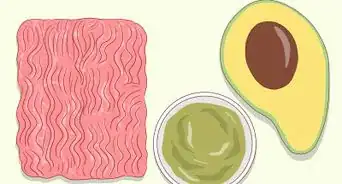
Peach puree makes a great baby food or addition to classic cocktails—it’s sweet, delicious, and chock full of antioxidants, vitamin C, potassium, and fiber! To safely prepare whole peaches, boil them, shock them with cold water, and peel off the skins. Then, dice them up and heat them on the stovetop with a little liquid before pureeing them in a blender or food processor. You can store excess puree in the freezer for up to 6 months, making it easy to prepare big batches for future use.[1]
Ingredients
Easy Peach Puree
- 4 fresh or frozen peaches
- 3 tablespoons (44 mL) of apple juice, breast milk, or water
Makes about 4 cups (700 grams) of peach puree
Steps
Blanching, Peeling, and Dicing
-
1Use fresh, frozen, or canned peaches. If you’re using fresh peaches, look for ones that have a nice aroma and that aren’t super bruised or soft. For frozen peaches, opt for ones that are already peeled. If you go with canned peaches, choose ones that are stored in water or fruit juice rather than in syrup.[2]
- If the fresh peaches you have are extremely hard, put them into a paper bag for 1-2 days to soften them up a bit before pureeing them.
- If using frozen peaches, let them thaw at room temperature before moving on to the steaming process.
- If you’re using canned peaches, drain them from their liquid before moving on to the steaming process.
Warning: If you’re making peach puree for a baby, make sure you have your pediatrician’s approval to start giving them food first. Many babies are ready to be introduced to foods starting at 6 months old, but every child is different.[3]
-
2Bring a large pot of water to a boil on the stovetop. Use a pot that is large enough to fully fit 4 whole peaches submerged in water. Turn the burner to high and let the water come to a boil before adding the peaches to the pot.[4]
- It may take about 10 minutes for the water to come to a boil. Just keep an eye on the pot—once the water is bubbling, you’re ready to move on to the next step.
- If you’re using canned or frozen peaches, skip the boiling and blanching process entirely.
Advertisement -
3Cut a small X at the bottom of each peach. Use a clean kitchen knife to make the cuts. The cuts will help the skin peel off more easily after the peaches have been boiled and blanched.[5]
- Because the peaches are going to be boiled, there’s no need to rinse them. The hot water will kill any bacteria on the surface of the skin.
-
4Boil the peaches for 2 minutes. Use a slotted spoon to lower the peaches into the boiling water. If you were to just drop them in, you would risk splashing and burning yourself. Once all 4 peaches are in the water, set a timer for 2 minutes.[6]
- There’s no need to stir the water or lower the heat while the peaches are boiling.
-
5Put the peaches into an ice bath for 1 minute. While the peaches are boiling, fill a large bowl with ice and water. After the timer goes off, use a slotted spoon to carefully remove each peach from the pot and put it into the ice bath. Leave the peaches in the ice bath for 1 minute, then remove them and set them to the side.[7]
- The ice bath stops the cooking process and also loosens the skin, making it much easier to remove.
-
6Peel the peaches by hand or use a knife to loosen the skin. You should be able to simply rub the skin of the peach and peel it off by hand. Try starting at the bottom of the peach where you made the X. If you’re having a hard time getting the peeling process started, use a knife to gently lift the edge of the skin at the X and then peel it upwards, away from the peach.[8]
Tip: If you don’t have time or don’t want to boil and blanch the peaches, you can just peel them by hand with a vegetable peeler.
-
7Dice the peeled peaches into quarters and remove the pits. Use a knife and clean cutting board to halve and then quarter each peach. Be careful, as the peach will be slippery.[9]
- Discard of the peach pits or put them into a compost pile.


Steaming and Pureeing
-
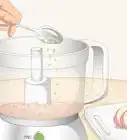
1Put the peaches into a stockpot along with 3 tablespoons (44 mL) of liquid. Use either apple juice, water, or breastmilk. The extra liquid will help the puree get to a smoother consistency than if you were to just use peaches by themselves.[10]
- Complete this process whether you’re using fresh, frozen, or canned peaches. It’s important to steam them to remove any potential bacteria. Plus, it’ll help them achieve that smooth consistency that you want in a puree.
- Breastmilk will make the puree creamier, plus it has added nutrients that will benefit your baby. If you don’t have breastmilk, you could also use formula for a similar effect.
Peach Puree Isn’t Just for Babies: It’s also a popular ingredient in mixed drinks, like Bellinis. If you’re making peach puree for something other than baby food, use 3 tablespoons (44 mL) of water and feel free to add 1-2 teaspoons (4-8 grams) of sugar to the stockpot for some added sweetness.
-
2Stir and cook the peaches over medium heat for 10 minutes. Use a wooden spoon or something similar to stir the peaches. Mash the peaches as you stir to help them soften quicker.[11]
- Steaming the peaches in the stockpot helps break down stringy fibers in the peaches. Plus, it softens them even further, which will make it that much easier to get them to a puree consistency.
-
3Transfer the hot peaches to a food processor or blender. Turn off the burner and use a hot pad when touching the stockpot so you don’t burn yourself. Use a wooden spoon or something similar to scoop the peaches out of the pot and gently put them into the food processor.[12]
- Pour any remaining liquid from the pot into the processor after you’ve removed all the peaches.
-
4Blend the peaches for 2 minutes or until they are completely smooth. Whether you use a food processor or a blender, check the consistency of the puree after 2 minutes to see how it’s coming along. It should be soft, smooth, and completely free of chunks and lumps.[13]
- You can’t over-blend the puree, so don’t be afraid to give it some extra time if you’re worried about the consistency.
-
5Let the puree cool for 10-15 minutes before transferring it to a container. Set a timer so you don’t forget about it. Wait until the puree has cooled down slightly so it is just warm to the touch before you store it.[14]
- Don’t leave the puree out at room temperature for more than 2 hours. If you do, it should be discarded because bacteria could have started to grow.


Storing Puree in the Fridge
-
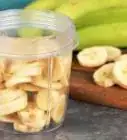
1Transfer the puree from the processor to an airtight glass container. You could use a large glass container to store all of the puree in one place, or you could divvy it up into smaller containers. Make sure the container you’re using is clean, and use a clean spoon to move the puree.[15]
- If you use a single large container and are feeding the puree to an infant, don’t feed them directly from the container. Instead, transfer about 1 ounce (28 g) of puree into another container and feed your baby from that to avoid contaminating the rest of it.
-
2Store peach puree in the fridge for 3-5 days. If you notice any odd smells or spots on the puree, discard it immediately. If you haven’t used all the puree after 3-5 days, you can freeze what is left.[16]
- Apart from baby food and cocktails, you could also spread peach puree on toast or muffins, or you could even use it as a sweetener for oatmeal or hot cereals.
-
3Label the container with the date it was prepared. Puree in the fridge only lasts for a few days, so it’s important you remember how long it’ll stay good for. After 5 days, either freeze the puree or throw it out.[17]
- Use masking tape for an easy label that’ll wash off once it’s no longer needed.


Freezing Puree
-
1Pour the puree into ice cube trays to freeze baby-sized portions. If you want to store the puree for a longer period, freezing it is a great option. Use a silicone ice cube tray to make it easier to pop out the puree once it’s frozen.[18]
- Each ice cube tray makes about 1 ounce (28 g) of baby food, which is about how much your baby will eat at once.
-
2Cover the ice cube tray with a lid or plastic wrap. If your ice cube tray came with a lid, use it. If not, use plastic wrap to cover the puree while it is freezing. This just helps prevent freezer burn and keeps things out of the puree while it’s still in its semi-liquid form.[19]
- You could also use aluminum foil, but you’ll need to check the puree very carefully after it’s frozen to make sure none of it got stuck to the surface.
-
3Freeze the ice cube trays for several hours. Pop the covered ice cube trays into the freezer, making sure to keep them level so the puree doesn’t get frozen to the covering. Leave them alone for 2-3 hours or overnight to ensure they’re completely frozen through.[20]
- Try sticking a toothpick into a puree cube. If it easily pushes into the center, the puree is still soft. If it can’t penetrate the puree, chances are it is completely frozen.
-
4Pop out the frozen chunks of puree and transfer them to a plastic bag. Once the puree is frozen, remove it from the ice cube tray and store the blocks in a resealable, freezer-safe plastic bag. This helps save storage room in your freezer, though if you have space, you could leave the puree in the tray.[21]
- Label the outside of the bag with the “date made” so you can easily remember how long the puree will be good for.
-
5Use frozen puree within 3-6 months of freezing it for the best quality. As long as your freezer stays at 0 °F (−18 °C), the puree should technically be good indefinitely, but the flavor of the puree will decline over time.[22]
Defrosting Frozen Puree: Remove a portion of puree from the freezer 24 hours before you’d like to use it and let it defrost in an airtight container in the fridge. Reheat the puree in the microwave in 10-15 second increments.[23]


Expert Q&A
-
QuestionHow do I get my baby to eat vegetables?
 Amy ChowAmy Chow is a Registered Dietitian and the Founder of Chow Down Nutrition, a family and child nutrition consulting service in British Columbia (BC), Canada. With over nine years of experience, Amy has a special interest in pediatric nutrition, food allergy management, and eating disorder recovery. Amy holds a Bachelor’s degree in Nutritional Sciences from McGill University. She gained her clinical experiences at residential and outpatient eating disorder treatment programs as well as for BC Children’s Hospital before starting her own business. She has been featured on Find BC Dietitians, Dietitians of Canada, Food Allergy Canada, Recovery Care Collective, Parentology, Save on Foods, National Eating Disorder Information Centre (NEDIC), and Joytv.
Registered DietitianRepeated exposure at eating vegetables with your baby, and then also for babies, you can puree and mince some of these vegetables and add them into their food. You also want to make sure to offer these vegetables directly to the baby on the side because you want them to learn how to eat these foods.
Warnings
- Discard peach puree after it has been left out at room temperature for more than 2 hours. Don’t refreeze puree that has been reheated.[24]⧼thumbs_response⧽
- Discard of any puree that has developed spots or weird smells.⧼thumbs_response⧽
Things You’ll Need
- Peaches
- Stockpot
- Knife
- Slotted spoon
- Cutting board
- Large bowl
- Measuring spoon
- Wooden spoon
- Food processor or blender
- Airtight glass container
- Ice cube tray
- Plastic wrap
- Resealable plastic bag


References
- ↑ https://www.homemade-baby-food-recipes.com/peach-baby-food-recipes.html
- ↑ https://www.homemade-baby-food-recipes.com/peach-baby-food-recipes.html
- ↑ https://www.homemade-baby-food-recipes.com/peach-baby-food-recipes.html
- ↑ https://www.thekitchn.com/how-to-easily-peel-peaches-without-a-knife-221619
- ↑ https://www.thekitchn.com/how-to-easily-peel-peaches-without-a-knife-221619
- ↑ https://www.thekitchn.com/how-to-easily-peel-peaches-without-a-knife-221619
- ↑ https://www.thekitchn.com/how-to-easily-peel-peaches-without-a-knife-221619
- ↑ https://www.thekitchn.com/how-to-freeze-peaches-234168
- ↑ http://www.katiescucina.com/2014/07/homemade-peach-puree-baby-food-oxo-tots-giveaway/
- ↑ http://www.katiescucina.com/2014/07/homemade-peach-puree-baby-food-oxo-tots-giveaway/
- ↑ http://www.katiescucina.com/2014/07/homemade-peach-puree-baby-food-oxo-tots-giveaway/
- ↑ http://www.katiescucina.com/2014/07/homemade-peach-puree-baby-food-oxo-tots-giveaway/
- ↑ http://www.katiescucina.com/2014/07/homemade-peach-puree-baby-food-oxo-tots-giveaway/
- ↑ http://www.katiescucina.com/2014/07/homemade-peach-puree-baby-food-oxo-tots-giveaway/
- ↑ https://www.tasteasyougo.com/2017/06/homemade-baby-food-peaches-recipe.html
- ↑ https://www.tasteasyougo.com/2017/06/homemade-baby-food-peaches-recipe.html
- ↑ https://www.tasteasyougo.com/2017/06/homemade-baby-food-peaches-recipe.html
- ↑ https://www.homemade-baby-food-recipes.com/peach-baby-food-recipes.html
- ↑ https://www.homemade-baby-food-recipes.com/peach-baby-food-recipes.html
- ↑ https://www.homemade-baby-food-recipes.com/peach-baby-food-recipes.html
- ↑ https://www.homemade-baby-food-recipes.com/peach-baby-food-recipes.html
- ↑ https://www.homemade-baby-food-recipes.com/peach-baby-food-recipes.html
- ↑ https://youtu.be/we8EqHbMnGk?t=59
- ↑ https://youtu.be/we8EqHbMnGk?t=156
About This Article

To make peach puree, start by bringing a large pot of water to a boil. Cut a small X at the bottom of 4 fresh peaches to help the skin peel off more easily, then submerge them in the boiling water for 2 minutes. After you remove the peaches, put them into a bowl of ice water for 1 minute. This step will stop the cooking process and loosen the skin. Peel the peaches by rubbing the skin or gently lifting it with a knife. Dice the peeled peaches into quarters and remove the pits. Then, add 3 tablespoons of apple juice, water, or breastmilk to a stockpot along with your diced peaches. Stir and cook the mixture over a medium heat for 10 minutes before putting it in a food processor or blender for about 2 minutes. To learn how to store and freeze your peach puree, keep reading!