wikiHow is a “wiki,” similar to Wikipedia, which means that many of our articles are co-written by multiple authors. To create this article, 48 people, some anonymous, worked to edit and improve it over time.
The wikiHow Video Team also followed the article's instructions and verified that they work.
This article has been viewed 428,183 times.
Learn more...
Fake cuts are useful for Halloween costumes, movie making, stage plays, and any other costume event. You can make a fairly convincing wound just by scrounging up household materials, or turn it into a big project involving makeup and fake glass shards.
Steps
Making Easy Fake Cuts
-
1
-
2Draw on the wound. Sharpen your red eyeliner pencil. In the center of the smudged area, draw a thin line.Advertisement
-
3Add darker colors (optional). If you want a larger, more gory wound, add a dark brown or dark red line next to the thin, red line. Dab the lines with your finger to smear them together slightly, without wiping away their shape.
-
4Add clear lip gloss. This will make the wound glisten, making it look more recent and bloody.
Making 3D Wounds with Embedded Objects
-
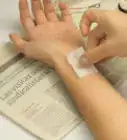
1Protect clothing and furniture. Clear a surface to work on and cover it with newspaper. It's best to wear the rest of your costume while you work, since changing clothes can mess up the cut, but protect the costume with an apron or bib if you are working on your face or neck.
-
2Coat the area with eyelash glue (optional). Use a damp makeup sponge to lightly coat the area you plan to decorate, then wait until it dries. You can skip this step if you like, but a base of eyelash glue can be easily removed later using body oil or eyelash glue remover.[3]
-
3Create fake skin with gelatin. If you want to embed fake razor blades or tubes of squirting blood in your wound, the fake skin needs to be extra sturdy. You can make it out of gelatin powder and a couple other ingredients:
- Warm several plates in an oven set to the lowest available temperature, until it is warm but not too hot to touch. Put a metal baking tray in the freezer.
- Mix gelatine powder, water, and liquid glycerin (hand soap) in equal amounts. There should be no sweetener or other additions in any of these ingredients.
- Heat this in a microwave in 5–10 second bursts, until it is a homogenous liquid. Do not touch it at this stage, as it can cause nasty burns.
- Take the plates out of the oven. Wearing gloves, pour the gelatin in a thin layer onto the plate. Tip the plate to spread it as thin as possible, then transfer the plate to the cold tray to set it in that thin shape.
-
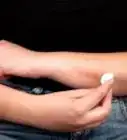
4Cut into the fake skin. Put the gelatin on your skin and wait for it to become firm before you cut into it. Use a butter knife or your fingers to gently tear apart a slit at the center of the tissue paper. Curl or pull back the edges around the slit, to form a raise layer of fake scar tissue.[4]
- For a long cut, keep the tear long but narrow. For a more shocking wound, tear it into a wide, mangled mess.
-
5Fill the cut with red face paint. Cover the inside of the slit completely, applying the material with a paintbrush. Only use face paint approved for use on skin. Other types of paint can cause rashes or more serious health problems.
- A non-toxic label does not guarantee the product is skin-safe.
-
6Color the fake skin with a mix of red food coloring and cocoa powder. You'll only need a small amount, so mix this in a shot glass or other small container. The end result should look like dirty blood, as though your cut has been exposed to dirt and air for hours.[5] Use a paintbrush to apply this to the fake wound.
- If your fake skin already matches your skin tone well, you can skip this step, or just sprinkle on cocoa powder for a dirty appearance.
- If the mixture is too pale or runny, mix in corn starch or honey to thicken it. This thicker mixture can also double as fake blood in the steps below.
-
7Blend the wound in with foundation (optional). Use a makeup sponge, foundation brush, or fingers to blend foundation around the wound, applying it in small circular motions. This can be the same shade as your skin tone, or slightly lighter.[6]
- If you do not have foundation, or if foundation alone doesn't look convincing, roughly brush on the cocoa powder and food coloring mixture.
-
8Add oozing fake blood. Make the cut extra-gruesome by dabbing a generous amount of glistening fake blood in the center of the cut. Decorate the skin around the wound with the excess blood:
- Dip a cotton swab in fake blood and let it drip onto the skin around your wound, while holding it vertical.
- Wet a toothbrush in fake blood and pull back the bristles with your fingers, letting go to spray the wound with blood splatter.[7]
-
9Embed objects in the wound. The gelatin skin should be strong enough to hold small objects. You can purchase fake glass shards, fake razor blades, or similar objects at Halloween stores or dollar stores, and slip them into the fake skin. A thoroughly cooked, washed, and broken chicken bone adds an especially gory effect.
- Never use real blades or shards, even plastic ones, or you could cause an actual injury.
-
10Squirt blood through your wound. For this, you'll need a medical oxygen line sold at drugstores, or an air tube from an aquarium stores, as well as a rubber squeeze bulb that fits tightly over the tubing. Fill the squeeze bulb mostly full of fake blood, then fit the tubing into the bulb. Hide this in your shirt sleeve or under the gelatin fake skin, with the other end of the tubing at the center of your wound. Squeeze the bulb to send out a squirt of blood.
- Check the label when buying fake blood. Light-viscosity fake blood creates a more dramatic squirting effect.[8]
Community Q&A
-
QuestionIs there a way for a kid to do it using household items?
 Community AnswerPut Elmer's glue around more than the area you want it. When it dries, start picking at it; it will look like your skin is peeling. Take a red marker (or red eyeliner; it works better), and make the shape of the cut. Add fake blood.
 -
QuestionWhat is the alternative method instead of red eyeliner?
 Community AnswerYou can use a pen, marker, or paint, but make sure they are washable so it can come off once you are done.
 -
QuestionCan I use a lip pencil?
 Community AnswerYes, a lip pencil is a good tool for making fake cuts.
Warnings
- Do not shock your parents with this as a prank. It may not be very well received.⧼thumbs_response⧽
- Do not use real sharp objects to "embed" in your fake wound; you risk actually harming yourself.⧼thumbs_response⧽
- The three-dimensional wounds can be difficult to make for beginners.[9] With practice, you'll get better at arranging the fake skin in a realistic shape, so the edge blends naturally into the surrounding skin.⧼thumbs_response⧽
Things You'll Need
- Gelatin
- Red face paint
- Red food coloring
- Cocoa powder
- Fake blood
- Water
- Paintbrush
- Cotton swab
Optional:
- Eyelash glue
- Makeup sponge
- Foundation that matches your skin tone, or is slightly lighter
- Butter knife
- Fake, plastic wound objects (fake razor blade, fake scissors, etc.)
- Small, clear plastic tubing (check drugstores and aquarium stores)
- Squeeze bulb
References
- ↑ https://www.youtube.com/watch?v=QZ2EKjOWHYc
- ↑ https://www.youtube.com/watch?v=YgdpzgORzhU
- ↑ http://patch.com/maryland/laurel/cheap-way-to-create-fake-cuts-gashes-for-halloween-a8696015
- ↑ http://life.wilko.com/gruesomely-gory-fake-wounds/
- ↑ http://life.wilko.com/gruesomely-gory-fake-wounds/
- ↑ http://patch.com/maryland/laurel/cheap-way-to-create-fake-cuts-gashes-for-halloween-a8696015
- ↑ http://patch.com/maryland/laurel/cheap-way-to-create-fake-cuts-gashes-for-halloween-a8696015
- ↑ https://books.google.com/books?id=Kn7QI1pjW-MC&printsec=frontcover#v=onepage&q&f=false
- ↑ https://www.youtube.com/watch?v=QZ2EKjOWHYc
About This Article
To make fake cuts in your skin, start by drawing a line with red eyeliner, washable marker, or paint where you want the cut to be. Then, smudge the line with your finger so it looks like smeared blood. Once you’ve smudged your first line, sharpen a pencil and draw another thin line in the middle to make the actual cut. If you want it to look like a larger, gorier wound, add a dark red or brown line beside the first and dab it lightly with your finger to smear them together a bit. You can also make the wound look shiny and bloodier by going over it with clear lip gloss. For more tips, including how to make a 3D wound with glass stuck in it, read on!


