This article was co-authored by Donna Serino. Donna Serino is a Dry Cleaning and Alterations Specialist and the Marketing Director for Hallak Cleaners, based in Manhattan, New York and Hackensack, New Jersey. She has expertise in tailoring and alterations, couture and casual wear, designer handbag cleaning, and suede, leather, and furs care. Donna and Hallak Cleaners are part of the National Cleaner’s Association, Drycleaning and Laundry Institute, and Leading Cleaners Internationale.
This article has been viewed 58,845 times.
Making your own curtains is an inexpensive way to brighten up a window and keep the light out. By making your curtains, you can pick the exact style, length, and fabric that you want for all of your decorating needs. Two of the easiest curtain-making techniques are no-sew curtains, which use ring clips, and rod pocket curtains, which slide directly onto the rod.
Steps
Making Easy No-Sew Curtains
-
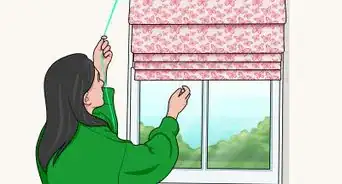
1Measure the window, adding width for folds in the fabric. Start measuring at the top of the window or slightly above it using a tape measure. Make sure you measure the length to the point where you want your curtain to fall on the window or wall and record that number. Then, divide the width of the curtain in half, and add that measurement to the width so your curtain has folds when the curtains are closed.[1]
- For example, if your window is 90 inches (230 cm) wide, you would add 45 inches (110 cm) to the measurement to make the total width of your fabric 135 inches (340 cm).
- If you wanted the curtain to hang 4 inches (10 cm) below the window, you would add this measurement to the length. If the window is 80 inches (200 cm) high, you would use 84 inches (210 cm) as your length measurement.
- In general, full-length curtains and drapes tend to be anywhere from 60–120 inches (150–300 cm) long, depending on the size of the window.
-
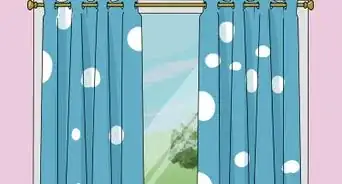
2Choose a fabric that gives you the right amount of coverage. Curtains can be made from almost any fabric, so pick one that suits your needs. Heavier fabrics are great for filtering out light and making a room cooler and darker. Lighter fabrics are best for letting in natural light and warmth. When you purchase the fabric, remember to add extra length for seam allowances, as well![2]
- If you want your curtains to look nice from outside of your house when you’re looking through the window, be sure to opt for a double-sided fabric.
Different Types of Fabric
Polyester is a versatile fabric that's inexpensive and available in different weights, allowing you to choose how much light comes in.
Cotton and linen are popular options that have a relaxed feel and allow light from outside to filter in.
Velvet and blackout are great fabrics for blocking out sunlight and heat.
Advertisement -
3Cut each panel with an additional 1–2 in (2.5–5.1 cm) on each side. Use a pair of fabric scissors or a specialty fabric cutter to trim your chosen fabric to size. If you want multiple panels, add at least 2 inches (5.1 cm) of width to the fabric per panel and 2 inches (5.1 cm) of length per panel for the seams. Then, divide the total width by the number of panels and cut them to the proper width.[3]
- For instance, if you want 2 panels for a window treatment, and your original measurement plus half was 135 inches (340 cm), you would add 4 inches (10 cm) to the measurement for a total width of 139 inches (350 cm). Then, you can cut the fabric in half to make panels that are 69.5 inches (177 cm).
-
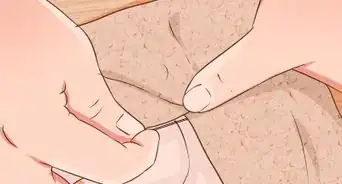
4Fold and pin 1 in (2.5 cm) side seams on the back of each panel. Measure 1 inch (2.5 cm) of the fabric on the side for the seam, and crease along the side of the panel, folding the fabric to the “wrong” side of the fabric. Apply pins approximately 1 inch (2.5 cm) apart along the crease. Then, repeat this process on each side of the panels, including the top and bottom.[4]
- After you fold and pin the fabric, step back to ensure that the seams are the same width.
-
5Iron the seams to crease the fabric. Set your iron to the lowest level and press along each of the seams. Move the iron up and down the seams firmly and quickly for 5-10 seconds per seam. This will create a crease in the fabric to guide you when you apply the fabric tape.[5]
- Try not to hold the iron in place for more than 5 seconds, as this can cause scorching on the fabric.
-
6Remove the pins to press fabric fusion tape between the seam and panel. Carefully pull the pins out of the seam that you want to fuse first, and cut a piece of fabric tape to fit the entire length of the seam. Press it into the fabric, and then fold the seam down on top of it, sandwiching the tape in between the fabric.[6]
- Remember to repeat this process for each seam, including the sides, top, and bottom of the panels.
-
7Place a damp towel on top of the seam and iron the fabric in place. Check the tape directions to set the iron to the proper temperature, which is normally the “wool” setting. Then, lay a damp cotton towel over the seam, and move the iron along the seam, holding it in place for 10 seconds in each spot to fuse the fabric together.[7]
- Once you have most of your seams done, you will likely have fabric overlapping in the corners. This is normal, and you can trim it on an angle to make sure the fabric doesn’t become too thick in the corners of the panel.
-
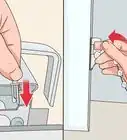
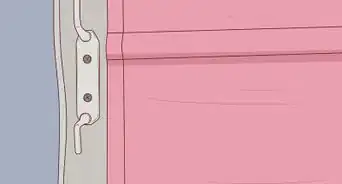
8Clip curtain rings 1–2 in (2.5–5.1 cm) apart along the top seam. Position the rings on the top seam of the fabric with a ring at both of the top corners of the panel. To make the panels look identical, count to ensure that each panel has the same number of rings.[8]
- If the fabric for your curtains is patterned, make sure the pattern is facing the right direction before you clip the rings in place.
Tip: To make your curtains look classy and purposeful, match the color of the ring clips to the color of the curtain rod.
-
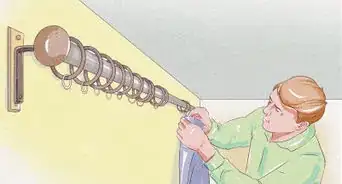
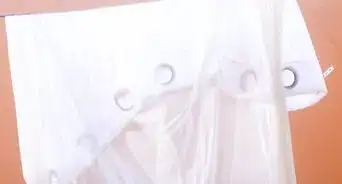
9Slide the rings onto a curtain rod to hang the curtains. Remove the rod from the window, and position the rings on the rod so the panels have an accordion-like shape. Then, hang up the rod and adjust the curtains to your preference.[9]
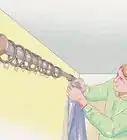
- Some people choose to iron their curtains before hanging them. You can also steam them while they’re hanging up to release wrinkles and creases in the fabric. Be sure to avoid the seams, as too much heat can cause them to curl or split apart.
Sewing Rod Pocket Curtains
-
1Measure the window, adding length and width for seams. Use a tape measure starting at or just above the top of the window, and measure the length and width. Make sure you measure the length down to the area on your window or wall where you’d like the curtains to lie. Then, add 4 in (10 cm) to the width and 12 in (30 cm) to the height.[10]
- For instance, if you have a window that is 120 inches (300 cm) wide and 160 inches (410 cm) high, your new measurements would be 124 inches (310 cm) wide and 172 inches (440 cm) high for a curtain that falls directly at the bottom of the window.
- Most curtains range in length from 60–120 inches (150–300 cm) depending on the size of the window, but you can make yours a non-standard length if you want.
-
2Choose a durable fabric that will provide enough light filtration for the room. At the craft or fabric store, opt for strong fabrics that are easy to slide along a flat surface, such as cotton, or linen. To make the room darker and cooler when the curtains are closed, opt for a soft, heavy fabric, like velvet, which will still be easy to slide on the curtain rod when you want to adjust them.[11]
- Avoid using heavy fabrics that don’t slide easily, like suede, as these can get caught or stuck on the curtain rod.
- Sheer fabrics tend to be more delicate and can be tricky to sew.
- If you want the curtains to look good from outside of the window as well, be sure to choose a double-sided fabric.
-
3Cut the fabric according to your measurements. Use your new measurements to trim the fabric to the correct size for your windows. To split the curtain into 2 panels, divide the width in half so each of the panels are an equal width and the height remains the same for each.[12]
- It’s best to only have 1 or 2 panels per window, since more than 2 panels can easily bunch together and get stuck on the rod.
- If you decide to make 2 panels, be sure to add an additional 4 inches (10 cm) to your width measurement to account for 2 more seam allowances on the sides of the panels.
Tip: If you're making a valence or half shade, keep the width of the fabric the same, and shorten the length to give the right coverage on your window.
-
4Add 1 in (2.5 cm) seams along the sides of the panels. Fold and pin side seams onto the back of each panel, and then quickly iron over them to hold the seam in place. Use a sewing machine to quickly sew the seams down, or sew them by hand for a more handcrafted look. Once the seams are sewn down, remove the pins.[13]
- It’s important to sew the side seams first to allow the top and bottom seams to have open ends for inserting the rod.
- If you are sewing delicate fabric using a sewing machine, make the tension looser.
-
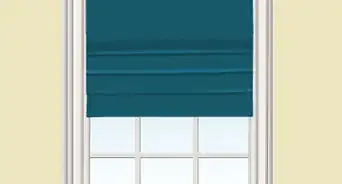
5Fold the top of the curtain down 3 in (7.6 cm) and sew it in place. To make the top pocket for the curtain rod, crease the fabric so that the seam is at least double the width of the rod. Pin the seam in place and iron the crease to ensure that it stays in place. Then, use a sewing machine or hand sew the seam into place before removing the pins.[14]
- If you’re not sure how wide your rod is, 3 inches (7.6 cm) is normally enough to accommodate most rods. If you want a tighter fit so the rod stays in place, use the double width method. Be sure to adjust the measurements of your seam allowances to accommodate this change.
-
6Sew a 3 in (7.6 cm) seam onto the bottom of each panel. For the bottom seam, repeat the process for the top “pocket.” If you don’t want the bottom seam to be open on the sides, you can sew them closed along the side seam.[15]
- If you want to add a footer to the curtain, you can sew an additional line of thread down the middle of the seam.
- If the fabric is light, you can sew some weight into the hem to make your curtains drape nicely.
-
7Slide your panels onto a curtain rod and hang it in your home. Position the opening of the top seam on the curtain at the end of the rod with the pattern of the fabric facing toward you. Make sure the seams are facing toward the window, and then hang the rod up on the wall.[16]
- If you leave the bottom seam open, you can flip the curtains upside down to reverse the pattern of the fabric.
Community Q&A
-
QuestionHow do I make bedroom curtains?
 Community AnswerMeasure your window's height and width. If you are using a heavy material, multiply the width by 1.5 and buy a measure of material equal to the result (for example, if your window is 36 inches wide, 36 x 1.5 = 54 inches of material). For lighter materials, multiply the width by 2. Hem the sides and bottom, allowing an extra inch for hemming. For the top casing, fold over and sew 2-3 inches for rod. If you want a ruffle above the rod, measure the casing at about 5 inches.
Things You'll Need
Making Easy No-Sew Curtains
- Measuring tape
- Fabric
- Fabric scissors
- Iron
- Pins
- Fabric fusion tape
- Cotton towel
- Curtain rod
Sewing Rod Pocket Curtains
- Measuring tape
- Fabric
- Fabric scissors
- Iron
- Pins
- Sewing machine or needle and thread
- Curtain rod


References
- ↑ https://abeautifulmess.com/2014/04/easy-no-sew-curtains.html
- ↑ https://www.countryliving.com/uk/homes-interiors/interiors/a740/how-to-choose-curtains/
- ↑ https://abeautifulmess.com/2014/04/easy-no-sew-curtains.html
- ↑ https://abeautifulmess.com/2014/04/easy-no-sew-curtains.html
- ↑ https://abeautifulmess.com/2014/04/easy-no-sew-curtains.html
- ↑ https://abeautifulmess.com/2014/04/easy-no-sew-curtains.html
- ↑ https://abeautifulmess.com/2014/04/easy-no-sew-curtains.html
- ↑ https://abeautifulmess.com/2014/04/easy-no-sew-curtains.html
- ↑ https://abeautifulmess.com/2014/04/easy-no-sew-curtains.html
- ↑ https://sewing.com/diy-rod-pocket-curtains/
- ↑ https://www.countryliving.com/uk/homes-interiors/interiors/a740/how-to-choose-curtains/
- ↑ https://sewing.com/diy-rod-pocket-curtains/
- ↑ https://sewing.com/diy-rod-pocket-curtains/
- ↑ https://heyletsmakestuff.com/tutorial-diy-easy-sew-ikea-curtains/
- ↑ https://heyletsmakestuff.com/tutorial-diy-easy-sew-ikea-curtains/
- ↑ https://sewing.com/diy-rod-pocket-curtains/
About This Article

To make curtains, measure the height and width of your window so you know how much fabric you’ll need. Then, buy fabric with a little extra width so you'll have folds in your curtains when they hang. Next, cut your curtains to size and pin 1 inch seams on the back of each side. Then, crease the seams with an iron before removing the pins and adding fabric fusion tape. Finish by ironing the tape, clipping curtain rings to the top, and attaching your curtains to a curtain rod. For tips on how to sew rod pocket curtains, keep reading!