This article was co-authored by wikiHow staff writer, Danielle Blinka, MA, MPA. Danielle Blinka is a Writer, Editor, Podcaster, Improv Performer, and Artist currently living in Houston, TX. She also has experience teaching English and writing to others. Danielle holds a Bachelor of Arts in English, Bachelor of Arts in Political Science, Master of Arts in English with a concentration in writing, and Master of Public Administration from Lamar University.
This article has been viewed 25,527 times.
Learn more...
Dazzle your tastebuds with homemade Italian cheese! Burrata is a delicious dish consisting of a shell of mozzarella cheese filled with tasty stracciatella made with soft cheese curds and cream. You can serve burrata alone or as part of a recipe. While the process may seem complicated, it’s actually pretty easy to make, so head to the kitchen!
Ingredients
- 2 tsp (10 g) of citric acid
- 1 gallon (3.8 L) of pasteurized milk
- 1 rennet tablet
- About 1 cup (240 mL) of spring water
- 3/4 lb (340 g) of cheese curds (if not making your own)
- 4 cups (0.95 L) of heavy cream
- Tap water
- Salt
Makes 1 burrata roll
Steps
Separating out Cheese Curds
-
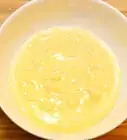
1Dissolve 2 tsp (10 g) of citric acid in 1⁄2 cup (120 mL) of spring water. Pour the spring water into a small bowl, then add the citric acid to the bowl. Let the bowl sit out until the ingredients are blended.[1]
- You can buy citric acid in the spice section of the grocery store or online.
-
2Pour 1 gallon (3.8 L) of pasteurized milk into a large pot. Use a soup pot so it’s big enough to hold the milk and other ingredients. Place the pot on your stove, but don’t turn on the burner.[2]
- It’s okay to use your favorite brand of milk for this. You don’t need to buy special milk.
Advertisement -
3Let the milk stand for 15 minutes, then stir in your citric acid. Leave the milk at room temperature and set your timer. When the timer goes off, pour the citric acid into the milk and stir the ingredients together with a mixing spoon.[3]
- Don’t turn on the burner until the next step.
-
4Warm the milk to about 88 to 90 °F (31 to 32 °C) over medium heat. Place the pot on a stovetop burner and turn on the heat. Stir the milk continuously as it heats up. Stick a food thermometer into the pot to check the temperature. Turn off the burner when your milk reaches the desired temperature.[4]
- It’s best to use a food thermometer. If you don’t have one, just turn off the burner when the milk feels warmer than room temperature but not hot.
-
5Crush a rennet tablet and dissolve it in 1⁄4 cup (59 mL) of spring water. Put the rennet tablet on a clean plate. Then, use the back of a spoon or the flat side of a butter knife to smash the tablet. Pour the powder into the spring water and stir it with your mixing spoon.[5]
- Wait until just before you use the rennet tablet to break it up. This preserves the quality of the rennet.
-
6Remove the milk from the heat, add the rennet, and stir twice. Turn off the burner and transfer the pot to a cool burner, cooling rack, or towel. Then, slowly pour the dissolved rennet into the pot and stir the ingredients together exactly twice.[6]
- Don’t stir continuously because the milk needs time to set. It will start separating into clumps and liquid, which is supposed to happen.
-
7Let the milk sit for 12 minutes. Set a timer and leave the pot in its cooling spot. Expect solid curds to start separating out of the liquid whey. Don’t stir or disturb the milk during this time, since you want it to separate out.[7]
- At the end of the 12 minutes, check for clumps of milk floating in a thin liquid. It might look similar to cottage cheese or dumplings.
-
8Heat the curds and whey to 105 °F (41 °C) over medium-low heat. Put the pot back on your stove and turn on the burner. Test the temperature about once every 30 to 60 seconds with a food thermometer. Turn off the burner when the curds and whey reach the correct temperature.[8]
- Typically, this takes about 5 minutes.
-
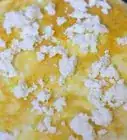
9Spoon the curds and whey over a colander to separate out the curds. Place the colander in your sink so the whey drains away. Carefully, scoop the curds and whey with your mixing spoon. Pour them into the colander to collect the curds.[9]
- If you want to save the whey, place the colander in a bowl so you can collect the whey.
-
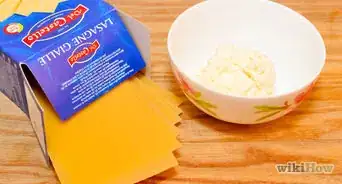
10Buy 3/4 lb (340 g) of cheese curds if you don’t want to make it. Making your own cheese curds is easy, but it’s also tedious. If you want to skip this process, purchase the cheese curds you need for your recipe.[10]
- You can buy cheese curds at a cheese shop or online.


Mixing the Stracciatella
-
1Bring a pot of water to boil on your stove. Fill a saucepan with tap water and put it on the stovetop. Turn the burner on high-heat and wait for the water to come to a boil.[11]
- If you're making pasta, just use your pasta water so you don't have to boil an extra pot of water.
-
2Scoop about 1/4 lb (113 g) of cubed curd into a mixing bowl. Weigh your cheese curds using a kitchen scale or estimate about 1/3 of the curds. It’s okay to just eyeball it if you don’t have a scale.[12]
- Set the rest of your cheese curds aside for later.
-
3Sprinkle a layer of salt over the cheese curds. Don’t worry about precise measurements when it comes to salt. Go ahead and cover the curds with a light layer of salt. Some of your salt will wash away when you add water to the curds, so it won’t get too salty.[13]
- If you prefer to measure out your salt, you might use 1 tbsp (17 g).
-
4Cover the cheese curds with boiling water. Spoon the water out of the pot and pour it over the cheese curds. Add enough water to just cover the cheese curds.[14]
- Be careful while handling hot water so you won’t accidentally burn yourself.
-
5Stir the cheese curds and start pressing them together into a ball. Use your mixing spoon to stir while the water is still steaming. Push the curds together to get them to combine. Keep mashing the curds with your spoon until the water is no longer steaming.[15]
- As you stir, the curds should start sticking together. However, don’t worry if they don’t because this may take some time.
-
6Use your hands to knead the cheese curds when the water stops steaming. Wait until the water cools down enough that it doesn’t burn your hands. Then, press the cheese curds together, stretch the cheese, and press them together again. Keep working with the cheese to make a ball.[16]
- Dip your hands in cool water if they start feeling hot. You might also do this before you put your hands in the warm water, especially if you’re sensitive to heat.
-
7Replace the water with fresh boiling water and more salt when it cools. Pour the cool water down your sink, then spoon more hot water over your cheese ball. Sprinkle salt over the water to replace any lost when you poured off the cool water.[17]
- You don’t need to be precise with how much salt you add to the water. You just want your water to be a bit salty so your cheese has flavor.
-
8Keep working the cheese curds until your mozzarella ball is smooth. Use your spoon to knead the cheese until the water cools down, then work the cheese ball with your hands. Continue to press and stretch the cheese until you have a smooth, shiny mozzarella ball. You may have to change out the water once or twice more.[18]
- Your mozzarella ball should look like the kind you buy at the store when it’s finished. It’ll be a solid, fist-sized white ball.
-
9Stretch the mozzarella ball into a rope, then cut it into small pieces. Pull your mozzarella ball at opposite ends to thin it out. Press and stretch the cheese until it looks like a long, thin rope. Next, use a knife to cut the cheese into bite-size chunks.[19]
- Your cheese should stretch similarly to how melted cheese stretches, but don’t stress too much about how your cheese looks. You’re going to be cutting it into small pieces anyway.
-
10Put the cheese into a bowl and cover with 4 cups (0.95 L) of heavy cream. Use a clean mixing bowl. Line the bottom of the bowl with your mozzarella chunks. Layer the cheese if necessary. Then, pour the heavy cream over the cheese and leave it to sit while you make another mozzarella ball for the burrata coating.[20]
- Add more salt if you like salty burrata.


Making the Mozzarella Coating
-
1Add 1/2 lb (227 g) of cheese curd, salt, and boiling water to a bowl. Weigh out your cheese curds or just use the remaining 2/3. Just like before, sprinkle salt over the curds, then spoon boiling water onto them.[21]
- You don’t need to add a precise amount of salt. If you’re worried about estimating it, add 1 to 2 tbsp (17 to 34 g).
- You may need to heat your water to boiling again if it’s cooled.
-
2Use your mixing spoon to stir and combine the cheese curds. Press the cheese curds together to start forming a second mozzarella ball. Work the cheese curds with your spoon until the water stops steaming.[22]
- This is the same process as the one you used to create a mozzarella ball for your stracciatella. However, you’ll be using twice as many cheese curds this time.
-
3Knead the cheese with your hands when the water feels warm. When the water stops steaming, start mashing and stretching your cheese with your hands. Continue to work the cheese ball until the water cools down.[23]
- Don’t forget to dip your hands in cool water if they start feeling warm.
-
4Replace cool water with more boiling water and salt. Pour the old water down your sink drain, then spoon more hot water onto the cheese. Add a sprinkle of salt before you start kneading the cheese again.[24]
- You don’t need to measure out your salt. Just sprinkle it over the surface of the water.
-
5Keep molding the cheese until you have a smooth mozzarella ball. Use your mixing spoon while the water is steaming, then knead the cheese with your hands once the water feels warm. Continue to press and stretch the cheese until your cheese ball is smooth and shiny.[25]
- You’ll likely do more kneading cycles this time, since you’re working with more cheese curds.
-
6Mold the smooth mozzarella ball into a flat 6 in (15 cm) circle. Place the cheese ball on a clean countertop, then push down on the top to flatten out the cheese. Smooth the cheese out from the center as you shape the circle. Leave the center of the circle a little thicker, with the edges of the circle pressed thin.[26]
- If your mozzarella pulls apart, dip it in hot water and reform it into solid cheese.
Forming the Burrata
-
1Place the mozzarella circle inside a bowl. Carefully lift the cheese from your work surface and drape it over the bowl. Press down in the center of the cheese to create a dip in the middle where your stracciatella will go.[27]
- As another option, you can hold the mozzarella circle in your palm while you stuff it. However, it’s easier to just use the bowl.[28]
-
2Scoop your stracciatella onto the center of the mozzarella. Use a clean spoon to transfer the stracciatella from the mixing bowl. Pile it on the center of the mozzarella circle to create your burrata filling.[29]
- Push down on the stracciatella with the back of your spoon if you need to compress it to make it fit.
-
3Fold the mozzarella over the stracciatella and press the edges together. Lift opposite edges of the mozzarella circle and bring them together. Use your fingers to press the mozzarella closed. Go around the edge of the folded half circle, closing the mozzarella coating.[30]
- Your burrata will look similar to a mozzarella ball when it’s closed. However, it may be more lumpy and the closure may not look smooth.
-
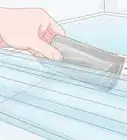
4Submerge the cheese for 5 to 6 minutes in cold water to seal the burrata. Fill a clean mixing bowl with cold water, then lower your burrata ball into the water. Set a timer to track how long the burrata is in the water. Remove it after about 5 to 6 minutes and place it on a clean plate.[31]
- Your burrata is now ready to eat!
-
5Serve your burrata with bread, salad, or your favorite Italian dish. Spread the burrata on toasted bread for a simple dish. As another option, use it as a replacement for mozzarella in caprese salad or bruschetta. You could also serve it as a tasty topping for a salad or pasta dish.
-
6Keep the cheese in your refrigerator for up to 5 days. Don’t worry if you don’t want to eat the burrata right away. While the burrata will be tastiest right after you make it, chill it if you want to make it ahead of time. Just cover it up with plastic wrap before you store in the refrigerator.[32]
- Don’t eat the cheese if you notice any mold or foul smells coming from it.


Things You’ll Need
- Stove
- Large pot
- Mixing bowls
- Stirring spoon
- Knife
- Spoon
- Butter knife (optional)
- Colander
- Cereal bowl
- Plate
Warnings
- Don’t put your hands into boiling water. Be super careful when handling the cheese and water while they’re warm so you don’t get burned.⧼thumbs_response⧽


References
- ↑ https://www.finecooking.com/recipe/made-scratch-burrata
- ↑ https://www.finecooking.com/article/make-burrata-home
- ↑ https://www.finecooking.com/recipe/made-scratch-burrata
- ↑ https://www.finecooking.com/recipe/made-scratch-burrata
- ↑ https://www.finecooking.com/recipe/made-scratch-burrata
- ↑ https://www.finecooking.com/recipe/made-scratch-burrata
- ↑ https://www.finecooking.com/recipe/made-scratch-burrata
- ↑ https://www.finecooking.com/recipe/made-scratch-burrata
- ↑ https://www.finecooking.com/recipe/made-scratch-burrata
- ↑ https://www.foodandwine.com/cooking-techniques/how-make-burrata-home
- ↑ https://www.foodandwine.com/cooking-techniques/how-make-burrata-home
- ↑ https://www.foodandwine.com/cooking-techniques/how-make-burrata-home
- ↑ https://www.foodandwine.com/cooking-techniques/how-make-burrata-home
- ↑ https://www.foodandwine.com/cooking-techniques/how-make-burrata-home
- ↑ https://www.foodandwine.com/cooking-techniques/how-make-burrata-home
- ↑ https://www.masterclass.com/articles/what-is-burrata-easy-homemade-burrata-recipe#whats-the-difference-between-burrata-and-mozzarella-cheese
- ↑ https://www.masterclass.com/articles/what-is-burrata-easy-homemade-burrata-recipe#whats-the-difference-between-burrata-and-mozzarella-cheese
- ↑ https://www.foodandwine.com/cooking-techniques/how-make-burrata-home
- ↑ https://www.foodandwine.com/cooking-techniques/how-make-burrata-home
- ↑ https://www.masterclass.com/articles/what-is-burrata-easy-homemade-burrata-recipe#whats-the-difference-between-burrata-and-mozzarella-cheese
- ↑ https://www.foodandwine.com/cooking-techniques/how-make-burrata-home
- ↑ https://www.foodandwine.com/cooking-techniques/how-make-burrata-home
- ↑ https://www.finecooking.com/recipe/made-scratch-burrata
- ↑ https://www.foodandwine.com/cooking-techniques/how-make-burrata-home
- ↑ https://www.foodandwine.com/cooking-techniques/how-make-burrata-home
- ↑ https://www.masterclass.com/articles/what-is-burrata-easy-homemade-burrata-recipe#whats-the-difference-between-burrata-and-mozzarella-cheese
- ↑ https://www.foodandwine.com/cooking-techniques/how-make-burrata-home
- ↑ https://www.finecooking.com/recipe/made-scratch-burrata
- ↑ https://www.foodandwine.com/cooking-techniques/how-make-burrata-home
- ↑ https://www.foodandwine.com/cooking-techniques/how-make-burrata-home
- ↑ https://www.finecooking.com/recipe/made-scratch-burrata
- ↑ https://www.foodandwine.com/cooking-techniques/how-make-burrata-home
About This Article