This article was co-authored by Pippa Elliott, MRCVS. Dr. Elliott, BVMS, MRCVS is a veterinarian with over 30 years of experience in veterinary surgery and companion animal practice. She graduated from the University of Glasgow in 1987 with a degree in veterinary medicine and surgery. She has worked at the same animal clinic in her hometown for over 20 years.
This article has been viewed 52,534 times.
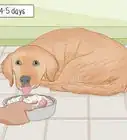
Bananas, peanut butter, and yogurt all make excellent treats for your dog. If you want to save money, make sure you know what's going into your dog's stomach, or just like the idea of giving your dog a treat you made yourself, there are different ways you can use these ingredients to whip up something your dog will love. Frozen treats are great for when it's hot out, but not so much in the dead of winter. Dehydrated treats take some special equipment, but they have a longer shelf-life than baked ones. If your pet has a medical condition, check with your veterinarian to see if this is an appropriate treat.
Ingredients
- 2 bananas, mashed
- 32oz plain yogurt
- ½ cup low-sodium peanut butter
- 2 cups rice flour
- ⅓ cup low-sodium peanut butter
- 3 tablespoons unsalted butter
- 3 bananas, mashed
- ½ cup plain yogurt
- 1 teaspoon vanilla extract
- 2 large eggs
- 1 cup plain yogurt
- 1 banana, mashed
- 1 tablespoon low-sodium peanut butter, heaped
Steps
Making Frozen Treats
-
1Gather your ingredients, and set out your utensils. By making sure that you are prepared to make your treats, you reduce the possibility of mess and cross-contamination that might occur as you reach around in your kitchen for a tool or food item. Be prepared, and make it easy on yourself.
- Make sure none of the ingredients contain the artificial sweetener xylitol, which is deadly to dogs.
- Dogs with a history of pancreatitis should avoid this treat because of the fat content in the peanut butter.
-
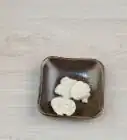
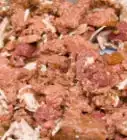
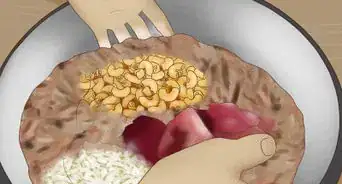
2Combine the yogurt, mashed bananas, and peanut butter in a large bowl. Make sure to mix your ingredients well. This will make sure that your dog isn't getting too much of one thing. Peanut butter is great for dogs, but in small doses.Advertisement
-
3Pour into 3-oz Dixie cups or muffin cups. A dozen or so cups should be enough, but keep a few more handy, just in case. Make sure to keep in mind how big you want your treats to be.
- Think about the size of your dog. If your dog is little, you should put less of the mixture in each cup.
- Don't put popsicle sticks or toothpicks in them. These will hurt your dog.
-
4Freeze overnight. By letting the treats sit overnight in freezer, you can make sure that they are frozen all the way through. Because these are frozen treats, not only will they help cool your dog down on those dog days of summer, they take longer to eat. If your puppy popsicles aren't frozen, they're not as much fun for your dog.
-
5Remove the treat from the cup when giving it to your dog. Your dog might eat the cup. The treat should pop out if you just squeeze it. But if you're having trouble, just tear the cup away.


Making Baked Treats
-
1Preheat your oven to 350° Fahrenheit (180°C). If you don't preheat your oven, it will take longer to cook your food. You have to make sure your oven is the correct temperature when you put the treats in, so that they cook properly.
-
2Grease a cupcake pan with cooking spray or oil. This is so that your treats don't stick to the pan. By greasing the pan, you make sure they don't break apart when you take them out of it.
-
3Measure your rice flour into the large bowl. Rice is much easier for dogs to digest than other grain flour. Unlike most other grains, dogs can absorb most of the carbohydrates in rice.[1] It also will help to stabilize you treat, so it doesn't just fall apart once out of the oven.
-
4Warm the peanut butter and butter together, until melted. Mix and let cool, but not too much. You should be able to put your finger in it, without hurting yourself. If you do not, you might cook your eggs prematurely, causing them not to mix with the other ingredients.
- On the stove-top, use a small pot. Warm with low heat. This should not take long. Be careful not to burn it. Butter burns easily.
- In the microwave, make sure that your bowl or container is microwave-safe. Try 20 to 30 seconds at first. Nuke it longer only if needed. You can burn butter in the microwave just like on the stove.
- If the butter is mostly melted, give it a stir and wait a minute. It will likely melt more.
-
5In a separate bowl, add the mashed banana, yogurt, eggs, and vanilla extract. Then slowly mix in your melted butter mixture, before the butter firms up.
-
6Add the wet ingredients to the rice flour, and fold together with a spatula. Do this until the mixture is evenly combined. Don't worry about little lumps of flour. Your dog won't mind. Do not over-mix.
-
7Distribute evenly among cupcake tins. You don't want to fill the spaces in the pan fully. These are for a dog, and they are treats.
-
8Bake until a toothpick can be inserted in the center and comes out clean. This is because, when fully cooked, the batter will not be sticky, as much of the water cooks out. Don't worry if they are a little over-done. Check after 20 minutes.
- The most important part is to cook the treats all the way through. Not only can it be dangerous to eat under-cooked eggs, your treat will fall apart.
- A softer treat, maybe for older dogs, will take less time to cook than a crunchier treat for a dog with stronger teeth.
- Make sure that no matter what size or crunchiness you wish of your dog treats, you fill each cup of your cupcake pan to the same point, otherwise they will cook unevenly.


Making Dehydrated Treats
-
1Set up your food dehydrator with a fruit leather tray. A sheet of parchment paper on a regular dehydrator tray will work for this as well. Placing these treats on a regular dehydrator tray, without an additional solid layer, will cause a big mess. It will be a hassle, and you'll waste all that perfectly good dog food.
-
2Grease a paper towel with non-stick cooking spray or oil. Rub the paper towel on the fruit leather sheet or parchment. A thin coating will suffice. You just need to keep the treats from sticking to the tray or the paper.
-
3Combine your ingredients in a bowl. Make sure to mix them well.
-
4Place evenly distributed dollops of your mixture on your sheet. This kind of distribution helps to ensure that your treats all dehydrate at the same rate. They don't have to all be exactly the same. Just think about the size of each treat you wish to give to your dog.
-
5Dehydrate overnight at 125 degrees. There is a delicate balance between the speed and temperature you dehydrate your treats. Like freezing, but unlike baking, dehydrated yogurt can retain its pro-biotic properties. At temperatures above 130° Fahrenheit (55°C), the good bacteria in yogurt will die. To be safe, keep your dehydrator running between 115 and 130° Fahrenheit (45 and 55°C).
-
6Separate treats from tray or parchment, and store in a cool, dry place. Dehydrated treats such as these are shelf-stable. Though they will eventually expire, they should last quite a while in your cabinet or pantry. They do not need to be refrigerated.


Warnings
- Do not use any sticks! If you put one in, your dog might swallow it and choke.⧼thumbs_response⧽
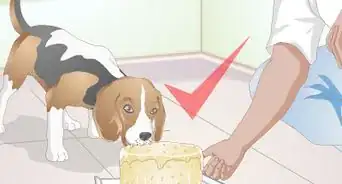
- If you want to add ingredients, make sure it is safe first. Dogs cannot eat grapes, raisins or chocolate; so ask a vet, or get a list of harmful foods for your dog.⧼thumbs_response⧽
Things You'll Need
Frozen Treats
- Large bowl
- Mixing implement
- Dixie cups
Baked Treats
- Large bowl
- Medium bowl
- Small container for warming (small pot or microwave-safe bowl)
- Mixing implement
- Cupcake pan
- Toothpick (to test when cooked)
Dehydrated Treats
- Dehydrator
- Parchment paper or fruit leather tray
- Large bowl
- Mixing implement
- Spatula for removal of treats


References
About This Article

To make banana, peanut, and yogurt treats for your dog, combine 2 mashed bananas, 32 ounces of yogurt, and half a cup of peanut butter in a bowl. Once the ingredients are well mixed, pour the mixture into muffin cups or small containers. Make sure to avoid putting popsicle sticks or tooth picks in the treats, since they could injure your dog. Then, freeze the treats overnight to ensure they’re frozen through. When you give a treat to your dog, remove it from the cup so it doesn’t eat the container. For tips from our Veterinary co-author, including how to make baked treats for your dog, keep reading!