This article was co-authored by wikiHow Staff. Our trained team of editors and researchers validate articles for accuracy and comprehensiveness. wikiHow's Content Management Team carefully monitors the work from our editorial staff to ensure that each article is backed by trusted research and meets our high quality standards.
There are 10 references cited in this article, which can be found at the bottom of the page.
This article has been viewed 197,792 times.
Learn more...
It’s called “album art" for a reason—vinyl records are a great option for spicing up a blank wall. Not only do they come in bright colors and eye-catching designs, but they also let you put your favorite music on display. Hanging your records on the wall with specialty frames can be an simple option. Other display methods, like screw hooks, are designed to let you take out the records and play them before returning them to the wall. If you want to use sleeveless records as decoration, consider attaching them to the wall with indoor mounting tape or thumbtacks.
Steps
Hanging Record Sleeves with Screw Hooks
-
1Decide how you want to arrange the records on the wall. You can hang a single row of records across your wall. Or, it may work better in your space to arrange them in a square or rectangle shape. Either way, the best place to hang your records is nearby—or even above—your record player, to make it easier to slip one out and give it a spin.[1]
- Consider the size of your record collection when determining your layout. The arrangement will look best if all the rows have the same number of records.
-
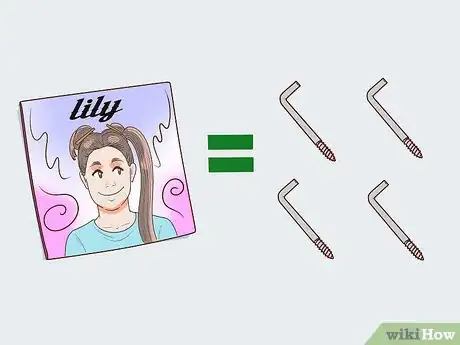
2Purchase 4 screw hooks per record. Once you’ve decided how many records you’ll be hanging up, you can calculate how many screw hooks you need. L-shaped screw hooks are sold at most hardware stores. Find ones that are about 2 inches (5.1 cm) long.[2]
- Screw hooks typically come in both silver and gold finishes. Consider matching the hooks to other metallic accents in your room, like the door handles or light fixtures.
Advertisement -
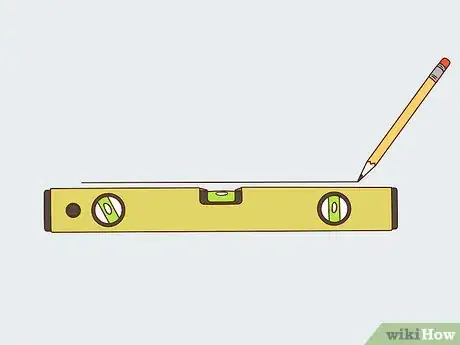
3Draw a line on the wall where you want the bottom of your records to go. Using a spirit level and a pencil, draw a straight line across the wall to mark where the bottom of your records should sit. To tell if the spirit level is positioned correctly, look at the bubble in the tube. It’s straight if the bubble is centered between the two black lines. It’s crooked if the bubble slides off to one side.[3]
- You can also use a long strip of painters’ tape to mark the line instead of a pencil, if you don’t want to write on the wall. Make sure you use a spirit level with this method, too, to ensure that the tape isn’t crooked.
-
4Measure and mark where to screw the bottom hooks for the first record. Make two dots 10 inches (25 cm) apart along the straight line you just drew, positioning them in the center of your planned layout. These will hold the center record in the bottom row (or just the center record if you’re only hanging a single row of records).[4]
- For each record, you will position two screws along the bottom. The other screws are positioned one on each side, about halfway up the record jacket to keep it from tipping off the wall.
-
5Mark the position of the side hook screws. Starting from the mark for the right bottom screw, measure 1.5 inches (3.8 cm) horizontally to the right, then 6.5 inches (17 cm) vertically and mark with a dot. This is the location of the right side screw. Then, starting from the mark for the left bottom screw, measure 1.5 inches (3.8 cm) horizontally to the left and 6.5 inches (17 cm) vertically and mark with another dot. This is the location of the left side screw.[5]
- The two side screws should end up being 12.5 inches (32 cm) apart horizontally.
- There are no top screws in this arrangement, which makes it easy to slip your record in and out.
-
6Mark the screw holes for the other records in the same row. Use the same spacing for the screws for each individual record. There should be a 1 inch (2.5 cm) space between each record and the one next to it, meaning that the side screws for separate records should also be spaced 1 inch (2.5 cm) apart.
- The left bottom screw for one record should always be 4 inches (10 cm) from the right bottom screw for another.
-
7Insert the screws into the wall where you marked. Once you've marked the location of all the screws, start installing them into the wall. Make a small hole in the drywall with a nail to start the process. Then, use your hand to manually twist the screw into the wall. Make sure the screws stay as straight as possible and are not angled up or down.
- The screw should stick out about 1 inch (2.5 cm) from the wall
- The “L” part of the bottom screw hooks should point up. The side screws should point inwards towards the record.
-
8Slide each record between the side screws so it rests on the bottom hooks. Once all the screws have been attached to the wall, you can slide the records into their slots. You can pull them out whenever you want to play them, or replace them with a new record.
- Slide the records in gently—it's never a good idea to put additional pressure on the screw hooks, which can be ripped out of the wall.
-
9Repeat this process for each additional row in your layout. Measure 1 inch (2.5 cm) from the top edge of the records that you’re already displayed on the wall and use a spirit level to draw another straight horizontal line. Use this as the basis for your next set of screw hooks.
- The screws should line up vertically with the screws in the row below.
Showcasing Record Sleeves in Frames
-
1Buy play-and-display frames for accessibility. There are several types of specialty record frames with different pros and cons. Play-and-display frames feature a front that pops open and latches shut for easy access to the records. This is one of the more expensive frame options and is best for a collector who plans to play their displayed records frequently.[6]
- Frames may be a better option for displaying a small number of records, since they are typically more expensive than other display options.
-
2Go with plain plastic frames for a purely decorative option. These are typically the most economical choice and often come in packs of 10 or 20. However, they make it difficult to access your albums and can occasionally be too thin to hold the sleeve with the record inside of it.[7]
- You could display either a record sleeve or the actual LP in one of these square frames. If you plan to display the record itself, don’t use one that you plan to play again, since it will almost certainly get scratched by the frame.
-
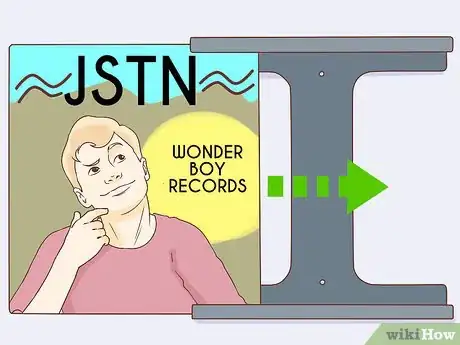
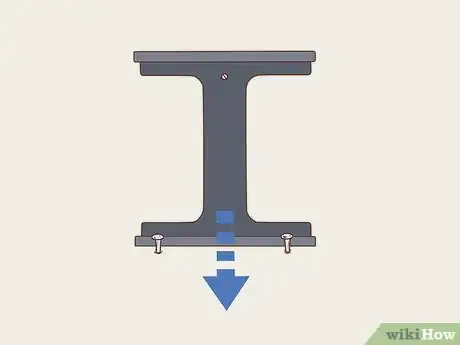
3Slide your gatefold albums into a grooved wall hanger. This type of specialty frame features just a top and bottom rail, which allows you to slide albums in and out. These are a great option for displaying thicker or gatefold albums, since there’s no glass front.[8]
- These are also a more economical option.
-
4Plan your layout for arranging the records on the wall. Records can be hung in a single, straight row or in a rectangle or square configuration. Think about the size of your record collection when choosing a layout.
- The display will look best if all the rows have the same number of records.
-
5Measure and mark where you want the records to hang. If you’re hanging multiple records, consider using parchment paper to map out their positioning on the wall. A good rule of thumb is to leave 1 inch (2.5 cm) between frames, but you could space them out further. Just make sure they are evenly spaced.
-
6Attach the frame to the wall with indoor mounting tape to prevent permanent marks. Generally you should to clean and then dry the area wall where you’re applying the tape, but check the instructions on your particular brand of tape to make sure. Pull off the backing on one side and press it firmly to the frame. Then, remove the other backing and press the tape firmly into the wall for several seconds.[9]
- Double check that the tape you’ve chosen is strong enough to support the weight of the frame. Most mounting tapes include their weight limit on the packaging.
- This is a great option if you're renting and don't want to leave permanent marks on the walls.
-
7Hang the frame with a nail and wire for a more adjustable option. Hammer a nail into the wall at a slight upwards angle, then slide the frame down over the nail into position. Use a level to adjust the frame to make sure it’s straight.
- Certain frames, such as those featuring top and bottom rails, may come with drywall mounting screws. Position the frame in place using a level, then use a screwdriver to screw it into the drywall.
Decorating with Sleeveless Records
-
1Plan out how you want to arrange the records. First, determine the shape of your layout. You could arrange your records in a single straight line, or go with a square or rectangular configuration. Decide if you want to space the records out with several inches in between, or if you want to line them up so their edges touch.[10]
- This display option will scratch up the records, so make sure you’re using records that you don’t plan to play.
- If you’ve selected records with brightly colored labels, consider laying them out in a rainbow pattern. Or, arrange them so the colors are distributed evenly.
- If you have enough records, consider lining them up edge to edge so they cover the entire wall—or even the ceiling.[11]
-
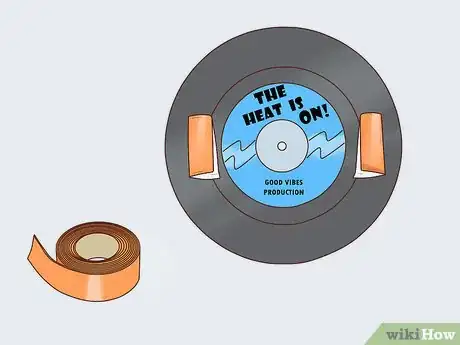
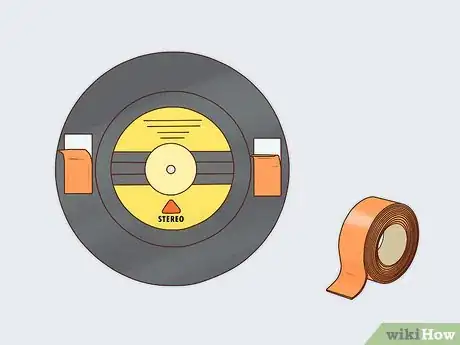
2Test your layout by attaching records to the wall with painter’s tape. Tear off two pieces of painter’s tape and roll them up, then attach them to the back of one of the records. Stick the record to the wall, and repeat with the rest of your records to test out the layout you’ve settled on.[12]
- If you want to make sure that your records are hung straight across, use a spirit level to draw a straight horizontal line. Then, align the bottom edge of your records with this line.
-
3Use strips of indoor mounting tape to permanently display your records. Cut 2 2 inches (5.1 cm) strips of tape and stick them on the back of a record. Peel off the tape backing and press the record firmly against the wall to attach it permanently.[13]
- Repeat with the rest of your records until you’ve completed your layout.
- You can also use thumbtacks and stick one through the middle of the LP to attach it to the wall. This will leave a hole in your wall, however.[14]
Community Q&A
-
QuestionDoes this work for all records? It worked for my Weird Al "Dare to Be Stupid" record, but it has not been working for my "Best of the Beach Boys" record.
 RebelixCommunity AnswerThat's because different records have different diameters and conditions. All in all, not every method works for every form. Check on the type of records you have, so you can determine the best way to display them.
Things You'll Need
Hanging Record Sleeves with Screw Hooks
- L-shaped screw hooks (4 per record)
- Pencil
- Measuring tape
- Spirit level
- Nail
Showcasing Record Sleeves in Frames
- Record frames
- Indoor mounting tape
- Scissors
- Nail
- Hammer
- Spirit level
- Pencil
- Measuring tape
Decorating with Sleeveless Records
- Painter's tape
- Indoor mounting tape
- Thumbtacks
- Scissors
- Measuring tape
References
- ↑ https://youtu.be/FkGkKflnnXU?t=17
- ↑ https://youtu.be/FkGkKflnnXU?t=46
- ↑ https://lifehacker.com/how-to-build-an-album-art-wall-on-the-cheap-5043706
- ↑ https://youtu.be/FkGkKflnnXU?t=86
- ↑ https://youtu.be/FkGkKflnnXU?t=107
- ↑ https://www.core77.com/posts/38770/Storing-Vinyl-Records-on-the-Wall
- ↑ https://www.core77.com/posts/38770/Storing-Vinyl-Records-on-the-Wall
- ↑ https://www.core77.com/posts/38770/Storing-Vinyl-Records-on-the-Wall
- ↑ https://www.apartmenttherapy.com/how-to-hang-a-p-92595
- ↑ http://lovegrowswild.com/2013/02/how-to-create-a-record-wall/
- ↑ https://www.blueistyleblog.com/2015/05/HowToCoverAWallInRecords.html
- ↑ https://www.blueistyleblog.com/2015/05/HowToCoverAWallInRecords.html
- ↑ http://lovegrowswild.com/2013/02/how-to-create-a-record-wall/
- ↑ https://youtu.be/-dcCZSNStXQ?t=59

