This article was co-authored by Monique Capanelli. Monique Capanelli is a Plant Specialist and the Owner and Designer for Articulture Designs, an innovative design firm and boutique in Austin, Texas. With over 15 years of experience, Monique specializes in interior botanical design, living walls, event decor, and sustainable landscape design. She attended the University of Texas at Austin. Monique is a Certified Permaculture Designer. She provides plant and botanical design experiences, from small gifts to entire transformations, to shoppers as well as commercial clients including Whole Foods Market and The Four Seasons.
There are 23 references cited in this article, which can be found at the bottom of the page.
wikiHow marks an article as reader-approved once it receives enough positive feedback. This article received 22 testimonials and 93% of readers who voted found it helpful, earning it our reader-approved status.
This article has been viewed 377,641 times.
Tomatoes are one of the most popular edible plants to grow at home, and for good reason.[1] Many varieties grow well in a container, and taste much better freshly harvested than the tomatoes that end up in grocery stores. Tomatoes are sun-loving and picky about watering schedules (the more regular, the better), but besides that they don't need much attention. Plant them now and before long you'll be enjoying a fresh tomato salad with a lush green friend next to you for company.
Things You Should Know
- For a less challenging start, choose bush variety tomato seedlings—or, if you're up for the challenge, start them from seeds indoors.
- For bush varieties, place the seedlings into 5 US gallon pot, place a 3-4 foot stake into the soilless potting mix, and gradually increase your tomatoes' time outdoors.
- Give your plants 6-8 hours of sunlight daily, water them when the top of the soil feels dry, and treat leaf fungus with fungicide.
Steps
Choosing Plants, Pots, and Potting Mix
-
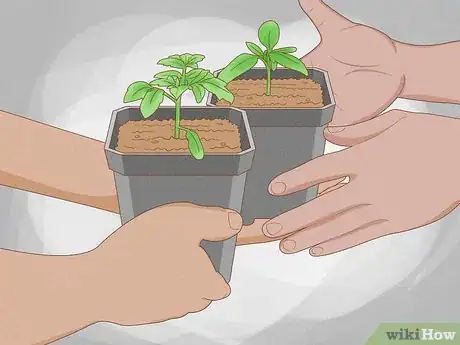
1Pick a bush variety of tomato unless you have lots of space. Pots are great for fitting a miniature garden onto a balcony or patio, but only the bush varieties of tomatoes (also called determinate varieties) will be comfortable in small containers.[2] Most of these can grow in pots as small as 5 gallons (19 L)).[3] Each variety also has a maximum height, so you'll know in advance that they won't hit a roof overhang.
- There are thousands of tomato varieties to choose from. You can ask a local plant nursery or university extension about tomatoes that grow well locally, or try a popular option like Bush Steak, Celebrity, or Mountain Pride for medium to large fruits.[4] For cherry tomatoes, try Heartbreaker, Micro Tom, or Terenzo F1.[5]
- If you have pots at least 4 feet (1.2 m) across, with 6–12 feet (1.8–3.7 m) of vertical space, you can grow vine type or "indeterminate" varieties instead.[6] These tomatoes can keep growing and fruiting for weeks longer than the bush tomatoes, as long as the weather is nice and sunny.
-
2Buy seedlings for a higher success rate or if starting late in the season. Look for plants with dark green leaves and a compact look (not a leggy stem with sparse leaves).[7] The stem should be at least as thick as a pencil, and there should be no spots on the leaves[8]
- Starting with seedlings instead of seeds saves you several weeks of effort. The tomato plants are already growing and healthy, so in most climates, there's no need to worry about grow lights and finicky temperature controls.
Advertisement -
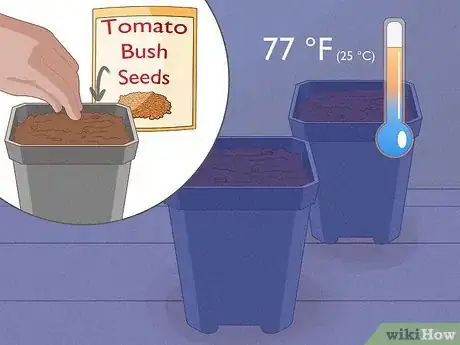
3Start seeds indoors instead if you're up for a challenge or want to start early. Growing tomatoes from seeds does let you begin indoors before the growing season has started, but it can be a hassle to create the perfect conditions for the seeds to germinate. If you're up for the challenge, plant them in small seedling containers and keep them in a dark room around 77 °F (25 °C). Wait a week or two until the seedlings have a pair of small seed leaves, plus their first true leaf.[9] Transplant to a larger pot and grow indoors with grow lights at 60 °F (16 °C) until the seedlings are six or seven weeks old before moving them outside.[10]
- You can start with a very ripe storebought tomato by scooping out the seeds onto a coffee filter or other thick paper, then letting them dry before planting.[11] This is a fun experiment, but an unpredictable one, since the tomatoes that grow won't usually look like the one you bought.
-
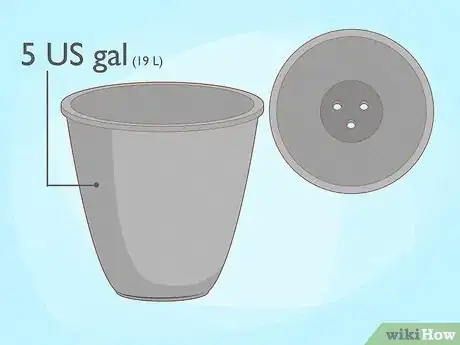
4Find a lightweight 5 US gal (19 L) pot or larger for each plant. This is the minimum size a tomato plant needs to grow healthy roots.[12] Any container with drainage holes will work.[13] However, a lightweight plastic or felt container is much easier to move than a clay pot.[14]
- Vine tomato varieties can outgrow a pot this size. You can look your variety up to find out how big it will get, or just plan on transplanting it to a bigger pot if its roots start to fill up the space.
-
5Fill the pots with soilless potting mix. Compared to soil, these mixes drain faster, compact less, and are much lighter weight—all great things when you're growing in containers.[15] You can buy these ready-made from a gardening supply store, or make your own. The easiest DIY recipe is equal parts peat moss and perlite, mixed together thoroughly.[16]
-
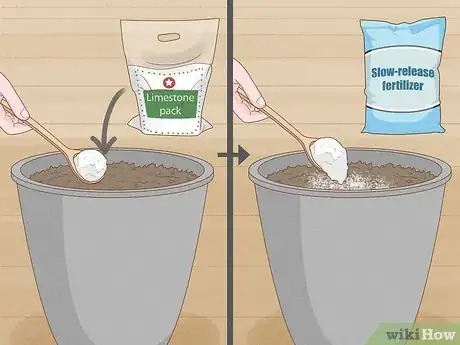
6Stir in limestone and slow-release fertilizer for best results. Stirring in ground limestone or agricultural lime gives your plants calcium and makes the soil a bit less acidic. Use about 1/2 Tbsp per gallon (2 mL per liter). Now is also a good time to add a slow-release fertilizer, following the label instructions, which will give your plant nutrients for the whole growing season.[17]
- To go the extra mile and get a great potting mix, set up a frame with 1⁄2 inch (1.3 cm) hardware cloth over a large bucket. Pour the potting mix (with all the additions stirred in) onto the hardware cloth and shake the frame to sift the mix into the bucket. This breaks up clumps so the mix is more evenly distributed and easier for roots to grow through.[18]
Planting Tomato Seedlings
-
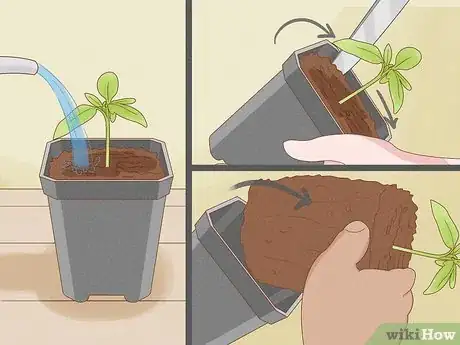
1Water the seedling well, loosen the soil, and lift it out of the starter pot. Get the soil good and moist, then dig around the plant with a table knife to loosen the soil around the roots. Use the knife to lever out the plant, trying not to break any roots. If the plant doesn't come out easily, gently pull it up by a leaf (since it's less of a big deal if that breaks compared to the stem).[19]
- It's easiest on the plant if you transplant on a cool, cloudy day with low wind, and/or in the late afternoon.[20]
- Seedlings sold in a biodegradable starter pot are super convenient: skip this step and instead just "plant" the entire seedling pot inside the larger one. Just make sure none of the pot material is above the surface.[21]
-
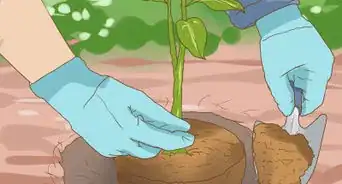
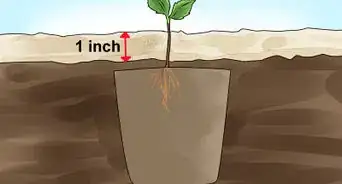
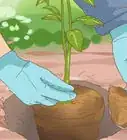
2Plant in a hole deep enough to cover the stem up to the lowest leaves. Dig a hole in the new pot deep enough to cover part of the stem, without burying any leaves. Put the seedling in this hole, pat the potting mix down, and water the plant again.[22]
- Your tomato will grow roots out of the buried part of the stem. This makes it a healthier, stronger plant.[23]
-
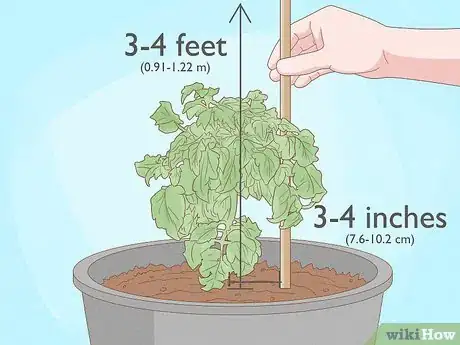
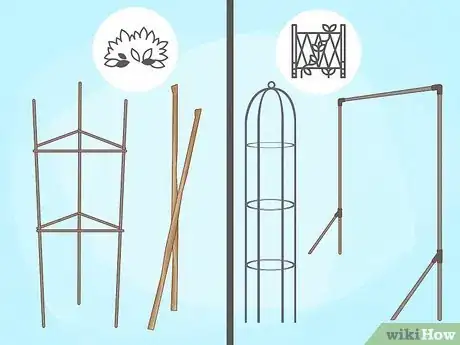
3Put in one stake next to bush varieties. Bush varieties can mostly support themselves, but will often sag from the weight of their fruit.[24] To prevent this, get a metal stake 3–4 feet (0.91–1.22 m) tall. Stick this 3–4 inches (7.6–10.2 cm) away from the plant, opposite the lowest branch.
- A small wire tomato cage with two rings also works pretty well for these types of tomatoes, placed over the plant.[25]
- These varieties don't need support as seedlings, so you can wait until later if you don't have the right tools on hand today.
-
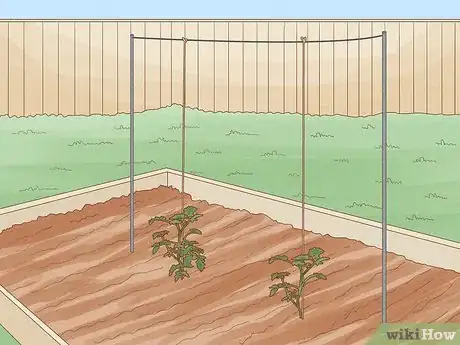
4Anchor a trellis deep in the soil next to vine varieties. These varieties need support from an early stage.[26] Tie a piece of heavy wire horizontally across the top of the trellis, then tie lengths of twine hanging vertically down from this. As the plant grows, choose the strongest vines and wrap them around the twine or attach them with plastic greenhouse clips so they grow upward.
- You can use a large tomato cage instead, placing it over the whole plant right after planting. Cage-grown tomatoes produce more tomatoes but take longer to ripen.[27]
-
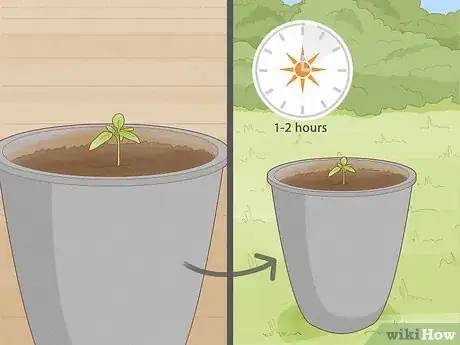
5Move the plant outdoors for 1-2 hours daily, gradually increasing this time. Transplanting can be pretty hard on a plant, especially if you bought it from an indoor nursery and plan to grow it on an exposed balcony. Go easy on the young tomato by moving it to a shady spot with wind shelter for a couple of hours each day. Over the next 2 weeks, gradually increase the amount of time the plant spends outdoors each day, and the amount of sun it gets.[28]
- After 2 weeks, your plant should be tough enough to stay outdoors permanently.
- This process is called "hardening off."
- Bring the plant indoors during high wind or cold snaps.
Caring for Tomato Plants
-
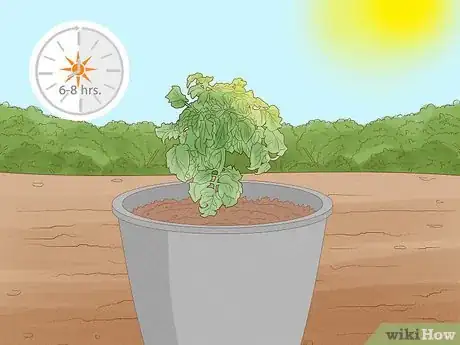
1Place plants in a spot that gets 6–8 hours of direct sun daily. Once the tomato plants are accustomed to their new pot and being outdoors, they love to soak up sun. Keep them in a sunny spot for the whole growing season.[29]
- If you're in a cool climate, put the containers against the side of a building or garden wall, which reflects heat back onto the plants.[30] If you're in the Northern Hemisphere, put the plant on the south side of the structure for maximum sun.
-
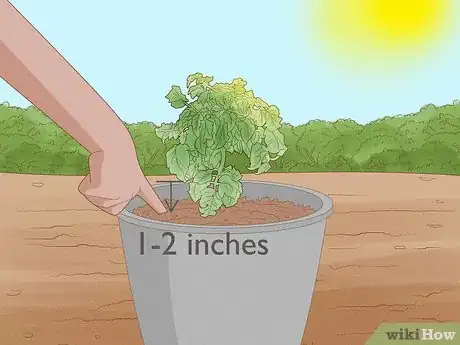
2Water whenever the top inch of potting mix turns dry. Once a day (twice during hot weather), poke your finger 1–2 inches (2.5–5.1 cm) into the potting mix.[31] If it feels dry, water it until the bottom of the container starts to drain.[32]
- The more consistent the moisture level is, the better the fruit, and the better your precious plants can defend themselves against disease.[33]
-
3Support and prune branches as they grow. Tomato plants in containers don't need much pruning, but most of them appreciate a little support to stop them falling over. The details depend on your tomato variety and what kind of support you've installed:
- Bush variety with a stake: as each branch starts to fruit, support it by tying a piece of twine to the stake, then looping the twine loosely above (never below) the fruit cluster.
- Bush variety with a tomato cage: thin leaves from the center of the bush regularly. This prevents trapped moisture that can cause disease.[34]
- Vine variety with a trellis: attach each strong vine to a separate piece of twine hanging from the top of the trellis, using plastic greenhouse clips or just wrapping the vine around it. Prune away the weakest vines that you don't have space for.
- Vine variety with a tomato cage: all you need to do for this setup is poke the vines back around the cage wires whenever they start to grow outward.[35]
-
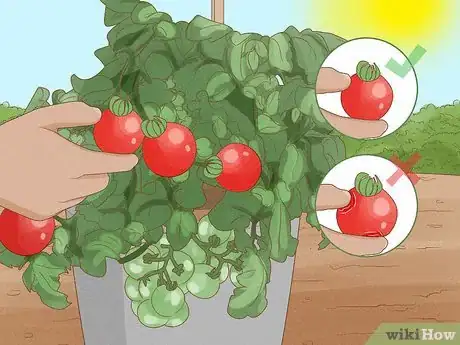
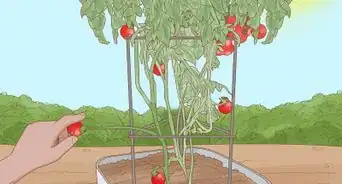
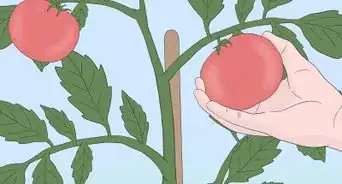
4Harvest tomatoes when they ripen and turn red. The fruits start green, grow to their final size, then gradually change color (usually to red, but some varieties are yellow, orange, or green even when ripe).[36] Pick each tomato when it's done changing color, but before it softens.[37]
- Hot weather (92 °F (33 °C) and above) can mess with the tomatoes' flavor and texture.[38] If you get a hot spell, shade the fruit and pick it a little early to ripen indoors, once the color has started to change.[39] Most tomato fruits end up best when the weather isn't above 85 °F (29 °C).[40]
- Tomatoes taste best when kept at room temperature after harvesting, not in the fridge.[41]
-
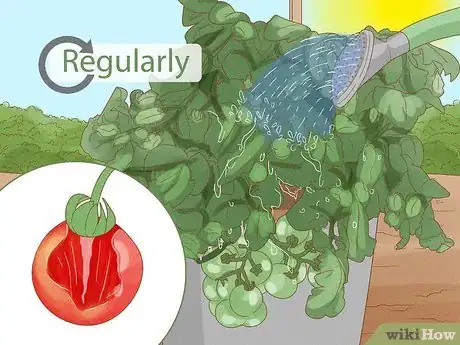
5Water on a more regular schedule if you see rotting fruits. One of the most common problems for home tomato growers is blossom end rot. Just like it sounds, this is a brownish rot that shows up on the bottom of the fruit. Pick and throw away the rotted fruits, and try to water as regularly as possible so the other fruits turn out better.[42]
- Blossom end rot is actually caused by two things: too much change in moisture level, and too little calcium.[43] To solve the second problem with your next attempt at growing tomatoes, try adding more limestone into the potting mix.
- Inconsistent watering can also cause cracked fruits, with skin that splits apart either in concentric circles or long lines. These also need to be removed, but unlike rotting fruit, they're still edible after you let them finish ripening indoors.[44]
-
6Treat leaf fungus with pruning and fungicide. Fungal diseases on tomatoes usually look like spots that start on the lower leaves and move upward. Cut off the affected leaves to try and stop the spread. If it gets bad, use a fungicide from a garden supply store.[45]
Expert Q&A
Did you know you can get expert answers for this article?
Unlock expert answers by supporting wikiHow
-
QuestionWhat are the signs of overwatering tomato plants?
 Maggie MoranMaggie Moran is a Professional Gardener in Pennsylvania.
Home & Garden Specialist
-
QuestionHow often do you water tomatoes in pots?
 Maggie MoranMaggie Moran is a Professional Gardener in Pennsylvania.
Home & Garden Specialist
-
QuestionHow many hours of sun does a tomato plant need?
 Maggie MoranMaggie Moran is a Professional Gardener in Pennsylvania.
Home & Garden Specialist
Things You'll Need
- Tomato plants or seeds
- Planting pots
- Soilless potting mix
- Ground limestone
- Fertilizer
- Hardware mesh
- Watering can
- Metal stake, trellis, or tomato cage
- Shears
References
- ↑ https://extension.missouri.edu/publications/g6461?p=1
- ↑ https://extension.umn.edu/vegetables/growing-tomatoes#choosing-tomato-varieties-173311
- ↑ Monique Capanelli. Plant Specialist. Expert Interview. 22 September 2020.
- ↑ https://ohioline.osu.edu/factsheet/HYG-1624
- ↑ https://savvygardening.com/the-best-tomatoes-for-containers/
- ↑ https://marinette.extension.wisc.edu/files/2018/01/tomato-in-a-container_sr.pdf
- ↑ https://www.canr.msu.edu/resources/michigan_fresh_growing_tomatoes
- ↑ https://extension.umn.edu/vegetables/growing-tomatoes#finding-and-buying-tomato-plants-173310
- ↑ https://extension.psu.edu/successful-tomatoes-from-seed
- ↑ https://www.canr.msu.edu/news/time_to_start_vegetable_garden_seeds
- ↑ https://www.theguardian.com/lifeandstyle/gardening-blog/2009/jun/24/gardens
- ↑ Monique Capanelli. Plant Specialist. Expert Interview. 22 September 2020.
- ↑ https://extension.unh.edu/blog/what-best-way-grow-tomatoes-container
- ↑ Monique Capanelli. Plant Specialist. Expert Interview. 22 September 2020.
- ↑ https://extension.unh.edu/blog/what-best-way-grow-tomatoes-container
- ↑ https://extension.psu.edu/homemade-potting-media
- ↑ https://extension.psu.edu/homemade-potting-media
- ↑ https://extension.psu.edu/homemade-potting-media
- ↑ https://extension.umn.edu/vegetables/growing-tomatoes
- ↑ https://extension.umn.edu/vegetables/growing-tomatoes#transplanting-173561
- ↑ https://extension.umn.edu/vegetables/growing-tomatoes#transplanting-173561
- ↑ https://garden.org/learn/articles/view/356/
- ↑ https://extension.umn.edu/vegetables/growing-tomatoes#transplanting-173561
- ↑ https://extension.unh.edu/blog/what-best-way-grow-tomatoes-container
- ↑ https://extension.unh.edu/blog/what-best-way-grow-tomatoes-container
- ↑ https://ohioline.osu.edu/factsheet/HYG-1624
- ↑ https://ohioline.osu.edu/factsheet/HYG-1624
- ↑ https://extension.psu.edu/hardening-transplants
- ↑ https://marinette.extension.wisc.edu/files/2018/01/tomato-in-a-container_sr.pdf
- ↑ https://catalog.extension.oregonstate.edu/ec1333/html
- ↑ https://marinette.extension.wisc.edu/files/2018/01/tomato-in-a-container_sr.pdf
- ↑ https://extension.unh.edu/blog/what-best-way-grow-tomatoes-container
- ↑ https://extension.umn.edu/vegetables/growing-tomatoes#watering%C2%A0-141310
- ↑ https://extension.unh.edu/blog/what-best-way-grow-tomatoes-container
- ↑ https://ohioline.osu.edu/factsheet/HYG-1624
- ↑ https://www.johnson.k-state.edu/lawn-garden/agent-articles/vegetables/harvest-ripen-tomatoes.html
- ↑ https://extension.missouri.edu/publications/g6461?p=1
- ↑ https://extension.missouri.edu/publications/g6461?p=1
- ↑ https://extension.umn.edu/vegetables/growing-tomatoes#harvest-and-storage-141314
- ↑ https://cvp.cce.cornell.edu/submission.php?id=91
- ↑ https://extension.missouri.edu/publications/g6461?p=1
- ↑ https://extension.missouri.edu/publications/g6461?p=1
- ↑ https://extension.missouri.edu/publications/g6461?p=1
- ↑ https://pender.ces.ncsu.edu/2020/03/what-causes-tomatoes-to-crack/
- ↑ https://marinette.extension.wisc.edu/files/2018/01/tomato-in-a-container_sr.pdf
- ↑ https://marinette.extension.wisc.edu/files/2018/01/tomato-in-a-container_sr.pdf
- ↑ https://marinette.extension.wisc.edu/files/2018/01/tomato-in-a-container_sr.pdf
About This Article
To grow tomatoes in pots, select a 15 gallon, 18-inch plastic pot with drainage holes at the bottom for each tomato plant. Add a layer of pebbles or river rocks to the bottom of the pot, then fill the pot the 1/3 of the way with a mixture of potting soil and vegetable fertilizer. Place your seeds or seedlings into the pot, then fill the pot the rest of the way with soil and attach a tomato cage to the pot. Water the plants thoroughly whenever the soil seems dry, and keep the plants where they will get 4-6 hours of sun each day. Keep reading for tips from our horticulture reviewer to learn when you should harvest your tomatoes!


