This article was co-authored by Janet Miranda and by wikiHow staff writer, Jessica Gibson. Janet Miranda is a Professional Hair Stylist, Makeup Artist, and the Founder of Be.NYLA. With over 15 years of experience, Janet specializes in makeup and hair for advertising, commercial, editorial, runway, special events, television, and videos. She was trained at Vidal Sassoon Academy and with top hair and makeup artists including MAC Cosmetics and Redken. Janet has worked five seasons of New York Fashion Week and one season on Project Runway. She continues to add brands to her growing client list including Armani Exchange, Neutrogena, and Pantene. Janet’s work has been featured on CBS, Brides Magazine, 100 Layer Cake, Style Me Pretty, Green Wedding Shoes, Ireland Image Brides Magazine, and Elle Japan.
There are 8 references cited in this article, which can be found at the bottom of the page.
This article has been viewed 36,132 times.
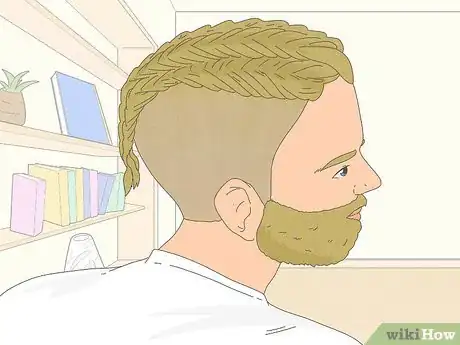
The popular Vikings television show has created several memorable hairstyles. The Ragnar look, based on the character Ragnar Lodbrok, might be the most popular. To get this hairstyle for yourself, grow out your hair so it's at least shoulder-length. Shave the sides and back of your head, leaving the hair long on top. Make 3 braids with the top hair for the rough, Vikings look. If your hair isn't long enough or you want a slightly different style, try one of Ragnar's other signature looks.
Steps
Undercutting the Sides
-
1Gather a 4 1⁄2 in (11 cm) section of hair on top of your head and tie it back. Brush your hair to remove knots or kinks. Then, use a wide-tooth comb to create a 4 1⁄2 in (11 cm) wide section of hair directly on the top of your head. Tie it into a bun to keep it out of your way and look in the mirror to check that your hairline is even on both sides of your head. You don't want a lopsided cut![1]
- Make the hairline high up on your head and not low on your temples. Curve the hairline towards the back of your head so it's 3 to 4 inches (7.6 to 10.2 cm) above your neckline. Pull all of the hair above the neckline up and tie it back.
- It might help to ask a friend to help you or go to a stylist.
-
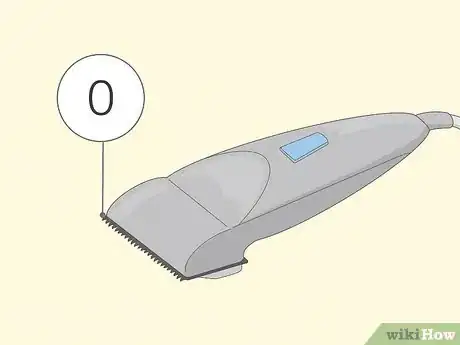
2Adjust your hair clippers to skin or 0. For the closest undercut, remove the guard from your hair clippers. This means you'll be shaving directly against the skin. If you'd like to leave very short hair on the sides and back, put a 0 guard on your clippers.[2]
- If your hair clippers don't have a 0 guard, use the lowest number available.
Advertisement -
3Shave the sides and back of your head with the clippers. Keep the hair on the top of your head pulled back so it doesn't get in your way. Then, shave the sides and back of your hair so you work right up to the hairline that you marked.[3]
- If you shave with the 0 guard but find that you want it shorter, just take the guard off and use the clippers against your skin.
- Don't adjust the clipper length to fade or blend the hair since you want a bold, noticeable look.
Braiding the Long Hair
-
1Grow out the top of your hair until it's at least shoulder-length. Ragnar hair is really long so the most challenging thing about this style is growing your hair out in the first place! Long hair is easier to braid and it stands out against the undercut sides. Try to grow out your hair until it at least reaches your shoulders or until it's mid-back length.[4]
- To encourage your hair to grow longer, protect it from damage. Don't pull your hair back tightly or dye it while you're growing it out.
- If you'd like extra length while you're growing out your hair, apply hair extensions that you can remove once your hair is long.
-
2Divide the hair into 3 vertical sections that are 1 1⁄2 inches (3.8 cm). Use a comb to evenly segment the long hair on your scalp into 3 vertical sections so they run from your forehead to the base of your head. Make each about 1 1⁄2 inches (3.8 cm) wide so you have enough hair to braid. Clip each section to keep it them out of your way while you're braiding.
- If you'd rather do 1 large braid, skip this step.
-
3French braid each segment of hair on the top of your head. Work with the center segment first and divide it into 3 smaller sections. Start a regular braid, but add hair from the sides of the segment as you braid across the top of your head. Once you reach the end of your hair, tie off the French braid with a hairband and repeat this for the other 2 segments.[5]
- If you have a hard time French braiding your hair, ask a friend to do it for you or go to a hairstylist.
-
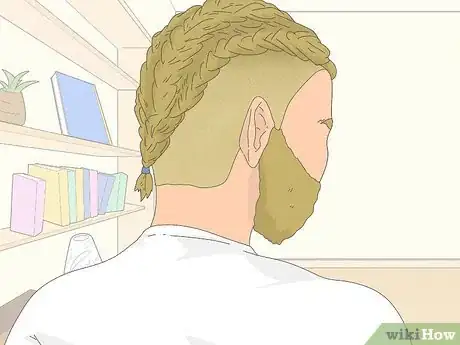
4Tie the 3 braids together at the nape of your neck. Instead of leaving the 3 braids loose, gather them at the back of your neck and secure them with a hairband. Choose a decorative hairband that matches your look.[6]
- For example, Ragnar usually ties his braids back with thin leather strips.
-
5Pull on tufts of the hair to give it a rough, worn look. Hairstyles from Vikings don't look smooth or polished, so rough up your French braids by picking at the hair. Use your thumb and forefinger to pull up on the braids so the hairs loosen. You could also rub the palm of your hand back and forth across the top of your head to make the hair a little fuzzy.[7]
- This hairstyle looks great after a few days since sleeping on it will give the braids a lived-in look.
Trying Variations
-
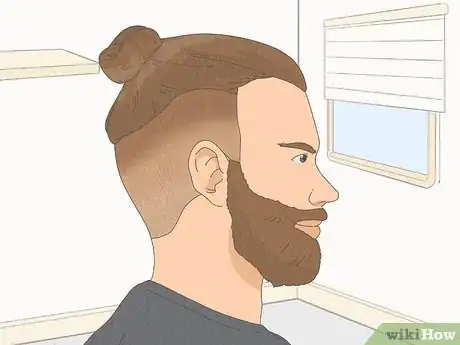
1Put your hair into a top knot if you don't want to braid it. Braiding hair can be trickier than it looks! If you're struggling or your hair isn't long enough, gather the long hair into a ponytail and wrap a hairband around it. Twist the length of hair tightly and wrap the coil around the hairband so it forms a bun. Then, wrap another hairband around it to keep the top knot in place.[8]
- The top knot or man bun is a great option for summer when you want to keep your long hair pulled back.
- If your hair is thinning, you can buy a color powder from a drugstore like Target. Use it to disguise that thinning.
- L'Oreal makes them in different tones. For example, they have a brunette color powder in a spray bottle.
- You can spray it on the balding areas to cover them. It looks like your natural hair, so you do not see that area. Or you can put an eyeshadow on the scalp with a flat brush to camouflage the balding area.
-
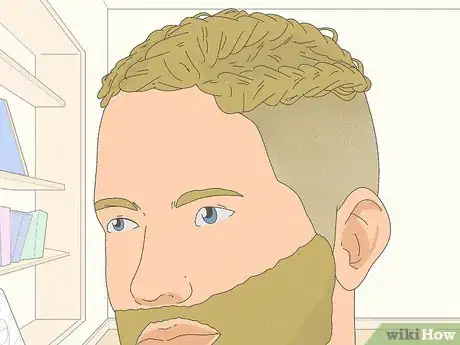
2Use scissors to cut the top hair short if you don't want to grow it out. Long hair isn't for everyone or you might be tired of growing it out. At some points during the show, Ragnar features cropped hair on the top while the sides are shaved close. To get this look, divide the hair near the upper temple so it makes a diagonal line down the back of the head. Then, use scissors to cut all of the hair above this line until it's as short as you want.[9]
- Ragnar sometimes has short, buzzed hair on top. If you'd rather have an even cut on top, use clippers with a 2 or 3 guard when you cut the top hair.
-
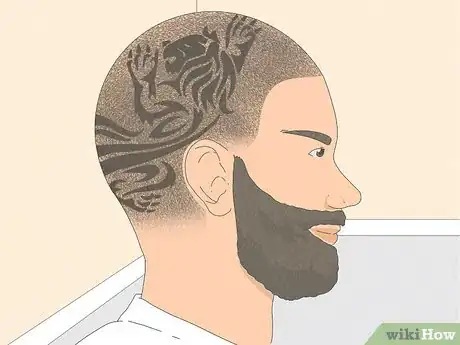
3Shave your entire head to highlight scalp tattoos. In later seasons of the show, Ragnar shaves his whole head. This is a cool look if you have tattoos on your scalp that you want to be visible. Keep your beard and mustache long if you go this route so you have a rough, Vikings style.[10]
- If you want to keep this style for a while, plan on shaving your head every few days. This prevents your style from looking fuzzy!
Things You'll Need
- Haircutting clippers
- Hair clips
- Brush or comb
- Hairband
References
- ↑ https://youtu.be/AZN_-ngyH0I?t=89
- ↑ https://www.undercuthairstyle.com/best-undercut-haircut-guide-men/
- ↑ https://youtu.be/AZN_-ngyH0I?t=206
- ↑ https://www.menshairstylestoday.com/ragnar-lothbrok-hair/
- ↑ https://youtu.be/-Ju8RVYD8cI?t=129
- ↑ https://youtu.be/-Ju8RVYD8cI?t=148
- ↑ https://youtu.be/-Ju8RVYD8cI?t=175
- ↑ https://youtu.be/UEEUtRTd0t0?t=197
- ↑ https://www.menshairstylestoday.com/ragnar-lothbrok-hair/







-Step-1-Version-8.webp)
