This article was co-authored by Michelle Myles. Michelle Myles is the Co-owner of Daredevil Tattoo, a tattoo shop located based in New York City's Lower East Side. Michelle has more than 20 years of tattooing experience. She also operates the Daredevil Tattoo Museum, co-owner Brad Fink's personal collection of antique tattoo memorabilia that he has amassed over the last 27 years of tattooing.
There are 8 references cited in this article, which can be found at the bottom of the page.
wikiHow marks an article as reader-approved once it receives enough positive feedback. This article has 13 testimonials from our readers, earning it our reader-approved status.
This article has been viewed 1,577,755 times.
If you can’t afford a professional tattoo or you don’t have access to a tattoo parlor, you can give yourself a tattoo at home without a tattoo gun, using what is sometimes called the "stick-and-poke" method. This process can be dangerous, however, and if it turns out badly, you’re left with a permanent reminder. Be sure you know what you’re doing and make sure to follow all of the safety warnings and sanitation requirements before you try this yourself.
Steps
Preparing for Your Tattoo
-
1Buy or assemble a home tattoo kit. The main components of any home tattoo kit are needles and ink. Only use tattoo needles that haven't been used. Tattoo ink is the only type of ink you should use, but not always easy to find. India Ink is commonly used as calligraphy ink but is the only ink that is not tattoo ink that can be used as tattoo ink. Don't use pen or marker ink![1]
- Home tattoo kits are the safest option, are inexpensive, and include both supplies and instructions.
- Find a reputable brand of tattoo ink to ensure it doesn't contain any toxic ingredients.
- Don't use sewing needles, straight pins, or safety pins. They are not sterile, even if they are new. It is extremely dangerous to use any of these objects to tattoo yourself. You may end up in the hospital. They don't hold the ink well and generally aren't the right type of needle. You need to be as professional as possible if you are going to do this yourself. [2]
- Don't use old needles. Don't share needles. Doing either of these will put you at serious risk for infection. Also, be sure to safely dispose of the needles when you're done.
-
2Set up your station. You'll need a few other things before you start putting needle to flesh. Grab some cotton thread, a cup for water, and rubbing alcohol. [3]
- Keep a non-permanent, non-toxic marker around for drawing potential tattoo ideas.[4]
- It's a good idea to keep ink caps, a shallow bowl, or saucer handy to pour India ink into. Ink caps are inexpensive and can help prevent you from wasting ink. Sterilize with rubbing alcohol or hydrogen peroxide that is 91-99% alcohol.
- It's important to make sure everything you use is clean. Wash any bowls or saucers you'll be using in hot, soapy water and peroxide/rubbing alcohol, and then cover them with plastic wrap. For extra protection, wear gloves that are very well sterilized when handling any of the supplies you'll be using. Wash gloves (if using) and hands multiple times throughout the whole process.
-
3Clean and shave your chosen area. Wherever you decide to tattoo yourself, clean it with soap and warm water. Shave the hair off in the area about an inch larger than you want your tattoo to be.
- After you shave, sterilize your skin with rubbing alcohol. Dab it on with a cotton ball and make sure it's evaporated before continuing.
-
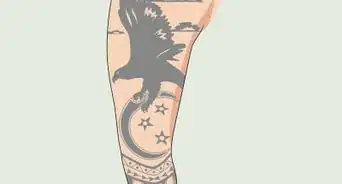
4Draw the design on your skin. Trace or draw your desired tattoo in the place you want it to go. You can have someone else do it for you if you want, but take the time to get it how you want it. This image is all you'll have to go on once you start. You can also use stencil paper and stencil gel to make it more accurate.
- Since you'll be tattooing yourself, make sure the place you choose is easily. You WILL be poking for a few hours. Awkward or hard to reach places on the body, such as your chest or shoulder, are never good ideas for stick 'n' pokes on yourself.
- Stick 'n' pokes work much better with simple and tiny tattoos. If you want a complex tattoo, you're better off going to a parlor.


Starting Your Tattoo
-
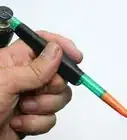
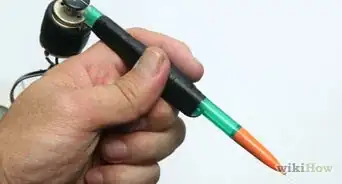
1Sterilize the needle. The best way to sterilize the needle before using it is with flame. Hold the needle over the flame of a candle or a lighter until it glows. Make sure you hold the other end with tongs, or you'll burn your fingertips.[5]
- Once the needle is sterile, wrap it in cotton thread. Start about 1⁄8 inch (0.3 cm) away from the tip and wrap the thread back and forth about 1⁄4 inch (0.6 cm) up the needle until the thread has formed an oval shape. This will absorb some of the ink as you dip your needle into the saucer.[6]
-
2Start poking. Dip the needle into the India ink and then poke it through your skin, leaving a small dot. There may be some blood after several layers of poking, but there shouldn't be much. If blood is dripping/excessive, stop immediately and sterilize. Hold a clean paper towel, not cloth, onto the tattoo until it stops bleeding .
-
3Start working your way along the lines. Stay inside the line of the tattoo design you've drawn, filling it in with tiny punctures. Use a cotton swab or a rag to wipe away any blood or excess ink.[7]
- The skin may swell up a bit as you poke it which may cause the resulting tattoo to appear spotty. You may have to do touch-ups when the swelling goes down if you want smooth lines throughout the tattoo. Wait to do touch ups until after the tattoo is completely healed, which can take up to two months.
-
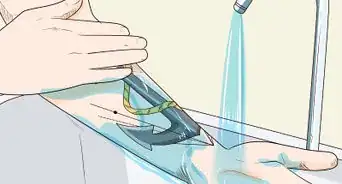
4Clean the tattooed area. When you finish the tattoo, wipe down the area with soapy water. Throw away any remaining India ink in the ink cap and needles. They are no longer sterile. Use a new needle and a new saucer of ink if you plan on doing any touch-ups in the future.
- Avoid cleaning a fresh tattoo with alcohol -- use soap and water, instead.


Caring for Your Tattoo
-
1Bandage your new tattoo with saran wrap. Don't use a cloth or band-aid as they can absorb some of the ink and fade it faster. Don't use any ointments or lotions for the first week of healing because they can clog the tattoo and puts it at risk of infection. .[8]
- Leave the wrap on for 1-3 hours, but no longer than 6.[9]
-
2Keep your tattoo clean. Remove the initial wrap and gently wash the area with warm water and non-scented soap. Don't scrub, and only wash the tattoo with clean hands.[10]
- Don't soak your tattoo and don't run it under hot water. It won't feel nice, and it take the ink out of your skin.[11]
- Avoid picking at the tattoo as this could cause some of the ink to bleed out, causing messy lines and even scarring.
- Make sure to remove the bandage and wash the tattoo after a couple of hours.
-
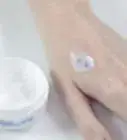
3Apply lotion to your tattoo. After the swelling goes down and the skin starts to scab, switch to a plain, unscented lotion. Most professionals recommend Lubriderm or Aquaphor. Keep the layers thin. Your skin needs to breathe so it can heal properly.
- Moisturize your tattoo 3-5 times a day depending on the size of the tattoo. If your skin starts to look dried out, use a small amount of lotion.[12]
- Don't apply anything that's too greasy, like vitamin E, aloe, or Vaseline.
-
4Let your tattoo heal. For the first week or so be mindful of your tattoo. It's going to scab over and you'll need to take extra care to keep it clean. In addition to washing it and keeping it moisturized, you'll need to avoid certain activities.[13]
- Keep your tattoo out of direct sunlight, as this can cause the ink to fade. It will also burn like a bad sunburn.
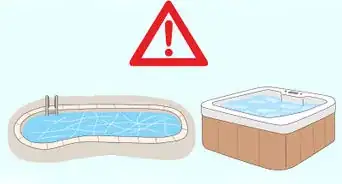
- Avoid pools of water such as baths, hot tubs, pools, lakes, oceans, etc. They are full of bacteria, which can lead to infection.[14]
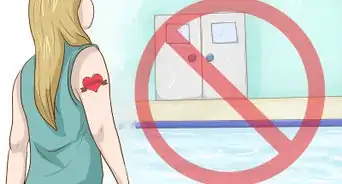
- Avoid any activity that is high-contact or induces excessive sweating, like working out. [15]
- Wear loose clothing so your tattoo can breathe. Tight clothing prevents this.
-
5Watch out for infection. Be on the lookout for redness or excessive scabbing around your tattoo, as well as any oozing, or swelling. These are all signs of possible infection.[16]
- You can minimize the risk of infection by keeping your supplies clean and taking care of your tattoo. Still, it is possible your tattoo could become infected. If you suspect that your tattoo has become infected, consult your physician.[17]
- Make sure that you aren't picking or scratching at your tattoo, either.


Expert Q&A
-
QuestionIs it 100% permanent or will it go away completely after a few years?
 Kiara HamedKiara Hamed is a Tattoo Artist based in Dallas, Texas. She has over nine years of tattoo designing experience. She received her Tattoo Artist Certification in 2010 and a BS in Computer Information Systems from Clark University Atlanta in 2013.
Tattoo ArtistIt may fade over time but it's not guaranteed to go away completely. Tattoos are permanent. -
QuestionHow far apart should the pokes be?Kiara HamedKiara Hamed is a Tattoo Artist based in Dallas, Texas. She has over nine years of tattoo designing experience. She received her Tattoo Artist Certification in 2010 and a BS in Computer Information Systems from Clark University Atlanta in 2013.
Tattoo ArtistTry to make them as close together as possible so you cover the entire intended area. Otherwise, the tattoo will be splotchy.
Warnings
- Only use tattoo ink or India ink. Other inks are toxic and could cause serious problems.⧼thumbs_response⧽
- The safest way to get a tattoo is in a professional tattoo parlor. Do not try this if you are not comfortable with the risks associated with self-tattooing.⧼thumbs_response⧽
- Only use new, clean needles and make sure you sterilize them before you begin. Never reuse or share needles.⧼thumbs_response⧽
- Home tattooing puts you at risk for serious infections and may be illegal in some places. Know the risks before you start.⧼thumbs_response⧽
- Sharing needles can put you at risk for HIV, Hepatitis, Staph. infections, MRSA, and a host of other transmittable diseases.[18]⧼thumbs_response⧽


References
- ↑ http://www.vice.com/read/stick-v14n4
- ↑ http://www.vice.com/read/stick-v14n4
- ↑ http://www.vice.com/read/stick-v14n4
- ↑ http://www.vice.com/read/stick-v14n4
- ↑ http://www.vice.com/read/stick-v14n4
- ↑ http://www.vice.com/read/stick-v14n4
- ↑ http://www.vice.com/read/stick-v14n4
- ↑ http://www.brilliancetattoo.com/aftercare
- ↑ https://www.netdoctor.co.uk/beauty/skincare/a28494311/tattoo-aftercare-products-treatments-advice/
- ↑ https://authoritytattoo.com/tattoo-aftercare/
- ↑ https://www.inkaholiktattoos.com/tattoo-after-care/
- ↑ https://majestictattoonyc.com/tattoo-aftercare/
- ↑ https://majestictattoonyc.com/tattoo-aftercare/
- ↑ https://majestictattoonyc.com/tattoo-aftercare/
- ↑ https://majestictattoonyc.com/tattoo-aftercare/
- ↑ https://www.aad.org/public/everyday-care/skin-care-basics/tattoos/tattoo-skin-reactions
- ↑ https://www.aad.org/public/everyday-care/skin-care-basics/tattoos/tattoo-skin-reactions
- ↑ https://health.clevelandclinic.org/are-home-tattoo-kits-safe/
About This Article

Before you give yourself a tattoo, get a tattoo kit or a sterilized needle and black India ink. Clean and shave the area, then sterilize the skin with rubbing alcohol. Trace the image you want onto your skin, making sure to get it exactly right. When you’re ready to tattoo, sterilize the needle by holding it over a flame until it glows, then wrap cotton thread around the needle to help absorb the ink. Dip the needle into the ink, then poke it into your skin. Repeat this until you’ve finished the tattoo. Read on to learn how to care for your tattoo as it heals.