X
wikiHow is a “wiki,” similar to Wikipedia, which means that many of our articles are co-written by multiple authors. To create this article, volunteer authors worked to edit and improve it over time.
This article has been viewed 78,317 times.
Learn more...
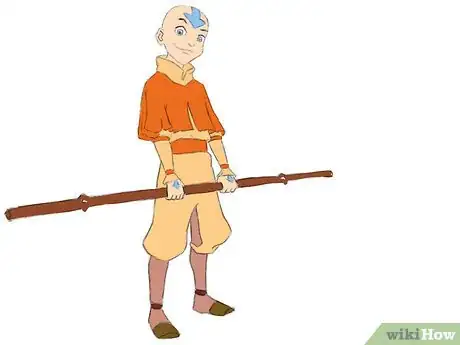
Everybody loves Aang from Avatar: The Last Airbender, particularly his cheery personality and sense of humor. Aang is a twelve-year-old airbending master, with unique abilities and a very interesting appearance. This step-by-step tutorial will help you learn to draw Aang the airbender.
Steps
Method 1
Method 1 of 2:
Full body Aang
-
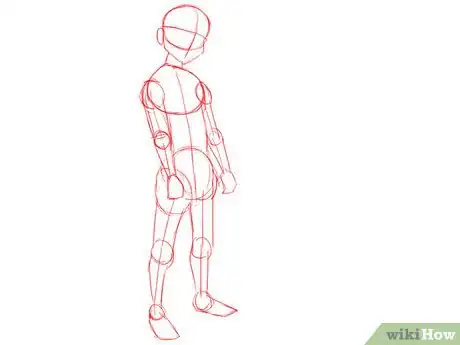
1Draw basic shapes that form the torso, head, arms, and legs. These will serve as the basis for Aang's body, which is similar to that of a real twelve-year-old boy.
-
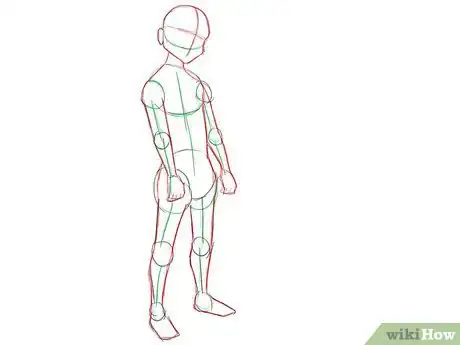
2Erase the unnecessary guides to refine the body and create a more solid outline. You will now be able to see the shape of the body a little better.Advertisement
-
3Draw the top part of Aang's clothing. The top part of the fabric should conform to the shoulders, falling and overlapping itself like a curtain.
-
4Erase parts of the outline that would be covered by Aang's clothing. Continue drawing the rest of Aang's clothing. Aang has pants that fold below his knees, while his boots conform to the shape of his lower legs and feet.
-
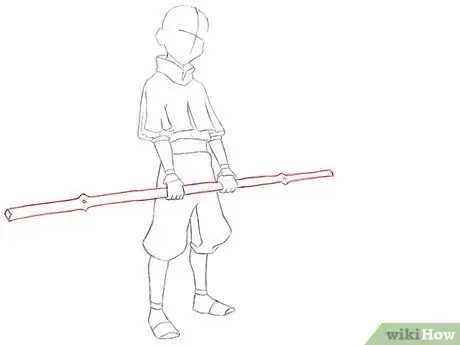
5Now draw Aang's glider. It should look like a simple stick, since he isn't using it to fly around right now. Don't forget the diamond forms on either side of the weapon. Make sure your lines are straight and steady.
-
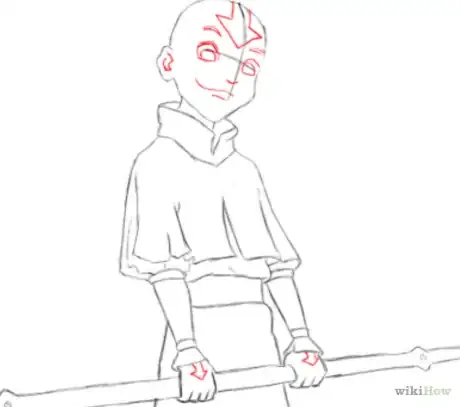
6Draw Aang's face. Follow the guidelines to place his eyes, nose, mouth, and forehead markings properly. Aang has huge, anime-esque eyes, as well as a wide and childish smile.
-
7Now add details (like eye color) and define the details of the face. Don't forget the arrows on his hands! Once you've finished detailing, remove the guidelines to clean it up.
-
8You're done! All you need to do now is clean up the lines and close any gaps. Make sure that there are no remaining guidelines. You can also color Aang in, if you wish.
-
9Finished.
Advertisement
Method 2
Method 2 of 2:
Aang's head and face only
-
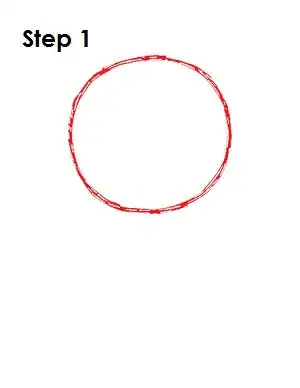
1Start by drawing a big circle near the top half of the page. This will be the basic shape for Aang's head. The circle doesn’t have to be perfect. It’s just a guide.
-
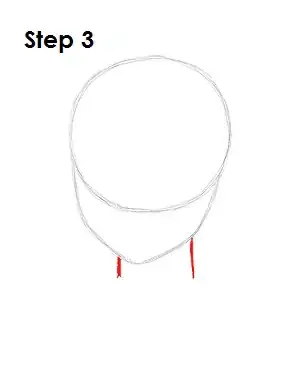
2Draw a curved line as a guide for learning how to draw Aang's lower jaw and chin later on. Notice that there is a bit of a point to the line near the bottom for the chin. It also bends a bit at the sides for the jaw.
-
3Draw two short, curved lines below the head as guides for Aang's neck.Draw two short, curved lines below the head as guides for Aang's neck.
-
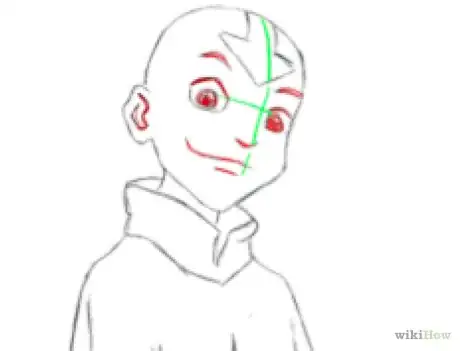
4Make two intersecting lines across the entire head shape, one vertical and one horizontal. Bend the lines so that they contour to the shape. Draw a smaller horizontal line halfway between the bottom part of the circle and the bottom of the chin. These will be construction lines that will help you when learning how to draw Aang's facial features later on.
-
5Draw the eyes. As guides for Aang's eyes, draw two circles sitting on top of the horizontal construction line and on either side of the vertical construction line.
-
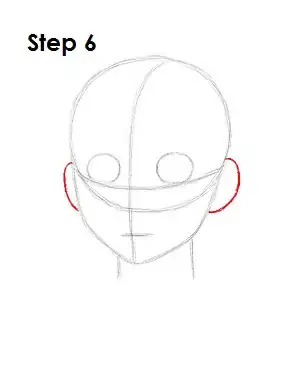
6Draw a curved line as guides for the ears on the either side of Aang's head. The top part of these lines should be near the ends of the horizontal construction line, and they should be similar to the letter C.
-
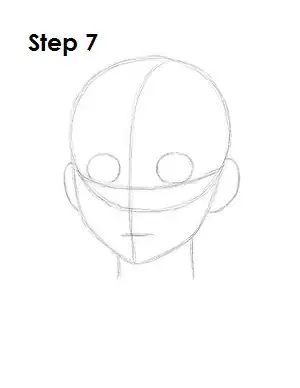
7Tighten up your drawing. When learning how to draw Avatar Aang, the last airbender from this point on, press harder with your pencil in order to get darker lines and a more defined sketch.
-
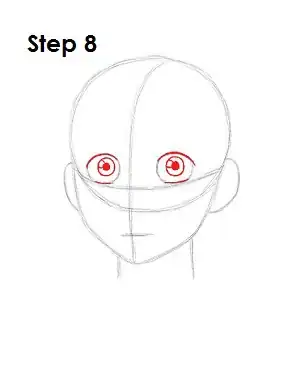
8Tighten the shape of Aang's eyes by darkening the top and bottom part of each circle. Inside each eye, draw a circle for this Avatar character's irises. Inside each iris, draw a smaller circle and shade it in for the pupils. Draw another small circle inside each iris on the sides to represent glare.
-
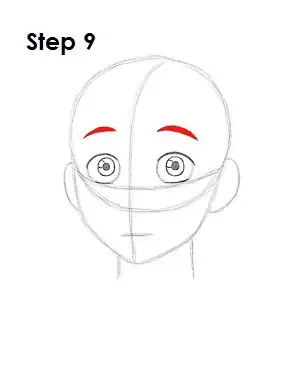
9For Aang's eyebrows, draw a thick line high above each eye that comes to a point at the sides
-
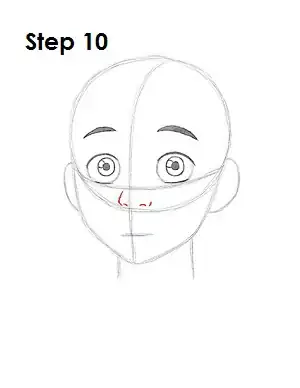
10Draw Aang's nose. Place it under the horizontal construction line and above the bottom part of the main circle. Two small curved lines make up the nostrils, and two different-sized lines make up the sides of this Avatar character's nose.
-
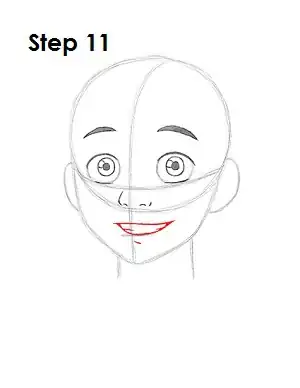
11Draw Aang's smiling mouth, which sits right on top of the smallest construction line. The top of this Avatar character's mouth is a horizontal line, and the bottom part is a curved line. Draw Aang's teeth inside by adding two small lines on the sides inside the shape of the mouth. Draw a small line on the outside at the bottom for the lower lip of Avatar Aang, the last airbender.
-
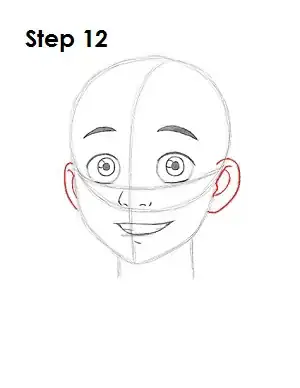
12Use the curved lines on the sides of Aang's head as guides to draw the ears. Darken the lines and make them wider at the top than the bottom. Draw a few curved lines within the shape to create the inner ear structure.
-
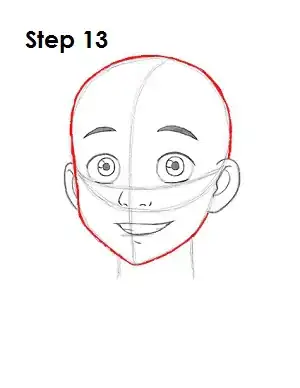
13Use the original circle and jaw line as a guide to draw the rest of Aang's head. Simply follow the path of the guides and darken the line all the way around.
-
14Draw the arrow on top of Aang's head. The point of the arrow is between his eyebrows on top of the vertical construction line. Then it moves up and creates a sort of V shape. After that it moves toward the back of Aang's head.
-
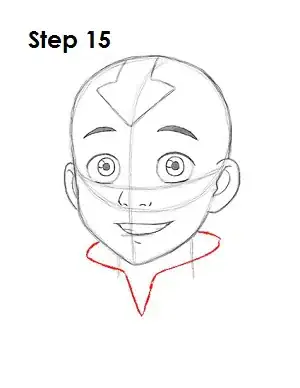
15Draw the top part of Aang's collar under the head. The shape is similar to and oval but with a V-like line at the bottom for the collar's opening.
-
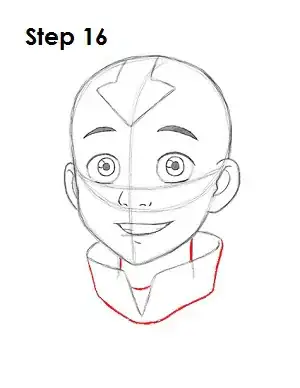
16Darken the lines for Aang's neck inside the collar. Draw the sides of the collar using a couple of vertical lines and the bottom of the collar using a curved horizontal line.
-
17Done. You now have a nice sketch of Aang from Avatar: The Last Airbender. You can stop at this quick drawing for a rough, sketchy look or go for a more finished look by continuing to the step below.
-
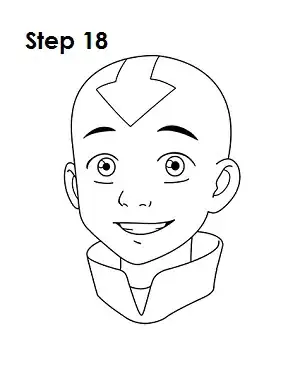
18Draw over the lines. For a more finished, inked look, carefully draw over the final sketch lines with a pen or marker. Wait for the ink to dry, and then get rid of every pencil mark with an eraser. You now have a finished inked drawing of Aang from Avatar: The Last Airbender! You can stop here or go to the final step to complete your Aang drawing.
-
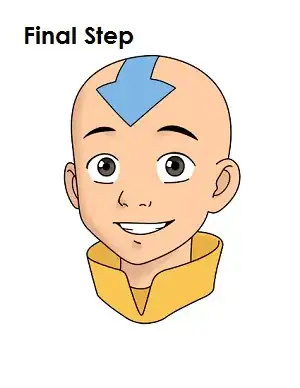
19Add color. For a completely finished Aang drawing, you have to color it. You can use markers, color pencils or even crayons! Color the arrow on his head light blue. Aang's skin is peach, but if you don’t have peach, improvise and use yellow-orange or light brown. Experiment! His eyes are brown and his collar is yellow. That’s it! You have now learned how to draw Avatar Aang, the last Airbender.
Advertisement
About This Article
Advertisement
