This article was co-authored by Clinton M. Sandvick, JD, PhD. Clinton M. Sandvick worked as a civil litigator in California for over 7 years. He received his JD from the University of Wisconsin-Madison in 1998 and his PhD in American History from the University of Oregon in 2013.
wikiHow marks an article as reader-approved once it receives enough positive feedback. In this case, 93% of readers who voted found the article helpful, earning it our reader-approved status.
This article has been viewed 119,393 times.
Purchase and sale agreements are used most commonly when selling real estate. It is drafted after the buyer makes an offer and the seller accepts the offer. The agreement lays out important terms, such as the closing date, the amount of the deposit, and any special situations that would warrant canceling the agreement. The document is usually prepared either by the attorney or the Escrow Agent who handles the closing process. If you are selling your own home, then you may end up drafting a purchase and sale agreement. Be sure to show your draft to a qualified attorney.
Steps
Beginning the Purchase and Sale Agreement
-
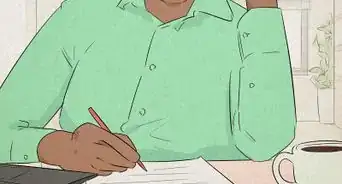
1Format the document. You should type up the purchase and sale agreement so that it is legible. You don't want the other side to claim that you hid information using small fonts, so set the font to a readable size and style. Times New Roman 12 point works for many people.
- If you are going to use your sale and purchase agreement more than once, then set it up as a template. Include blank lines for information that will change from contract to contract, such as the name of the purchaser and the purchase price.
-
2Insert a title. At the top of the page, you should center the title between the left- and right-hand margins. Title your document something like “Purchase and Sale Agreement” or “Agreement to Purchase Real Estate.”Advertisement
-
3Identify the parties to the sale. You need to identify the purchaser and the seller at the start of your agreement. You could include blank lines for their names or insert a brief paragraph like the following:
- “[Insert the name of purchaser] (‘Purchaser’), offers and agrees to purchase from [insert the name of seller] (‘Seller’), upon the terms and conditions set forth herein, the property legally described as [insert legal description].”[1]
-
4Add the legal description of property. You need to accurately describe the property in your agreement, so find the legal description of property, which is on the deed. You can get a copy of the deed at your county’s Recorder of Deeds office.
- See Get a Legal Description of Property for more information.


Explaining the Purchase Price and Payment
-
1State the purchase price. You can write: “The purchase price shall be [insert price]. After earnest money is credited, the remaining balance shall be paid by Purchaser at closing.”[2]
-
2Identify any earnest money deposited. Earnest money is a form of security deposit. It is how you show the seller that you are serious about buying the property. Without depositing earnest money, a potential buyer could claim to be interested in any number of homes, effectively removing them from the market.[3] You should include a clause describing the amount of earnest money to be deposited and the deadline for depositing it.
- Sample language could read: “Earnest money in the amount of [insert amount] shall be paid to the Escrow Agent, [insert the name of agent and the address], in the form of check or money order. Purchaser shall deliver payment to Escrow Agent no later than 5:30 pm, five (5) calendar days after Seller’s acceptance of this agreement.”
- You should also clarify that the earnest money will be credited to the purchase price.
-
3Describe the financing. You need to identify the purchaser's source of financing and ask for proof that they qualify for the financing. Generally, sufficient proof will be a letter from the purchaser's bank or lender.
- For example, if the buyer is using cash, then include the following: “This is a cash offer. The balance of the purchase price will be paid at closing by certified check.” You can also ask that the purchaser include a verification letter stating that funds are available.
- If the purchaser is getting a loan, then identify the loan type (e.g., VA, FHA, conventional, etc.) Also ask for a letter about the loan status and give a deadline for receiving the letter.
-
4List items included in the sale. A home may come with personal property inside or “fixtures.” Fixtures are improvements made on the property that cannot be removed, such as bookshelves installed in the wall or a fireplace. You should identify any fixtures or items that will be sold with the property, such as:
- wall-to-wall carpeting
- attached light fixtures and bulbs
- attached mirrors
- heating and cooling equipment
- plumbing fixtures
- ceiling fans
- doors
- windows, screens, and storm windows
- built-in kitchen appliances
- security systems
- window treatments
- awnings
- fencing
-
5Identify items not included in the sale. If there is anything the seller is taking with them, then be sure to list it in the purchase and sale agreement. For example, you might want to take your kitchen appliances with you. If so, be sure to list them.
- Also identify any leased items in the house. The purchaser needs to know that you don't own them.
-
6State whether the sale is conditioned on the buyer selling their home. This is an important provision. It is often unrealistic to expect someone to purchase a home if they can't sell their current home. By including this provision, the purchaser can get out of the purchase if they can't sell their home. Alternately, the offer might not be contingent on the buyer selling their home. Either way, explain the situation:[4]
- “This offer is contingent upon the sale and close of Purchaser’s property located at [insert location] within [insert number] days.”
- “This offer is not contingent upon the sale or close of property owned by Purchaser.”


Describing Closing Costs
-
1State what closing costs the seller must pay. Generally, the seller needs to pay any existing loans or liens. Also, the seller pays real estate commissions, title insurance policy with the buyer to receive benefit, and the balance on any leased items that remain on the property. The seller shall also transfer any existing rental or lease deposits to the purchaser at closing.
-
2Explain what closing costs the buyer must pay. The buyer can pay the deed and deed of trust recording fees, association transfer fees, transfer taxes, insurance (hazard and other), purchaser's settlement fees, and its own loan expenses.
-
3Explain who pays the taxes. The house might sell in the middle of the tax year. Accordingly, you might want to prorate the taxes. You should explain whether taxes will be prorated and what the proration will be based on.
- For example, you can base the proration on the previous year's taxes, an agreed upon amount, or the most current county information.[5]


Describing the Inspection Process
-
1Warn the buyer to get an Inspection. An inspection is a standard part of any home purchase. You should include a clause where the purchaser acknowledges that he or she has been advised to have the home inspected.
- Sample language could read: “Purchaser acknowledges that it has been recommended that Purchaser hire, at Purchaser’s own expense, the services of a professional inspector to inspect the property.” You can then include a space for the purchaser to initial.[6]
-
2State whether the sale is contingent on an inspection. Sometimes the purchaser will want the added protection of getting an inspection before finalizing the agreement. If so, you should state that the sale is contingent on the property inspection.
- You could write, “This offer is contingent upon Purchaser, at Purchaser’s expense, obtaining a property inspection and reports. The inspection may include the structural, mechanical, pest, and physical conditions relating to the property. Written notice shall be provided to Seller or Seller’s agent within five business days of acceptance of this agreement.”[7]
- The purchaser may also waive the inspection. If so, include a line for the purchaser to initial their agreement to waive inspection.
-
3Identify options if the inspection is unsatisfactory. You might get back a bad inspection report. In this situation, the purchaser might not to want to go through with the sale as is. Accordingly, you should explain options that each side can take:[8]
- The purchaser could accept the condition.
- The seller could correct the condition and provide an inspector's certification that the condition has been corrected.
- The purchaser and seller will negotiate a settlement.
- The seller does nothing and the agreement becomes null and void within a certain number of days after the seller receives the inspection reports.
-
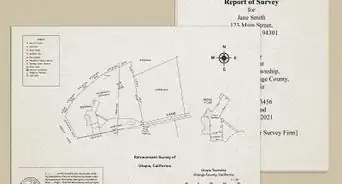
4Recommend that the purchaser get a survey. You can include a provision where the buyer acknowledges that he or she has been advised to have a survey performed. If the purchaser decides to waive a survey, then you can include that information. Ask the purchaser to place their initials beside any waiver.[9]


Making Promises about the Property
-
1List the seller's representations. A “representation” is a statement of fact which the seller warrants is true at the time of contracting. If the fact turns out to be false, then the buyer can usually cancel the contract or sue. You should list the seller's representations. The following are typical representations:
- there are no violations of zoning, fire, or building codes
- the building is not in a floodplain or a Special Flood Hazard Area
- there are no boundary line disputes
- there are no violations of setback lines, easements, or property boundary lines
-
2Describe the deed conveyed. Generally, the seller will transfer a general warranty deed to the purchaser. With a warranty deed, the seller is basically promising that they are the rightful owner of the property and that they have the right to transfer title. They also warrant that no one has a better claim to title. If these promises are false, then the buyer can sue for compensation.[10]
- Sample language could read: “Seller will convey to Purchaser good and marketable title by a valid general warranty deed.”
-
3Describe how “risk of loss” passes. The building might burn down between the date you sign a contract and the date you actually close. Who bears the risk? With a risk of loss provision, you can explain who bears the risk of an accident.
- A sample clause could read: “Seller is responsible for any loss or damage to the property before closing.”


Finalizing the Agreement
-
1Include a dispute resolution clause. If there is a dispute between the two parties, then they may end up in court. However, you can also choose ahead of time to resolve your dispute using mediation. You should include an agreement to mediate in the purchase and sale agreement.
- Sample language could read: “Any dispute arising out of, or relating to, this agreement will be submitted to a private mediation service. Any cost of mediation will be shared equally between Seller and Purchaser.”[11]
-
2Identify the time for acceptance and closing. The offer to sell doesn't last indefinitely. Instead, there is usually a deadline for acceptance. There is also a deadline for closing. You should include these dates in your purchase and sale agreement.
- For example, you could write: “This offer is void if not accepted by Seller in writing on or before [insert time and date]. Closing of the sale shall take place [insert number of days] after Purchaser’s receipt of an abstract showing marketable title in Seller or title insurance binder showing insurable title in Seller. This offer is made at [location] this [insert date].”
- Insert a signature line for the purchaser beneath this statement.
-
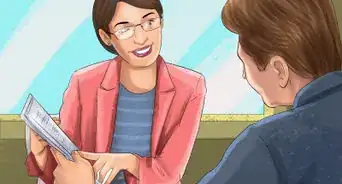
3Add the acceptance by seller. You also need a provision where the seller explicitly states that it agrees to the contract. If the seller needs to pay a brokerage fee, then include that information here.
- Sample language could read: “The foregoing offer to purchase real estate is hereby accepted in accordance with the terms and conditions specified above. The undersigned hereby agrees to pay a brokerage fee of [insert fee amount] to [insert name of the broker] in accordance with the existing listing contract.” Then insert the date and a line for the seller's signature.
-
4Show your draft agreement to an attorney. This article describes a basic purchase and sale agreement. Your needs may vary. To understand if anything is missing, you should show your draft to a qualified real estate attorney.
- You can find a real estate attorney by contacting your local or state bar association and getting a referral.
- Once you have the name of someone, call and schedule a meeting. Ask ahead of time how much the attorney charges.


Expert Q&A
Did you know you can get expert answers for this article?
Unlock expert answers by supporting wikiHow
-
QuestionCan a friend legally help someone sell property, and get paid to do so?
 Ryan BarilRyan Baril is the Vice President of CAPITALPlus Mortgage, a boutique mortgage origination and underwriting company founded in 2001. Ryan has been educating consumers about the mortgage process and general finance for almost 20 years. He graduated from the University of Central Florida in 2012 with a B.S.B.A. in Marketing.
VP, CAPITALPlus MortgageIf the friend is a licensed realtor, then yes. Otherwise, the friend cannot be paid for helping sell a property.
Support wikiHow by unlocking this expert answer.


References
- ↑ https://dlr.sd.gov/realestate/forms/purchase_agreement.pdf
- ↑ https://dlr.sd.gov/realestate/forms/purchase_agreement.pdf
- ↑ https://www.realtor.com/advice/finance/understanding-the-earnest-money-deposit-2/
- ↑ https://dlr.sd.gov/realestate/forms/purchase_agreement.pdf
- ↑ https://dlr.sd.gov/realestate/forms/purchase_agreement.pdf
- ↑ https://dlr.sd.gov/realestate/forms/purchase_agreement.pdf
- ↑ https://dlr.sd.gov/realestate/forms/purchase_agreement.pdf
- ↑ https://dlr.sd.gov/realestate/forms/purchase_agreement.pdf
- ↑ https://dlr.sd.gov/realestate/forms/purchase_agreement.pdf
About This Article

To draft a purchase and sale agreement, start by identifying the purchaser and seller by name and include a description of the property being sold. Also, be sure to explain what closing costs, such as loans or fees, will be paid by the buyer and which will be paid by the seller. In the body of the document, lay the terms of the sale agreement, including any circumstances that would make the agreement void. To end the document, state a deadline for the buyer to accept and close the sale. Then, have your document looked at by a qualified real estate attorney to look for any errors or missing elements. For more tips from our Legal co-author, like how to write a dispute resolution clause, keep reading!