This article was co-authored by Ndeye Anta Niang. Ndeye Anta Niang is a Hair Stylist, Master Braider, and Founder of AntaBraids, a traveling braiding service based in New York City. Ndeye has over 20 years of experience in African hair including braiding box braids, Senegalese twists, crochet braids, faux dread locs, goddess locs, kinky twists, and lakhass braids. Ndeye was the first female of her tribe in Africa to move to America and is now sharing her knowledge of African braids passed on from generation to generation.
This article has been viewed 16,714 times.
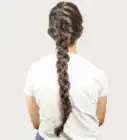
Curly hair is beautiful enough on its own, but sometimes you need to braid it back to keep it out of the way. This causes most of those beautiful curls to go away. Why not try a curly half-braided pigtail instead? It looks trendy, chic, and it keeps your hair out of the way without getting rid of those gorgeous curls. If you have straight hair, don't worry, you can get a similar look by curling your hair ahead of time!
Steps
Making Basic Curly Half-Braids
-
1Prep your hair. Brush your hair to remove any tangles so it's easier to braid.[1] If your hair is curly, you might want to finger-comb it instead, or brush it with a wide-toothed comb. This will help prevent it from getting too frizzy. If you have straight hair, curl your hair using your favorite curling method.
- This style works well for both short and long hair.
-
2Part your hair down the center. You can also create a side part instead, but make sure that it angles towards the center-back of your head. You want your hair to be split evenly in the back.Advertisement
-
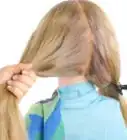
3Tie and clip half of your hair out of the way. Leave the other side of your hair loose. This will make it easier to create the braids, especially if you have thick, curly hair that likes to get everywhere.
-
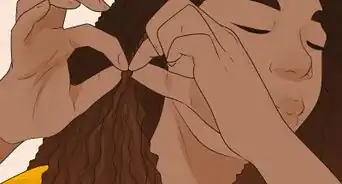
4Begin with a normal braid. If you plan on doing a Dutch braid (reverse French braid), cross the left and right strands under the middle one. If you plan on doing a French braid, cross the left and right strands over the middle one. You only need to braid for 2 cross-overs.
- A Dutch braid sticks out of your hair. A French braid lays smoothly against your hair.
-
5Continue with a Dutch or French braid. Add a small strand of hair to the left and right sections before crossing them under/over the middle one. If you want a Dutch braid, cross the left and right stands under the middle strand. If you want a French braid, cross the left and right strands over the middle one.[2]
-
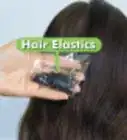
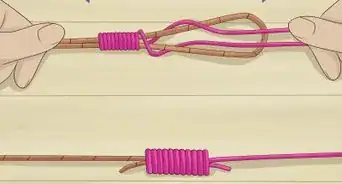
6Tie the braid off when you reach the nape of your neck. You can tie it off now with a clear elastic or a hair tie that matches your hair color, or add an accessory such as a ribbon or bow.[3] If you have very long hair, you can continue normal braiding for a few more cross-overs before tying it off.
-
7Repeat the process on the other side of your head. Unclip the hair on the other side of your head, and make another identical braid. If you crossed the strands under last time, make sure that you cross them under this time, too. If you crossed the strands over last time, then you need to cross them over this time as well.
-
8Touch up your curls, if needed. If you have naturally curly hair, you could shape the curls by wrapping them around your finger. Use a curl enhancing cream to define your natural curls. Feel free to make 1 big curl, or several small ones. If you curled your straight or wavy hair previously, you may need to touch it up with a curling iron.
-
9Consider adding some final touches. For a more boho-chic look, you could muss up the hair at your temples to give it a wispier look. You could also tie pretty ribbons around the ends of your braids to hide the hair ties, or clip in cute hair accessories.


Doing Dorothy Gale Braids
-
1Prep your hair. Brush your hair to remove any tangles, then curl it using your favorite curling method. If you have naturally curly hair, consider combing it with your fingers or a wide-toothed comb instead. This will help detangle it without making it frizzy.
- Brush a detangling product through your hair before you start if you have any stubborn kinks or knots.[4]
- If you decide to curl your hair, consider doing it the day before.[5]
- This style is better suited for long hair. You can attempt it with shorter hair, but it may not look exactly like Dorothy's.
-
2Part your hair down the center. Twist and clip one of the halves out of the way. Avoid doing a side or off-center part for this style.[6]
-
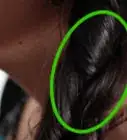
3Begin doing a twisted crown braid. Take a small section of hair from you front hairline, close to your center part. Twist it upwards, towards the center part.[7]
-
4Add a thin section of hair to the twisted section, and twist again. Make sure that you are only grabbing hair from your hairline and not the part.[8]
-
5Continue twist braiding your hair until you reach the nape of your neck. Keep the twists nice and tight as you go. Remember, you can always loosen it up later if you wish to do so.[9]
- You want all of your hair gathered into the twist by the time you reach the nape of your neck.
-
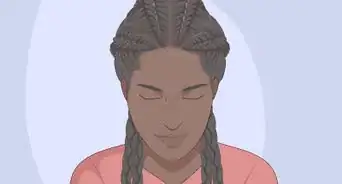
6Finish off by braiding your hair. Divide the twisted hair into 3 even sections. Braid them together 3 to 4 times, or until you reach your collar bone. Secure the braid with another hair tie.[10]
- If you are having trouble with this step, secure the twisted hair with a clear hair elastic first. Braid your hair, tie it off, then snip off the first hair tie.[11]
- If you have short hair, you may need to braid only once or twice.
-
7Repeat the process on the other side of your head. Unclip your hair. Twist braid it towards the nape of your neck. Make sure that you are twisting it upwards as before. Divide it into 3 sections, then normal braid it until you reach your collar bone. Tie it off with another hair tie.
-
8Shape your curls, if needed. If you curled your hair, you may need to touch the curls up with a curling iron. If you have naturally curly hair, wrap your hair around your forefinger to give it a better shape. Work a little curl-defining cream through your hair to help shape the curls.
-
9Touch up your hair. For a traditional Dorothy look, tie pretty ribbons into bows around the base of your braids. For a more boho-look, you could gently loosen up the twisted braid with your hands. Set your style with a light misting of hairspray, if needed.[12]


Things You'll Need
- Brush or wide-toothed comb
- Hair ties
- Curl-defining cream or gel
References
- ↑ Ndeye Anta Niang. Hair Stylist & Master Braider. Expert Interview. 10 January 2020.
- ↑ Ndeye Anta Niang. Hair Stylist & Master Braider. Expert Interview. 10 January 2020.
- ↑ http://www.glamour.com/gallery/best-braided-hairstyles-for-fine-hair-curly-hair#8
- ↑ Ndeye Anta Niang. Hair Stylist & Master Braider. Expert Interview. 10 January 2020.
- ↑ http://www.cutegirlshairstyles.com/hairstyles/braids/dorothy-braids-halloween-hairstyles/
- ↑ http://www.cutegirlshairstyles.com/hairstyles/braids/dorothy-braids-halloween-hairstyles/
- ↑ http://www.cutegirlshairstyles.com/hairstyles/braids/dorothy-braids-halloween-hairstyles/
- ↑ http://www.cutegirlshairstyles.com/hairstyles/braids/dorothy-braids-halloween-hairstyles/
- ↑ http://www.cutegirlshairstyles.com/hairstyles/braids/dorothy-braids-halloween-hairstyles/
About This Article