This article was co-authored by wikiHow Staff. Our trained team of editors and researchers validate articles for accuracy and comprehensiveness. wikiHow's Content Management Team carefully monitors the work from our editorial staff to ensure that each article is backed by trusted research and meets our high quality standards.
There are 13 references cited in this article, which can be found at the bottom of the page.
wikiHow marks an article as reader-approved once it receives enough positive feedback. In this case, 92% of readers who voted found the article helpful, earning it our reader-approved status.
This article has been viewed 293,432 times.
Learn more...
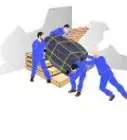
If you’re planning on getting rid of an upright piano, transporting it intact is very difficult. It’s much easier to disassemble the whole piano and move it in pieces. Dismantling a piano requires patient work and you won't be able to use the piano again because you'll probably damage pieces while taking it apart. If this is okay with you, then start by unscrewing all of the outer pieces to expose the piano’s inner workings. Then remove the keyboard and action brackets. Finally, take apart the rest of the piano structure to get it ready for disposal.
Steps
Unscrewing the Outer Pieces
-
1Open the key cover and piano lid. The key cover is located on the keyboard over the keys, and the lid is on the top portion of the piano. Both of these pieces should open easily. Slide the key cover back by lifting slightly and pushing it backwards until it stops. The lid on top of the piano is on a hinge and opens from the front.[1]
- Sometimes the piano lid is screwed down or secured in some way. If the lid won’t lift off, search for screws holding it down. Remove them to lift the lid.
-
2Unhinge the piano desk to expose the harp. The desk is the part of the piano in front of you where the sheet music sits. With the lid open, you can look and reach behind the desk. There is a hinge on each side of the desk securing it to the piano body. Undo those hinges by sliding the hooks out of each socket to free the desk. Then lift the desk off the piano.[2]
- You may need help for this step. Piano desks can be heavy, and a second person will make the lifting much easier.
- Some piano builders secure the desk with screws. If you find screws holding the desk to the body, remove them to lift the desk off.
Advertisement -
3Unscrew the piano key cover. The key cover is usually attached with screws. After you remove the piano desk, look behind the cover and find the screws. Remove them and lift off the key cover.[3]
-
4Pull out the lower board to expose the inner mechanism. The lower board is the flat, vertical section underneath the piano where the foot pedals come out from. It houses some of the piano’s inner mechanism. Usually, it is only secured by a pin and spring. Look under the keyboard for a metal pin. Push this upward to release the board. Then guide the board out of position.[4]
- Keep your hand on the board when you push the pin. It could come loose suddenly and fall on you.
-
5Unscrew the top lid. The final outer piece is the top lid, which you lifted up at the start. It is secured with hinges. Unscrew the hinges from the piano body to free the lid. Then lift the lid off.[5]
- Put all of these wood pieces you’re removing in a safe place. If you leave them out and near the work area, you could trip on them while you’re working.


Removing the Keys and Action
-
1Remove the muffler felt from the action. The muffler felt presses down on the piano’s strings to dampen the sound. It runs across the piano strings about eye level when you're sitting. Usually the muffler is held down with a wingnut on one side. Unscrew that wingnut and lift the muffler out when it comes loose.[6]
- Sometimes the muffler doesn’t have a wingnut. In this case, press the spring on the side of the muffler to disengage its mechanism. Then lift it out of the piano.
-
2Unscrew the bolts from the action brackets. The piano action houses the hammers that strike the strings. It is located just above the keyboard. The action is held down by 4 metal brackets connected to the piano with 4 knob screws. Turn all the knobs counterclockwise to remove them. Once all 4 are removed, the action is no longer secured.[7]
- Usually you can turn these knobs by hand without a screwdriver. If there are slots for a screwdriver in the knobs, however, then use a screwdriver.
-
3Pull the action mechanism forward and then lift it off. With the knobs unscrewed, the action is free to move. Grab 2 of the brackets from the top and pull the action forward until it reaches about a 45-degree angle. Then lift straight up to remove it.[8]
- If you want to keep the action in good condition, only lift from the brackets, because touching the internal mechanism could cause damage. If you are planning on scrapping the piano pieces, then don’t worry where you grab to lift the action out.
- Having another person to help lift the action out is a good idea because the action could be unexpectedly heavy.
-
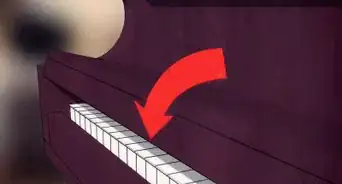
4Lift each key off the keyboard. The keys just rest on pins without being secured down, so they just lift off. Pull each key straight up to remove the keyboard.[9]
- Put the keys aside into a bucket or box. Music shops or professional instrument technicians may want to buy the keys to restore other pianos. Try posting your keys online or asking local music shops if they are interested in buying spare parts.


Disassembling the Piano Structure
-
1Loosen the tension in every string on the harp for safety. With the keyboard and action removed, you can easily access the piano harp. This is a large, metal frame secured to the back of the piano where the strings are attached. Do not do anything else until you loosen the strings. The harp has dozens of metal strings under high tension, and if one snaps it can cut you. Find the tuning pegs at the top of the harp. Then turn each one counterclockwise until the string sags.[10]
- For a faster option, you can buy a string turner. This works like a drill that wraps around the tuning fork and loosens or tightens strings quickly.
- If you want to salvage or sell the strings, remove them entirely by clipping them with wire cutters right below the tuning peg after you loosen them.
-
2Unscrew the key bed from the piano body. The key bed, where the keys sat on before you removed them, is attached to the piano with a series of screws. The screw locations depend on the manufacturer. Look up the back legs of the key bed for any screws holding it to the body. Then look along the bottom of the key bed. Remove any screws you come across, then pull the key bed off.[11]
- If you’re throwing this piano out anyway, then you don’t have to be so careful. Use a mallet or sledgehammer to break the key bed away from the piano body and make the job much faster.
- With the key bed gone, the rest of the piano may be off balance. Be careful standing behind it and keep children away from the piano until you’re done working.
-
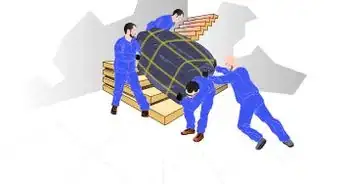
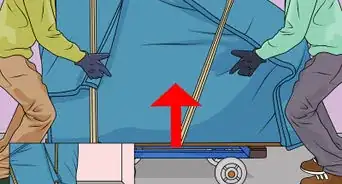
3Lay the piano on its back. With the key bed gone, the piano might tip over, so it’s safer to finish the work with the piano on its back. Stand behind the piano and slowly guide it down to the floor.[12]
- This piece is heavy, and so have someone else around to help.
- Be careful to avoid trapping your fingers to the floor when you guide the piano down.
-
4Remove the piano side supports. The final outer parts of the piano are the two planks on each side. On most upright pianos, this is where the wheels are. Look inside the piano frame for screws holding these planks down. Remove all of them and then pull the side planks off.[13]
- These planks will also come off with a few hits from a hammer. If you aren’t trying to keep the wood in good condition, take a mallet and pound the planks from the inside out. A few clean hits should dislodge them.
-
5Pull off the piano harp to complete the job. The final piece to remove is the piano harp. It is attached to the piano body with bolts and screws. Work your way around the whole harp and remove all the screws you see. Then lift the harp off to complete the piano disassembly.[14]
- On some upright pianos, the harp is glued down to the wood. In this case, even if you remove all the screws, you won’t be able to get the harp out.
- Remember that the strings should be loose before you remove the harp.


Community Q&A
-
QuestionHow do you remove the tuning pins? Is there a special tool?
 David GibsonCommunity AnswerThere is a special tool you can buy online, but it essentially a wrench with a socket, and will take forever to remove all the pins. There is no metric or English socket that will fit, but the 1/4 inch drive female end of a socket fits perfectly. Take the smallest you have - 9/32 or 7 mm - and flip it and insert it in an electric drill. The pins should come out very easily.
 -
QuestionDo I need to remove pins before removing the harp?
 Community AnswerWhile the tuning pins are not actually attached to the cast-iron plate ("harp"), they do pass through the plate. With a grand piano, the plate can be pulled straight up after removing the lid, and can slide up and off of the pins still in the pin block. An upright piano, spinet through upright grand sizes, cannot be slid off of the tuning pins as the keybed limits movement in that direction. If the keybed is fully removed then it may work, but at that point it would have just been easier to build a piano mock-up from plywood and lumber.
 -
QuestionHow do I remove keys from a piano?
 Community AnswerFor antique square grands, lift the band of wood just on the front side of the keys. It will slide vertically. Once removed, the key assembly can be slid out intact.
Warnings
- Do not dismantle a piano if you still plan on using it. You will need a professional to rebuild it from scratch.⧼thumbs_response⧽


References
- ↑ https://anamazingmachine.wordpress.com/2015/01/26/everything-you-ever-wanted-to-know-about-disassembling-an-upright-piano-but-were-too-afraid-to-ask/
- ↑ https://youtu.be/RxFeBcsGtgg?t=104
- ↑ https://youtu.be/RxFeBcsGtgg?t=217
- ↑ https://youtu.be/2sOEvkyihS0?t=87
- ↑ https://anamazingmachine.wordpress.com/2015/01/26/everything-you-ever-wanted-to-know-about-disassembling-an-upright-piano-but-were-too-afraid-to-ask/
- ↑ https://youtu.be/RxFeBcsGtgg?t=141
- ↑ https://youtu.be/G4lZ7qLh3CU?t=49
- ↑ https://youtu.be/G4lZ7qLh3CU?t=86
- ↑ https://www.howardpianoindustries.com/removing-keys-action-from-a-grand-piano-keyframe/
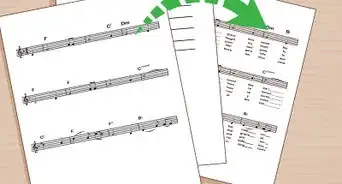
About This Article

It’s possible to dismantle a piano so it’s easier to get rid of, but keep in mind that you won’t be able to use the piano again once you do. To dismantle a piano, all you need is a screwdriver. The first thing you'll need to do is unscrew the cover and top lid so you can remove the outer pieces and access the keys and internal parts. Once those are off, you'll need to loosen the strings and the key bed that holds them in place so you can pull out the harp and internal pieces. After you've removed everything, the last thing you'll need to do is lay the piano down on it’s back and take off the sides and legs. For tips about how to remove the side planks with a hammer, keep reading!