This article was co-authored by wikiHow staff writer, Savannah Vold. Savannah Vold graduated from the University of California at Santa Barbara in 2020, earning her B.A. in English with a specialization in Literature and Culture of Information. Passionate about accessibility and fostering a love for the arts, she started her literary, arts, and culture-based website, The Executant. At wikiHow, Savannah feels fortunate to learn about new and exciting topics daily and is driven to empower anyone, anywhere, by providing accurate and engaging knowledge.
There are 9 references cited in this article, which can be found at the bottom of the page.
Learn more...
If you’ve been looking for a way to get rid of peach fuzz and reveal a smoother, brighter complexion, dermaplaning is it! The benefits of dermaplaning are endless—who wouldn’t want smoothed wrinkles, smaller pores, and softer skin? While dermaplaning may seem a little scary (a blade to the face? Eek!), it seriously couldn’t be easier to do safely and effectively at home. In this article, we’ll teach you the best way to dermaplane and protect your lovely face, so your skin looks dewy and hydrated.
Things You Should Know
- Dermaplaning is totally safe so long as you use short, gentle strokes and don’t go over the same patch of skin more than 3 times to protect from over-exfoliation.
- Start with clean, dry skin to ensure your single-blade dermaplaning tool doesn’t spread any bacteria and glides smoothly across your face.
- Use 1 hand to pull your skin taught at the jawline. Hold your dermaplaning tool at a 45-degree angle, moving downwards in short, light strokes toward your mouth.
- Finish the job with a hydrating moisturizer to lock in your gorgeous glow. Never dermaplane more than once every 4 weeks to avoid skin irritation.
Steps
Dermaplaning Your Skin
-
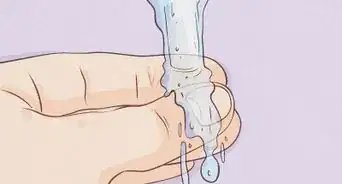
1Wash and dry your face. After applying a dime-sized amount of a gentle cleanser and washing it off, pat dry your skin with a towel. The drier your face is, the easier it will be for you to run the blade over the surface of your skin.[1]
- A clean base helps you prevent breakouts that could occur from your dermaplaning tool spreading bacteria from dirty skin into your freshly exfoliated pores.
-
2Use a single-blade dermaplaning tool. Single-blade dermaplaning tools are made for dermaplaning, making them the perfect tool for removing dead skin and peach fuzz. While a traditional, single-blade dermaplaning tool is the most popular, standard option, there are countless dermaplaning tools to choose from, such as the following:
- Derma Flash Luxe: This is one of the most expensive options, but it’s likely to have the best effects as it uses sonic pulsations to brighten and exfoliate the skin.
- Stacked Skincare Dermaplaning Tool: This dermatologist-recommended tool boasts a lightweight yet sturdy design, as well as the option to replace the blades after use.
- Single-Use Dermaplaning Tool: You can’t go wrong with a classic! A single-use blade gets the job done and is super affordable.
- Never use the same blade more than once. A dirty, used blade can cause infection and irritation.
Advertisement -
3Pull the skin taught, moving the blade in short, light strokes. Starting near your ear, pull the skin at your jawline taught with your free hand. Then, hold your blade at a 45-degree angle and move in light, downward strokes as you work your way across your face from ear to mouth.[2]
- Pulling your skin taught ensures that your blade lightly glides over your skin and minimizes the potential of knicking yourself.
- Be sure to work in short strokes. Using longer strokes across your face will result in a patchy finish and an irritated skin barrier.
-
4Work in sections over your cheeks, jaw, forehead, chin, and mouth. After you’ve dermaplaned your cheeks and jawline, use the same light, downward strokes to dermaplane your chin, upper lip, and forehead. Avoid going over the same spot more than 3 times to protect from over-exfoliating your skin.[3]
- Always hold your blade at a 45-degree angle, dermaplaning your skin in the direction that your hair grows (towards your chin).
- Remove any built-up skin and hair on the blade by wiping it with a clean paper towel or rinsing it under the sink.
- Sucking in your lips, so they lie taught against your teeth will make dermaplaning your upper mouth area easier.
-
5Finish by hydrating with a gentle moisturizer. Now that you’ve dermaplaned your entire face finish up by applying a dime-sized amount of hydrating moisturizer to protect your skin and amplify that gorgeous glow! Moisturizing after exfoliating is important because your skin is extra-prone to dryness and irritation after removing that top layer of dead skin.[4]
- To soothe nicks or irritation, tone your face with witch hazel before moisturizing.


Protecting Your Skin After Dermaplaning
-
1Wait 4 weeks before you dermaplane again.[5] Dermaplaning strips the top layer of dead, dry skin and hair, leaving renewed and refreshed skin underneath. This new layer of skin is extra-sensitive and must be nourished rather than exfoliated until the 4-week mark when it's ok to dermaplane again.
- Over-exfoliation can weaken the skin’s barrier making it more prone to infection and irritation.
-
2Add a hydrating serum to your routine for extra-glowing skin. The more you moisturize your skin, the better! Applying a hyaluronic acid serum before your moisturizer is a great way to give your skin the drink it needs, keeping it supple and luminous.[6]
- Hyaluronic acid reduces the appearance of wrinkles and fine lines—oh ya!
-
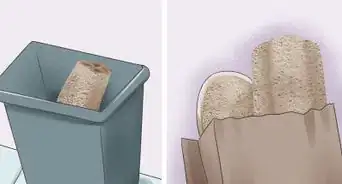
3If you can, don’t wear any makeup for at least 1 day after dermaplaning. It’s best to avoid wearing makeup for at least 1 day after your at-home treatment to avoid clogging your pores. Exfoliation opens up your pores, making them more susceptible to bacteria, resulting in skin irritation or acne.[7]
- Avoid makeup for 48 hours for best results, but 24 is sufficient.
- While refraining from wearing makeup after your treatment may be frustrating, the pros far outweigh the cons of aftercare. Smoothed wrinkles, fine lines, and a brighter complexion overall? Yes, please!
-
4Wear sunscreen daily. Apply sunscreen every morning to protect your skin from the sun’s damaging UV rays. Be sure to avoid the sun as best you can for at least 3 days after dermaplaning.[8]
- Because you’ve removed the top layer of dead skin, you’ll be more prone to sunburn and sun-related skin damage like wrinkles.
-
5Avoid chlorine for 3 days. While swimming in pools is heavenly, irritating your freshly exfoliated skin is not. Chlorine is a harsh, skin-stripping chemical best avoided for at least 3 days after your at-home treatment.[9]
- Sitting in a chlorinated pool or hot tub is fine. Just be sure not to get your face wet.


Warnings
- Don’t dermaplane if you have active acne, flaring rosacea, or extra sensitive skin, as it will cause further irritation.[12]⧼thumbs_response⧽
Things You’ll Need
- A gentle cleanser
- A single-blade dermaplaning tool
- A hydrating moisturizer
- Sunscreen
- Witch hazel (optional)
- Hydrating serum (optional)


-Step-12-Version-3.webp)


References
- ↑ https://youtu.be/_9k3NHh4lxo?t=390
- ↑ https://youtu.be/_9k3NHh4lxo?t=434
- ↑ https://youtu.be/r2UUwArpyNs?t=562
- ↑ https://www.aad.org/public/everyday-care/skin-care-secrets/routine/safely-exfoliate-at-home
- ↑ https://healthy.marshallhealth.org/2017/09/06/dermaplaning-what-to-expect/
- ↑ https://my.clevelandclinic.org/health/articles/22915-hyaluronic-acid
- ↑ https://www.aestheticsjulieedwards.co.uk/wp-content/uploads/2019/08/Dermaplaning-Aftercare.pdf
- ↑ https://healthy.marshallhealth.org/2017/09/06/dermaplaning-what-to-expect/
- ↑ https://www.aestheticsjulieedwards.co.uk/wp-content/uploads/2019/08/Dermaplaning-Aftercare.pdf
About This Article