This article was co-authored by Amy Guerrero. Amy Guerrero is an Arts and Crafts Specialist and the Owner of Sunshine Craft Co., a crafting studio based in Phoenix, Arizona. Amy specializes in macrame, DIY crafting, and teaching fiber arts. She offers monthly in-person and online workshops along with having developed a range of DIY craft kits for at-home projects. Amy holds a BS in Industrial Design from Philadelphia University. She worked as a graphic designer before starting her own business. Sunshine Craft Co. is a creative hub that offers a wide range of workshops, tools, and resources for any craft project to inspire creativity and community engagement.
There are 8 references cited in this article, which can be found at the bottom of the page.
wikiHow marks an article as reader-approved once it receives enough positive feedback. In this case, 88% of readers who voted found the article helpful, earning it our reader-approved status.
This article has been viewed 85,971 times.
Découpage is a great way to improve the look of a plain box. You can find or print out images to jazz up the box to your specific tastes. Start by prepping the box, then cut out the images you want to use. Once everything is ready, seal the images on the box with a thin layer of découpage glue or watered-down school glue.
Steps
Preparing the Box
-
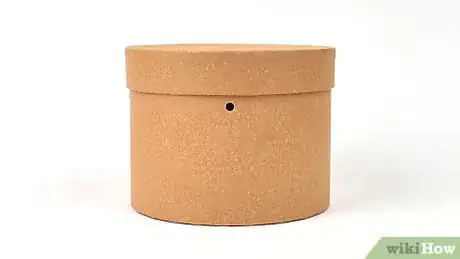
1Find or make a box to decorate. Look at your local craft store for plain boxes to decorate. You'll likely be able to find them in wood or heavy cardboard. You can also upcycle old boxes, such as shoe boxes or small cardboard shipping boxes. You can even use cereal boxes or other food boxes![1]
- You can also découpage old trunks.
- If you prefer, you can make a box out of cardstock or another heavy paper.
-
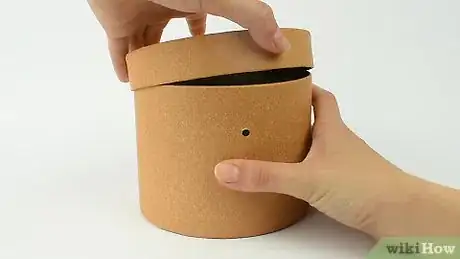
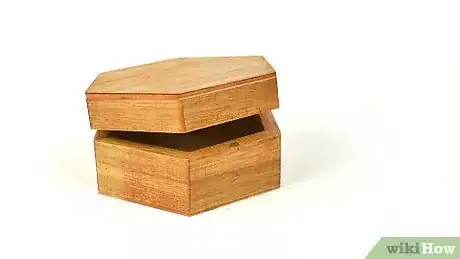
2Take off the lid off your box if it has one. This step will make the box easier to paint and decorate. If it's a shoe box or something similar, just pull the lid off. If you bought a wooden box, you may need to unscrew the hinges and put them to the side to take the lid off completely.[2]
- Make sure to put the metal parts in a safe place.
Advertisement -
3Sand down wood boxes with medium-grit sandpaper as needed. If you have a wood box with rough edges, sandpaper can quickly take care of that problem. Run the sandpaper back and forth over the rough areas until the whole surface is smooth.[3]
- Brush the dust off with a cloth when you're done.
- Aim for a sandpaper in the 160-220 grit range.
-
4Add primer or paint if you want a background. Pick up gesso (primer) from a craft store, along with a foam brush or a 1 to 2 in (2.5 to 5.1 cm) flat bristle brush. Paint the gesso on in a single, even layer, trying to go the same direction along each side. Once it's dry, add a layer of acrylic paint the same way if you'd like.[4]
- A primer can make it easier for your paper to stick, particularly with wood or slick boxes (such as cereal boxes) but it's not strictly necessary. However, if you plan to leave some areas blank when you add your paper decorations, you may want to paint the box a color of your choosing. In that case, you should prime it first.
- You may need to sand the box again to smooth out the surface for the paper.
Finding Images
-
1Print off designs from the internet for a custom box. You can find many free images online just by doing an image search with your term and the words "free images." To do an image search, click on "images" on most search engines, then type in your search term in the query box.[5]
- For example, you might search for "free images butterflies" to get images of butterflies.
- Don't use any copyrighted works!
-
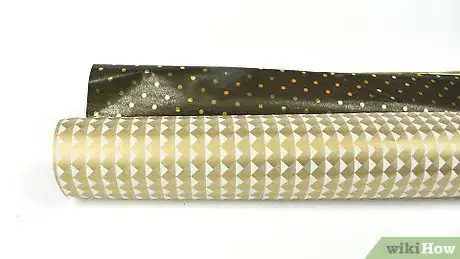
2Try wrapping paper, scrapbook paper, or wallpaper for cohesiveness. These types of papers make it easy to create a bold look without having to think too hard. The designer of the paper has already done it for you! You can just cut and glue. In fact, you don't even necessarily need to cut out shapes with this type of paper, as you can just use it in one big piece to cover the box.[6]
- Check dollar stores for cheap wrapping paper. You may be able to find leftover wallpaper scraps for cheap at home improvement stores.
- Look at the scrapbook paper aisle of craft stores. You can buy single sheets, often for less than $1 USD a piece. Just make sure to buy enough to cover your box.
-
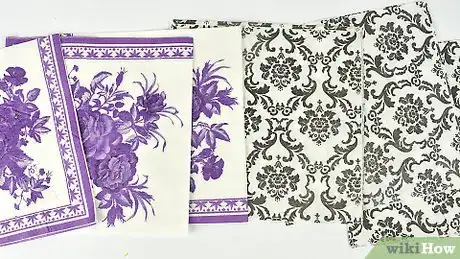
3Use decorative paper napkins or tissue paper for a seamless design. While these are thin, they actually découpage fairly well if you're careful. You can use holiday napkins, for instance, or floral designs for a festive box.[7] Because the paper is so thin, you won't see the edges as much as you would with other paper.[8]
- You can also use colorful tissue paper meant for stuffing in packages.
- Because napkins are so thin, you can often leave a border around the edge, and it will disappear or look feathery when you apply the glue. It becomes translucent.
-
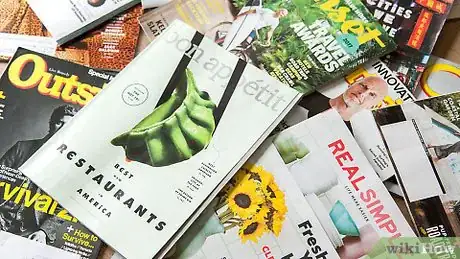
4Scour magazines and old books for free images to make a collage. Magazines often have pretty images, both in the main articles and advertisements. With this type of design, you'll have to get more creative in how you combine images, but if you do, you'll have a unique piece of art that's all yours.[9]
- Old, damaged books are also a good option. You can find images or just use the text to create a book-centered box.
- Always test out the paper first because it can be difficult to glue down some glossy paper. If the paper is too glossy, you can try scanning and printing the image on a different type of paper.
Cutting out the Images
-
1Go around the edges of the image for a clean-cut look. If you want your design to be crisp, this is the best option. However, it does take time to remove the border completely, so be patient and use a sharp pair of scissors. Cut out all the images you plan to use at once to make it easier to design your box.[10]
-
2Leave a border for a fun and efficient design. If you don't have the patience to cut out all the detailed edges of a design, you're not alone! The key to this option is to make the border as even as you can around the design. For instance, if you're cutting a flower out of wrapping paper, leave a 0.25 in (0.64 cm) around the whole design.[11]
- Try to smooth out the border so it has curved, even edges.
-
3Rip out pieces to create interesting layered effects. If you're using things like book pages, magazine pages, or even tissue paper, try ripping the edges of the pieces you're using. As you layer them on your box overlapping each other, you'll add texture to your piece, making it more interesting and unique.
Arranging and Gluing on the Paper
-
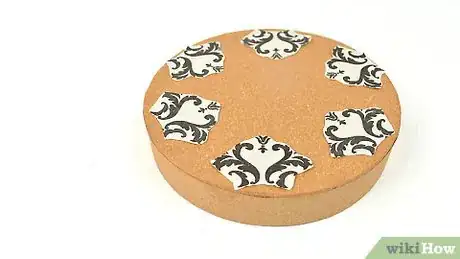
1Lay out your images first before you start gluing. Once you start gluing, you can't change it! Therefore, it's best to create your design first by laying out the pieces you want to use.[12] When you have a design you like, set them to the side in the way you want to add them to your box so you can quickly move them over as needed.[13]
- You can overlap images if you'd like!
- Don't forget you can use whole sheets if you prefer. Just cut them to fit each side.
-
2Add a thin layer of watered-down glue or découpage glue. Use a flat 1 to 2 in (2.5 to 5.1 cm) sponge or flat brush. Dip your brush into the glue and paint a thin layer across the surface of the box.[14] Work on one side at a time; don't add glue to the whole box at once, as it will just dry out.[15]
- Mod Podge is the most popular brand of découpage glue. If you don't have Mod Podge, mix equal parts school glue and water together to use instead.
-
3
-
4Put a thin layer of glue on top of each image. Dip your paintbrush back into the glue mixture. Run it over the images, adding another thin layer of glue on top.[18] Work in small, gentle strokes so you don't tear the paper. Since it's wet, it will tear more easily, particular if you're using napkins or tissue paper.[19]
- Try to smooth out any bubbles you can with the brush. In some cases, you may need to smooth it out with your finger and a bit more glue.
-
5Repeat on the other sides and wait for it to dry. Do each side individually so you have time to get the images down before the glue dries. Once all the sides are done, leave it out to dry completely before you put the box together.[20]
- Don't worry, the glue will dry clear.
Expert Q&A
Did you know you can get expert answers for this article?
Unlock expert answers by supporting wikiHow
-
QuestionWhat supplies do I need for decoupage?
 Amy GuerreroAmy Guerrero is an Arts and Crafts Specialist and the Owner of Sunshine Craft Co., a crafting studio based in Phoenix, Arizona. Amy specializes in macrame, DIY crafting, and teaching fiber arts. She offers monthly in-person and online workshops along with having developed a range of DIY craft kits for at-home projects. Amy holds a BS in Industrial Design from Philadelphia University. She worked as a graphic designer before starting her own business. Sunshine Craft Co. is a creative hub that offers a wide range of workshops, tools, and resources for any craft project to inspire creativity and community engagement.
Arts & Crafts Specialist
-
QuestionI have a wooden box I want to stencil and add pictures to découpage. What is the best way?
 Community AnswerTry any of the techniques in the article for your box. Make sure you don't use too much glue, though, or it will soak into the wood and will take a long time to dry. If you wanted to do the stencils with ink, try using a permanent marker.
 -
QuestionI'm using lightweight cardboard, and Mod Podge makes it wrinkle and bubble up. How can I prevent this?
 JLuckenbillCommunity AnswerUse a thinner layer of the glue when applying it, as too much glue will make it wrinkle.
Things You'll Need
Preparing the Box
- Box
- Screwdriver, optional
- Sandpaper, optional
- Gesso, optional
- Acrylic paint, optional
- Paintbrushes, optional
Finding Images
- Internet access
- Old books and magazines
- Decorative napkins or tissue paper
- Scrapbook paper, wallpaper, or wrapping paper
Cutting out the Images
- Sharp scissors
- Images on paper
Arranging and Gluing on the Paper
- Paintbrushes
- Watered-down school glue or Mod Podge
- Images on paper
References
- ↑ http://www.auntannie.com/DecorativeCrafts/Decoupage/
- ↑ https://www.craftmunki.com/decoupage/super-simple-romantic-decoupage-box/
- ↑ https://www.craftmunki.com/decoupage/super-simple-romantic-decoupage-box/
- ↑ https://www.craftmunki.com/decoupage/super-simple-romantic-decoupage-box/
- ↑ http://www.auntannie.com/DecorativeCrafts/Decoupage/
- ↑ https://thecraftedlife.com/diy-floral-decoupage-storage-box/
- ↑ Amy Guerrero. Arts & Crafts Specialist. Expert Interview. 9 October 2020.
- ↑ https://www.craftmunki.com/decoupage/super-simple-romantic-decoupage-box/
- ↑ http://www.auntannie.com/DecorativeCrafts/Decoupage/
- ↑ http://www.auntannie.com/DecorativeCrafts/Decoupage/
- ↑ https://thecraftedlife.com/diy-floral-decoupage-storage-box/
- ↑ Amy Guerrero. Arts & Crafts Specialist. Expert Interview. 9 October 2020.
- ↑ https://www.idealhome.co.uk/diy-and-decorating/how-to-make-a-pretty-decoupage-box-67515
- ↑ Amy Guerrero. Arts & Crafts Specialist. Expert Interview. 9 October 2020.
- ↑ https://www.idealhome.co.uk/diy-and-decorating/how-to-make-a-pretty-decoupage-box-67515
- ↑ Amy Guerrero. Arts & Crafts Specialist. Expert Interview. 9 October 2020.
- ↑ https://www.craftmunki.com/decoupage/super-simple-romantic-decoupage-box/
- ↑ Amy Guerrero. Arts & Crafts Specialist. Expert Interview. 9 October 2020.
- ↑ https://www.craftmunki.com/decoupage/super-simple-romantic-decoupage-box/
- ↑ https://thecraftedlife.com/diy-floral-decoupage-storage-box/
