This article was co-authored by Ryaan Tuttle. Ryaan Tuttle is a Home Improvement Specialist and the CEO of Best Handyman, Inc. in Boston, Massachusetts. With over 17 years of experience, he specializes in building home service businesses, focusing on creating scalable and efficient brands. With the help of his global team, the companies have achieved over 10+ million in sales and received recognition through magazine features, and enjoy partnerships with wikiHow and Jobber field service software. Boston Magazine and LocalBest.com have named Best Handyman Boston the Best Handyman in Boston. Ryaan holds Construction Supervisor and Home Improvement Contractor Licenses.
There are 10 references cited in this article, which can be found at the bottom of the page.
This article has been viewed 31,079 times.
Fiberglass reinforced polymer (FRP) is a lightweight, durable, and strong material that can be very useful in a variety of contexts. Whether you’re cutting out panels for a wall or ceiling or fabricating a smaller-scale project, give the FRP a chance to acclimate before you make any measurements or cuts. When deciding how much to trim away, you’ll need to account for the material’s inevitable expansion and contraction. Use a carbide-coated drill or saw to cut through thick panels. As glass fiber is highly abrasive, keep your tools clean and sharp and wear personal protective equipment at all times.
Steps
Acclimating the FRP
-
1Bring the FRP panels to the installation site or somewhere with a similar climate. During shipping and storage, the FRP panels will have expanded and contracted based on ordinary climate changes. Before you cut or install the panels, give them a chance to settle in the right climate. You can do this at the installation site if the environment is right, or you can bring the panels to another site that accurately represents the temperature and humidity levels they’ll experience once installed.[1]
- If you’re working in an unfinished job site, wait until the building is sealed off and the heating and cooling systems are up and running before acclimating or installing the FPR panels.
- Pay especially close attention to getting the right climate set up if you’ll be installing the panels in a high-humidity or low-temperature environment.
-
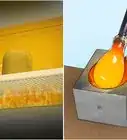
2Lay out the FRP panels on a flat, dry surface. Once you’ve located a suitable place with the right climate, unpack the panels and remove any banding or shipping materials. Lay down 1 panel onto a clean, level surface that will stay dry while the panels acclimate. Stack the rest of the panels on top of the first and leave them uncovered.
- Avoid placing the panels on concrete or any surface that could become damp overnight.
Advertisement -
3Allow the FRP panels to acclimate for 24 hours before cutting them. Wait 1 full day while the FRP adjusts to the new climate conditions. Keep the temperature and humidity levels relatively steady and make sure the panels stay dry.
- Don’t skip this step! If you cut the panels before they’ve had a chance to acclimate, they may shrink or grow to the incorrect size.


Making Cuts
-
1Wear personal protection equipment (PPE) when cutting FRP panels. Before making any cuts, put on safety glasses or goggles to protect your eyes, as well as a dust-filtering mask or respirator to prevent any particles from getting into your lungs. Slip on a pair of work gloves to protect your hands, and, if you’re operating noisy power tools, use acoustic earmuffs or earplugs as hearing protection.
- Fiberglass particles can be incredibly itchy and irritating, so choose well-fitting protective gear to prevent them from getting embedded in your eyes, skin, and respiratory system.[2]
- To be fully covered, you may wear a Tyvek suit.
-
2Leave 1⁄8 to 1⁄4 in (0.32 to 0.64 cm) of space for expansion when sizing your panels. FRP panels will naturally expand and contract over time. Therefore, it’s important to take these behaviors into consideration when you’re planning out how you’ll cut and space out your panels. Depending on the sizes of your panels and what they’ll be installed next to, cut the panels a little bit short to leave some room for expansion around each side. Refer to the manufacturer’s guidelines for exact spacing recommendations.
- For example, if you’re cutting a panel to fit along a wall measuring 9 ft (2.7 m) wall, don’t cut the panel to 9 ft (2.7 m). Instead, cut it to 8 ft 11½ in (2.7305 m) so that you can leave 1⁄4 in (0.64 cm) of space at both the top and the bottom.
- Allow for at least 1⁄8 in (0.32 cm) of clearance around molding, piping, fixtures, and electrical boxes.
- The larger the panel, the more expansion space you’ll need to allow for. So, for a wall measuring 12 ft (3.7 m) high, you’d leave about 3⁄8 in (0.95 cm) of space at the top and bottom, instead of the 1⁄4 in (0.64 cm) needed on on either side for a 9 ft (2.7 m) high wall.
-
3Place the panels face-down so you can cut them from the back surface. Clean your work surface thoroughly to avoid scratching the front of the panels. Then set 1 panel at a time face-down onto the cutting table or a pair of sawhorses. Clamp it down, if necessary. When you make your cuts, lower the blade into the back surface of each panel.
- Avoid cutting the FRP panels from the front side, as you might end up with some nicks or chips along the front side of the material.[3]
-
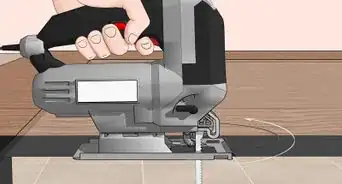
4Saw straight cuts through thick panels using a carbide- or diamond-coated blade. When making straight cuts through thick pieces of FRP, choose a blade with either a diamond or carbide coating that will be strong enough to cut through the material.[4] Create longer cuts with a table saw, or use a handheld circular saw for shorter cuts or smaller panels. Move the blade slowly and steadily through the material, applying gentle pressure on the blade to avoid chipping the panel.[5]
- If you’re using a circular saw, just make sure you provide enough support beneath either side of the panel to avoid making incorrect cuts or chipping the surface of the material.
- When making cutouts, use a jigsaw to give the inside corners a radius of at least 1⁄8 in (0.32 cm) to prevent stress cracking.[6]
-
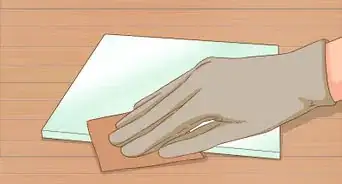
5Use handheld electric shears to trim or cut thin panels. Whether you want to trim off the end of a panel or create a cutout in the middle, use electric shears when working with thin pieces of FRP. Try swivel-head shears, sheet metal shears, or table shears. Aline the jaws of the blades so they can bite down on the edge of the FRP. Push the shears slowly but steadily through the FRP to avoid damaging it.[7]
- Unlike saws, shears work well for both straight and curved cuts.
- Keep in mind that most trimmers will cut out a thin strip from your material. Make sure you line up the blades accordingly so you don’t shave off too much of the panel.[8]
- If you’re making cutouts, create a radius of about 1⁄8 in (0.32 cm) around the inside edges.[9]


Drilling Holes
-
1Protect your skin, eyes, and mouth from irritation by wearing safety gear. Choose well-fitting personal protection equipment (PPE) when drilling FRP. Wear a dust-filtering mask or respirator over your mouth and a pair of safety goggles or glasses over your eyes. Protect your hands from the abrasive glass fibers by wearing work gloves.[10]
- Consider wearing acoustic earmuffs or earplugs, too, if you’ll be drilling for a while.
-
2Lay out the panel face-down so you can drill from back to front. If you start drilling from the front side, you might end up chipping the material. Instead, place the FRP panel face-down onto a clean work surface or between a pair of sawhorses. Clamp it into place so it doesn’t move around as you drill.[11]
- Consider placing a wooden backer board beneath the FRP to add some stability and to help you achieve the cleanest possible cut as the drill bit pokes through the other side.[12]
-
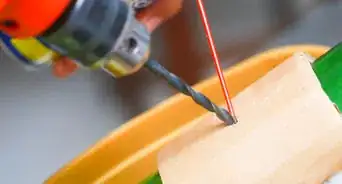
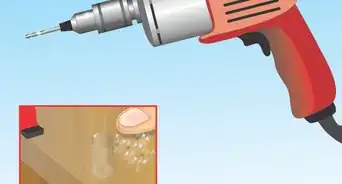
3Use a carbide bit and a slow drill speed when drilling thick FRP panels. For the best results in thick pieces of FRP, use a handheld power drill with carbide brad point drill bits.[13] When drilling through the FRP, use the same drill speed as you would for drilling hardwood.[14] Depending on the size of your drill bit, use a speed of about 750 to 1200 RPM for smaller drill bits but a slower speed of 250 to 500 RPM for larger drill bits.
- Alternatively, you can use non-carbide drill bits for thin pieces or small quantities. Just be aware that the material will quickly dull the blades.
-
4Use a drill bit 1⁄8 to 1⁄4 in (0.32 to 0.64 cm) larger than your hardware when making pilot holes. Once you’ve cut your FRP panels down to the correct size, mark out the location of the holes you’ll be pre-drilling. Whether you’re drilling a pilot hole for a fastener, rivet, or some other piece of hardware, make sure to create a slightly larger hole to account for the expansion that will happen. Once you know the diameter of your hardware, select a drill bit that’s about 1⁄8 to 1⁄4 in (0.32 to 0.64 cm) wider.
- In general, you’ll want to leave more room on larger panels, but refer to the manufacturer’s instructions for the correct clearance measurements.
- If you fail to drill a large enough hole, the panels may buckle and bulge out over time.[15]


References
- ↑ https://cranecomposites.com/wp-content/uploads/6876.pdf
- ↑ https://cranecomposites.com/wp-content/uploads/905172.pdf
- ↑ https://cranecomposites.com/wp-content/uploads/6876.pdf
- ↑ https://youtu.be/8SwXvYc2wVI?t=44
- ↑ https://youtu.be/8SwXvYc2wVI?t=69
- ↑ https://cranecomposites.com/wp-content/uploads/6876.pdf
- ↑ https://youtu.be/S1gfseRFL8s?t=1
- ↑ https://youtu.be/aRvaFOX7ZBg?t=141
- ↑ https://cranecomposites.com/wp-content/uploads/6876.pdf
- ↑ https://cranecomposites.com/wp-content/uploads/905172.pdf
- ↑ https://cranecomposites.com/wp-content/uploads/6876.pdf
- ↑ https://youtu.be/8SwXvYc2wVI?t=125
- ↑ https://youtu.be/8SwXvYc2wVI?t=89
- ↑ https://youtu.be/8SwXvYc2wVI?t=114
- ↑ https://cranecomposites.com/wp-content/uploads/6876.pdf
- ↑ https://cranecomposites.com/wp-content/uploads/6876.pdf
- ↑ https://youtu.be/8SwXvYc2wVI?t=39
About This Article