This article was co-authored by wikiHow staff writer, Darlene Antonelli, MA. Darlene Antonelli is a Technology Writer and Editor for wikiHow. Darlene has experience teaching college courses, writing technology-related articles, and working hands-on in the technology field. She earned an MA in Writing from Rowan University in 2012 and wrote her thesis on online communities and the personalities curated in such communities.
This article has been viewed 3,346 times.
Learn more...
Are you trying to create a new Maven project within IntelliJ? With Maven, developers can use a specific kind of data to create and manage software products (in Java, for example). You might want to use your IntelliJ software to keep all your projects together, and this wikiHow article teaches you how, with a few clicks, you can create a new Maven project.
Steps
-
1Open IntelliJ. The app icon looks like a capitalized "IJ" on a dark background that you'll find in File Explorer, on your desktop (Windows), Finder, or in the Dock (Mac).
- Although Maven should be included in all IntelliJ versions, you might find that it's not installed. That's ok! You can download the Maven plug-in from the Marketplace.[1]
-
2Select Projects and click New Project. The Projects tab is on the left side of the window and will display the New Project button on the right side of the window once you click the tab.
- If you already have a project open in IntelliJ, close it to see the Welcome window.
Advertisement -
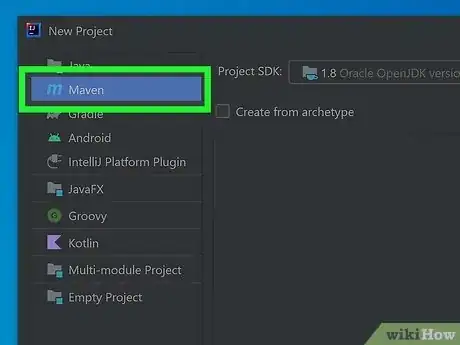
3Click Maven. It's in the panel on the left side of the screen.
-
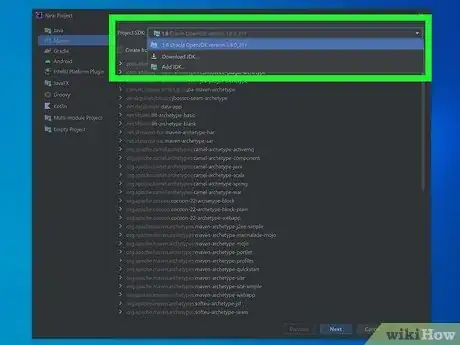
4Make sure you have the correct JDK selected. Click the drop-down next to "Project SDK" to choose which JDK you want to use with your project.
- By default, your system's JDK is selected. Although the menu is labeled "SDK," you're opting to use "JDK" because Maven works within Java and you'll be using a Java development kit.
-
5Click Next. You'll see this in the bottom right corner of the window.
-
6Name your project and select a location to save it to. Fill out the "Name" field so you know what the project is for, then make sure the field next to "Location" is showing the correct file location. If not, click the folder icon next to the field and use your file manager to find a different location.
-
7
References
- ↑ Install plugins | IntelliJ IDEA (jetbrains.com)
- ↑ https://youtu.be/dxn5DsMWhGY?t=130
- ↑ https://www.jetbrains.com/help/idea/managing-plugins.html
About This Article
1. Open IntelliJ.
2. Select Projects and click New Project.
3. Click Maven .
4. Make sure you have the correct JDK selected.
5. Click Next.
6. Name your project and select a location to save it to.
7. Click Finish.


