This article was co-authored by Grant Wallace. Grant Wallace is a Landscaper and Owner of Grantlanta Lawn in Atlanta, Georgia. With over seven years of experience, he specializes in lawn maintenance and landscape installation. In 2012, he earned his BA from the University of West Georgia. Grant has been profiled in Shoutout Atlanta, Canvas Rebel, and Voyage ATL.
This article has been viewed 16,933 times.
Arborvitae trees are a lovely addition to your yard or patio. They also thrive in a lot of different regions, making them a great choice. Even though these types of trees are pretty hardy, it’s important to shield them from the harsh winter elements. You’ll just need to stop by the garden center to pick up a few basic items to cover your arborvitae. It doesn’t take much time to do and it will help your trees stay healthy for the next growing season. There's no set date you need to do this, but a good rule of thumb is to do it before the first hard frost.
Steps
Protecting Your Trees from Winter Weather
-
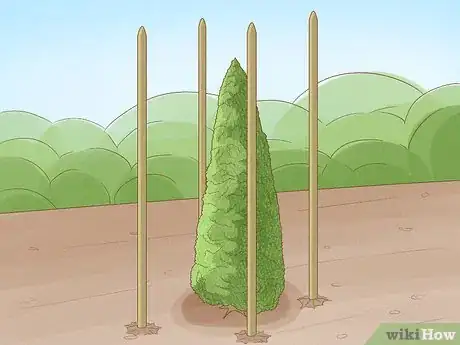
1Set up basic fencing stakes along 1 or 2 sides of the trees. Head to your favorite nursery and look for wooden or metal stakes. You're going to build a simple fence-like structure to create a barrier from the wind. Ask an employee to point you in the right direction if you need help. Back home, place the stakes in the ground approximately 2 feet (0.6 m) from the drip lines of your trees, which is the widest area of the circumference. For an evergreen like arborvitae, this would be the widest part at the bottom of the tree. Line up the stakes on the south and west sides of your arborvitae, or any side that is exposed to a lot of wind.[1]
- The number of stakes you need will vary depending on the size of the area you need to protect. If you have a long line of trees, you’ll need several. If you only have a few trees, 3-4 stakes will work just fine.
- The height of the stakes doesn't need to be precise. A good guideline is that they should be a few feet high. You're just trying to create a windbreak, not cover the entire tree.
- Place the stakes several feet apart from each other. You don’t have to measure a precise distance. Pound the stakes far enough into the ground that they don't wobble. Several inches deep should do it.
- You can order stakes online, make your own, or buy them at any box store that has a garden center.
-
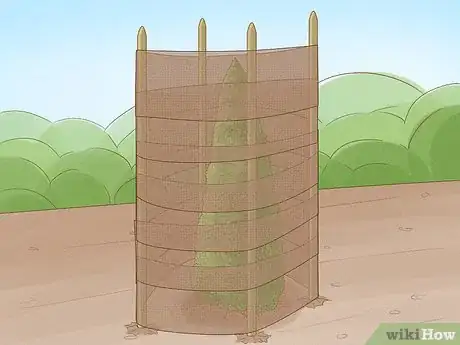
2Wrap burlap around the stakes to create a barrier from the wind. You can use basic burlap or purchase a specific material for wrapping plants at your favorite garden center. How much you’ll need depends on the number of trees that you have. Just buy enough to wrap around the stakes that you’ve placed near the trees. Start by securing the end of the material around the last stake on one end of your row, then extend the roll to the other end of your row of stakes.[2]
- Basically, you’re making a kind of fence to protect your trees. Wrap the material around your last stake and secure it with staples or tie it on with twine or wire.
- Small trees can also be wrapped with a clear tarp to let the sun through and to also keep it warm.
- Ask a store employee for help if you’re not sure what kind of material or how much to buy. They can be a great resource for you if you haven’t done this before.
Advertisement -
3Loosely wrap the tree branches with burlap for extra protection. You can create an additional barrier by using your fencing material to wrap your tree. Just loosely circle your tree with the material, making sure the branches are covered, but not so tightly that they will be crushed. The key is to make sure not to wrap the top of your tree. It still needs sunlight and fresh air, even when it is freezing outside, so leave a few inches exposed.
- If you need to use a ladder, ask a friend to help you out. They can keep the ladder steady for you and hand you material as needed.
-
4Prop pine boughs against branches for natural protection. Natural materials are also great for offering an extra layer of protection. Gather up fallen branches from Evergreen trees in your area and place them around the base of your arborvitae. They’ll help protect the tree from the freezing temps.[3]
- If you don’t have access to pine boughs or Evergreen branches, that’s okay. It’s an added layer protection, but it’s not essential.
-
5Remove the barriers at the beginning of spring. At the first sign that warmer weather is here to stay, gently unwrap the trees and remove any remaining boughs or branches from the base. You can also take down your burlap fence. It’s important to do this soon after the ground begins to thaw so that you can begin the process of pruning, watering, and mulching to keep your arborvitae healthy.
- When you do this depends on where you live. If you have questions, you can reach out to the extension of a local university to talk to an expert. They’ll likely be happy to help you out.
Taking Care of Potted Arborvitae
-
1Move the arborvitae inside if that is an option. The best way to protect smaller, potted plants is to keep them indoors during the winter. If you have room, move them inside to a basement or even a garage. It's not necessary for the trees to be near windows. Bring the trees in after the first hard frost and place them back outside after the last expected frost.[4]
- If this isn't an option for you, cover your plants to keep them safe outside.
-
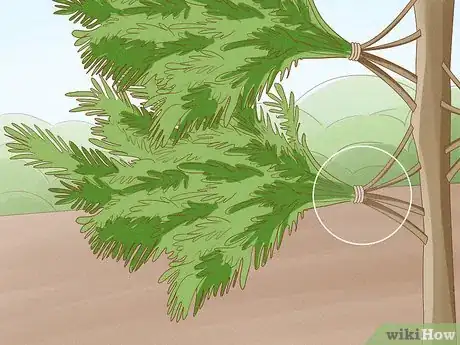
2Tie the branches together to protect potted trees outdoors. If you can’t bring your arborvitae inside, you can still protect them from harsh winters. Gather small groups of branches together and tie them loosely with twine or a similar material. This will make it easier to cover the trees since you won’t have loose branches to deal with.[5]
- Just use your best judgment about how many branches to tie together. Generally, you can make a small bundle of 3-4.
-
3Water the tree and mulch the soil to get it ready for winter. Before you cover your tree, make sure that it’s ready to be winterized. Water the tree as you usually would, and then make a layer of mulch out of straw or leaves. Make this layer several inches deep to help protect the soil.[6]
- You can purchase mulch or just gather some materials from your yard. Whatever works best for you is totally fine.
-
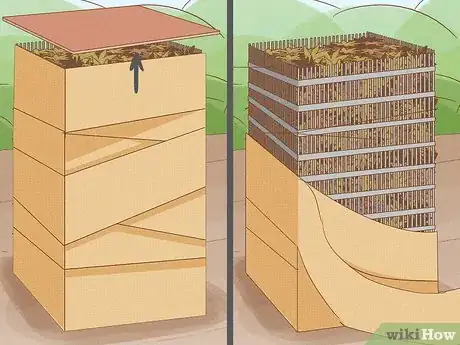
4Buy a wire cage and fill it with leaves. Think of this as the same sort of cage you might see around a tomato plant. In fact, you could just purchase a tomato plant cage and use that. If you prefer, you can buy some chicken wire or similar material and make your own. Just ask an employee at the garden center to point you in the direction of the supplies you’ll need.[7]
- The cage should be tall enough to cover your entire tree. Once you place the cage over the tree, fill it with dried leaves or straw. Place these materials gently in the cage so that you don’t accidentally break any branches.
-
5Wrap the cage with a layer of burlap and then cover it with plastic. Grab some burlap or similar material and place it over your enclosed tree. Then, use a piece of sturdy plastic to cover the burlap. How much you need will depend on the size of the tree. Don’t be afraid to buy a little more than you think you’ll need. If you don’t use it now, you can always use it next winter.[8]
- Gently secure the bottom of the plastic with a piece of string or twine.
-
6Unwrap the tree when spring arrives. Start by removing the plastic wrap that covers the burlap. Next, remove the burlap and pull out the leaves and any twigs that are inside of the cage. Finally, prune and water your tree.[9]
- Make sure that spring has truly arrived before you do this. If you think there might be another frost, keep your tree wrapped until you feel confident that the warmer weather is there to stay.
Helping Your Trees Stay Healthy
-
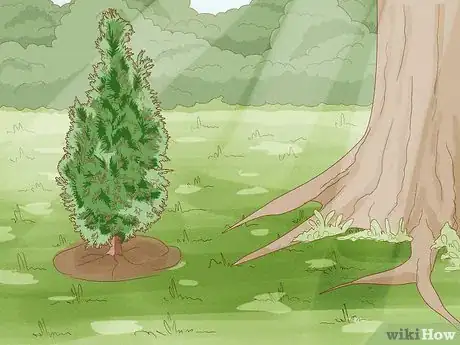
1Plant trees in areas protected from the sun. The north and northeast sides of buildings are typically the shadiest areas. If you can, plant your trees in these areas. You could also plant them on that side of larger trees so that they get more shade that way.[10]
- Planting your arborvitae so that buildings or trees provide shade is also a great way to protect them from strong winds. It’s an added bonus!
-
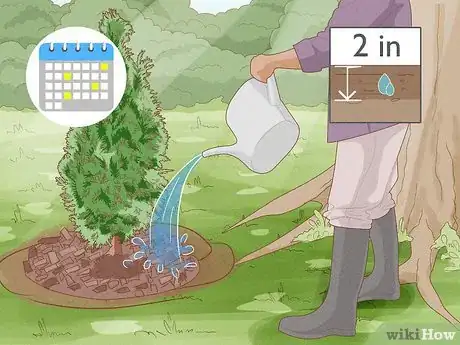
2Water and mulch your plants properly. Established evergreen trees need about an inch of water each week to thrive. You can water them using your hose or a watering can. If the tree is younger or recently transplanted, give them about 2 inches of water every week.[11]
- Apply a few inches of loose mulch around the base of your trees. Wood chips or leaf compost are great choices for your mulch.
-
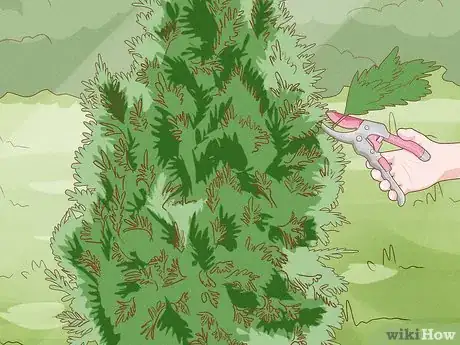
3Plant and prune your trees according to regional guidelines. Your trees will grow best if you plant them in either early spring (before the buds bloom) or late summer (August-September). Don’t prune your trees in the late summer or early fall, as that could damage them. It's best to do it in the spring when you uncover the trees.[12]
- Check with a local expert or employee at your garden center if you have specific questions about your region. Don’t be ashamed to ask! Caring for trees is definitely a learning process.
Expert Interview

Thanks for reading our article! If you'd like to learn more about gardening, check out our in-depth interview with Grant Wallace.
References
- ↑ https://hort.extension.wisc.edu/articles/winter-burn/
- ↑ https://hort.extension.wisc.edu/articles/winter-burn/
- ↑ https://extension.umn.edu/planting-and-growing-guides/protecting-trees-and-shrubs-winter#how-to-reduce-evergreen-winter-injury-1264311
- ↑ https://thegardenfrog.me/containter-gardening-with-arborvitaes-for-year-round-interest/
- ↑ https://lancaster.unl.edu/hort/articles/2004/pottedtreesshrubs.shtml
- ↑ https://lancaster.unl.edu/hort/articles/2004/pottedtreesshrubs.shtml
- ↑ https://www.chicagobotanic.org/plantinfo/faq/overwintering_evergreens_containers
- ↑ https://lancaster.unl.edu/hort/articles/2004/pottedtreesshrubs.shtml
- ↑ https://lancaster.unl.edu/hort/articles/2004/pottedtreesshrubs.shtml








-Oven-Step-15.webp)


