wikiHow is a “wiki,” similar to Wikipedia, which means that many of our articles are co-written by multiple authors. To create this article, volunteer authors worked to edit and improve it over time.
This article has been viewed 153,205 times.
Learn more...
Steps
Part One: Choosing Supplies
-
1Identify the four types of wood carving. There are four main types of wood carving: whittling, relief carving, carving in the round, and chip carving. Choose the style you prefer and learn about it in greater detail.[1]
- Whittling is an old carving style primarily done with the use of a stiff-handled whittling knife. The knife leaves behind sharp, angular strokes, and the finished pieces are usually small and three-dimensional.
- Relief carving is the art of carving figures into a flat wooden panel. The image appears three-dimensional from the front, but the back remains flat. You'll need a variety of hand tools to complete a relief carving.
- Carving in the round is probably the most life-like technique. You'll use a variety of tools to create this type of carved sculpture, and the finished piece will be three-dimensional, with softer, more natural lines.
- Chip carving primarily relies on the use of knives, chisels, and hammers. You'll chip away at the wood little by little to create three-dimensional patterns on a wood board, but the back of the piece will remain flat.
-
2Choose the right wood. As a general rule, the wood you use should be somewhat soft. Purchase labeled, higher quality wood from a craft store or wood supplier instead of getting it from a generic lumber pile.
- Basswood, butternut, and white pine are among the best woods to use, especially for beginners. These are soft woods, which makes them easy to carve, but basswood has a fine grain, butternut has a coarse grain, and white pine has a medium grain. Basswood is best for whittling, but you can use butternut and white pine for nearly any carving technique.
- Mahogany and black walnut both have medium grains and are somewhat difficult to carve since these woods are a little harder.
- Cherry, sugar maple, and white oak are all very hard to carve due to their level of hardness. Cherry and sugar maple have fine grains, but white oak has a medium to coarse grain. When carved properly, however, all three woods can create excellent finished pieces.
Advertisement -
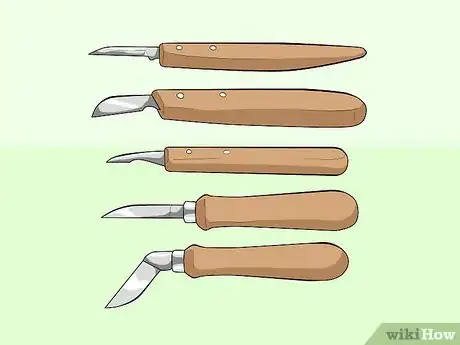
3Buy the right carving knife. The knife you choose must be sharp, easy to grip, and rigid. Retractable blades are often unsafe since they can collapse under pressure, so a standard pocket knife may not work well.[2]
- Chip carving knifes are your best option. The blade is roughly 1.5 inches (3.5 cm) long, and the handle is long enough to sit comfortably in your hand. Choose one made of high carbon steel so that it remains sharp and intact for a long time.
- If you're just starting out and don't want to make an investment yet, consider using a utility knife or craft knife. Just make sure that the blade is sharp and fixed. You must also be able to hold the handle for prolonged periods without experiencing discomfort.
-
4Obtain several gouges. Gouges are curved tools used to "scoop" the wood instead of cutting it. You'll use gouges to carve, shape, and smooth surfaces.
- U-gouges have curved shafts and curved cutting edges. When purchasing u-gouges, note that the cutting edges vary in width between 1/16 inch (2 mm) and 2-3/8 inches (60 mm), and the shape of the shaft can be straight, bent, back-bent, or spoon.
- V-gouges have angled tips that meet in a "V" shaped point. The cutting edge can range in width between 1/16 inch (2 mm) and 1-2/5 inch (30 mm). The sides can also meet at a 60-degree or 90-degree angle.
- Bent and spoon gouges are specialty tools that make it easier to reach certain areas of the wood carving. They aren't always necessary, but they'll be good to have if you get serious about the hobby.
-
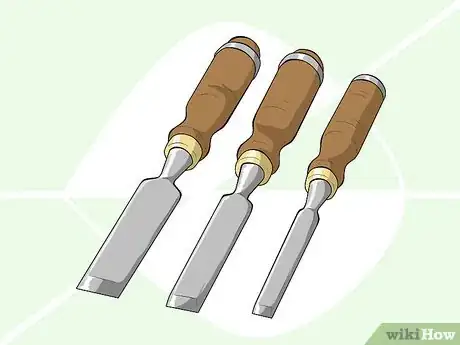
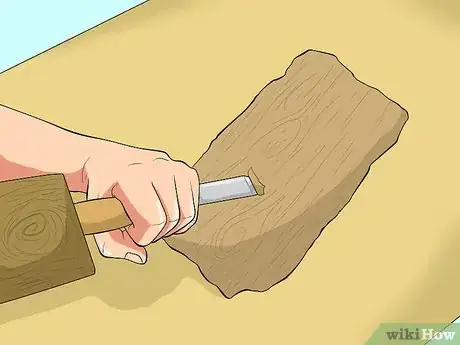
5Use chisels. Chisels are sharp, flat tools used in conjunction with rubber mallets. Good chisels are especially important for wood chipping practices.[3]
- Basic carpenter's chisels have flat edges that dig into the wood at a sharp angle.
- Skewed chisels also have flat edges, but they tilt back at a 45-degree angle, which allows you to make cuts that are slightly less blunt.
- Traditional mallets are technically made of heavy wood, but rubber mallets are less noisy and generally cause less damage to the handle of the chisel upon repeated impact.
Part Two: Practicing Cuts
-
1Practice with scrap wood. It's always a good idea to practice some basic cuts on scrap wood before working on any major piece. Doing so will give you the opportunity to become familiar with the tools. also, make sure to never cut towards your body, cut away from you in case the knife slips to avoid a trip to hospital.
- Always use sharp tools, even if you're only practicing. If the tools are sharp enough, they should make a clean, shiny cut through the wood without leaving any nicks or streaks behind.
-
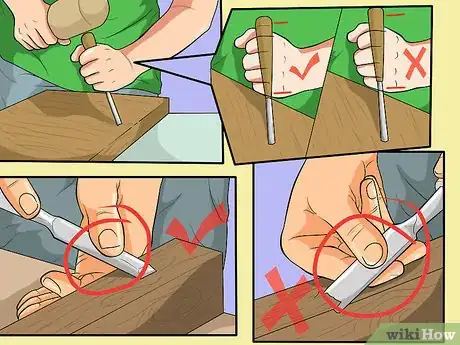
2Hold the knife correctly. When you need to push a knife, gouge, or chisel through the wood, keep your hands behind the sharp cutting edge. These tools can slip as you work, and if your fingers are in front of the blade, it'll result in an injury.
- When working with knives, grasp the wood with your non-dominant hand. Keep the hand behind the blade of the tool, but carefully press the thumb of that hand against the blunt side of the tool to help control it. While holding your non-dominant hand steady, rotate your dominant hand and wrist to make the desired cut.
- When working with gouges, hold the handle in the palm of your dominant hand while steadying the shaft by pinching it between the thumb and index finger of your dominant hand. The cutting edge should rest against the wood.
- Remember to control the direction of the carving tool with your wrist and not your elbow. This is true regardless of the cut or tool used.
-
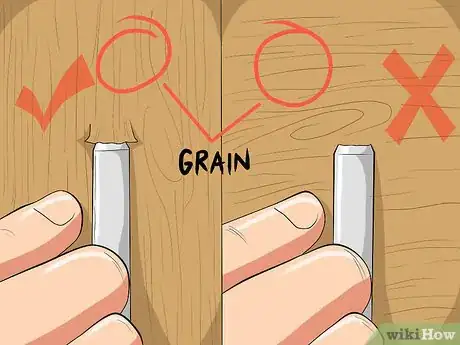
3Carve along the grain. Always make your cuts along the grain instead of working against it. Cutting up against the grain will cause the wood to splinter.
- Examine the wood and find the long, parallel lines running through it. These lines may or may not run parallel to the sides of the board, and they will be somewhat wavy instead of rigidly straight.
- Always carve in a downward direction onto those lines of grain. You can also carve diagonally across the grain or parallel to it, but do not carve up against the grain.
- If the wood begins to tear as you carve it even though the tool is sharp, you might be carving in the wrong direction. Switch to the opposite direction and check the results again.
-
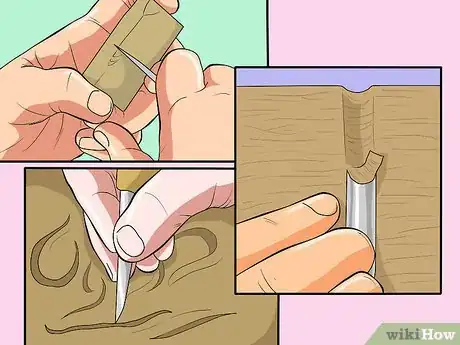
4Practice a few basic cuts. There are numerous cuts you'll need to learn as you practice this craft, but when you're first starting out, you should at least practice a few of the basics.[4]
- The running cut creates a long channel in the wood. Hold the blade of a U-gouge or V-gouge to the surface of the wood and push it across the grain, keeping the pressure as even as possible.
- A stabbing cut creates sharp carvings in the surface of the wood, allowing you to create hard shadows. Push the cutting edge of a gouge straight into the wood, then pull it out without pushing it any further.
- Sweep cuts are long arc-shaped cuts. Use a gouge to push across the grain, rotating the handle as you push it forward to create an arc.
Part Three: Carving Finished Works
-
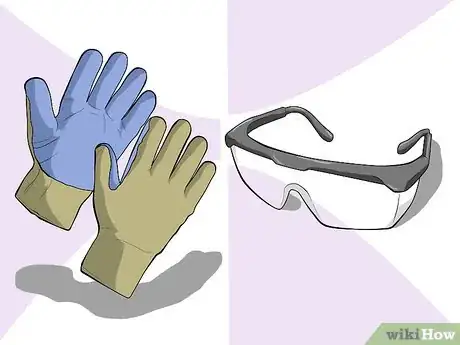
1Wear safety supplies. Carving can be dangerous if you aren't careful, so you should consider wearing some basic safety supplies to protect yourself.
- Wear a carving glove on your non-dominant hand, or the hand you hold the wood with.
- Cover your eyes with safety glasses, too. Wood chips will start flying, and even if the piece is small, stray scraps can still find their way into your eyes if you don't protect yourself.
-
2Sketch the design. When possible, use a pencil to lightly sketch the intended cuts and gouges before picking up any of your tools.
- These lines can create guides, which will make it easier to remain precise. You may make mistakes if a tool slips, but you won't make mistakes based on miscalculation.
- If you do make mistakes, there's no going back. You'll need to alter your original plan to incorporate the mistake or start over with new wood.
-
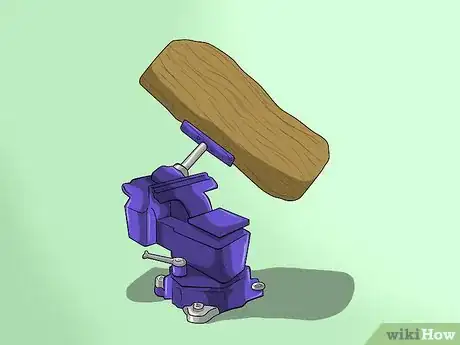
3Secure the wood. Ideally, you should hold the wood piece in place by clamping onto the table or inside a vise. Doing so will free both hands, making it easier to work.
- Never keep the wood in your lap as you carve it.
- For small carvings, like whittled pieces, you can hold the wood in your non-dominant hand as you work. Keep your non-dominant hand behind the cutting edge of the tool.
-
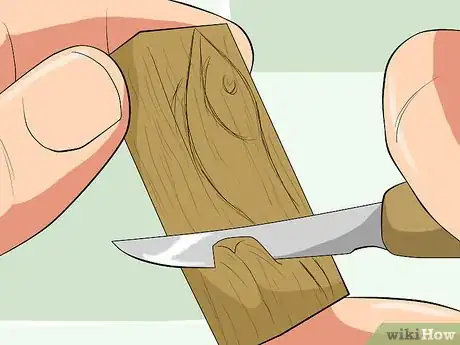
4Cut the basic shape. Remove as much wood as possible until you can visualize the basic shape of the final piece within the block of wood.
- For small pieces, you can cut the basic shape using knives or chisels. For larger pieces, you may need to use a band saw or chain saw.
- Don't be afraid of cutting away too much. As long as you do not cut past your sketched guidelines, you won't ruin the wood. You can go slow if doing so makes you feel more comfortable, but it can take a long time to obtain even a basic shape if you're too shy with your tools.
-
5Rough out the form. After obtaining the basic shape, use large u-gouges to remove as much excess material as possible until the overall form of the piece develops.
- Identify the largest planes and work on those forms first. As the larger shapes come into focus, gradually ease your way to the smaller, more well-defined forms.
-
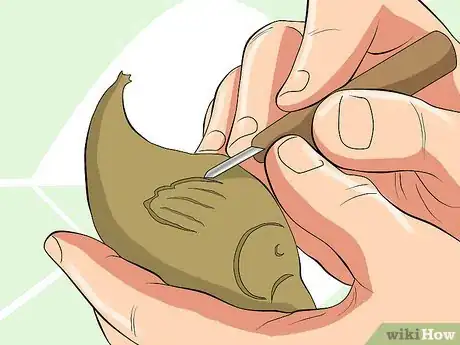
6Add fine details. Once the overall form is complete, switch to your smaller tools and add detail to the carving.
- While you should always have razor sharp tools, it's especially important during this step. Dull tools can nick the surface of the wood and ruin the appearance of the carving.
- Work on one area of the carving at a time. Complete the larger details and foreground details first, then progress to the small details and background.
-
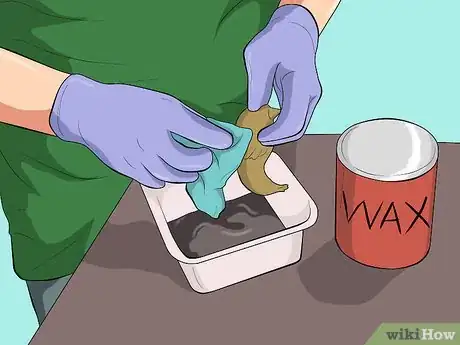
7Protect the finished piece. If you're satisfied with your work and want to preserve the carving, you'll need to apply a wood finish that can protect the surface from moisture, oils, dirt, and other debris.[5]
- Paste wax is relatively clear and allows the natural color of the wood to come through. It works well for decorative carvings but can wear off when applied to frequently handled carvings.
- Danish oil can tint the color of the wood slightly, but it tends to be quite durable and can be used for frequently handled carvings.
- Spray urethane and polyurethane are the most durable finishes and generally last for long periods even if the carving is handled frequently. You'll need to apply the finish during moderate, dry weather and allow it to dry thoroughly in between coats.
Community Q&A
-
QuestionDo I sand the wood to make it smooth?
 Community AnswerIt depends on what you're going for. Sanding is a good finishing technique if you want a smooth surface. Remember to go with the grain, and consider using small pieces guided by small tools on small areas.
 -
QuestionWhat should be the bevel angle of woodcarving tools, such as gouges, for carving basswood?
 Community AnswerThe angle of carving tools for soft woods is around 17 degrees, and for harder woods it's 25 degrees or more.
 -
QuestionCan I carve when I'm a kid?
 Community AnswerIf you know what you're doing, sure. Start out with something easy, like a bar of soap. Just make sure you ask a parent first, and possibly have someone supervise you to make sure you've got the technique down.
Things You'll Need
- Soft wood (basswood, butternut, or white pine)
- Chip carving knife
- U-gouges, varying sizes
- V-gouges, varying sizes
- Carpenter's chisel
- Skewed chisel
- Rubber mallet
- Carving glove
- Safety glasses
- Pencil
- Vise
- Wood finish (paste wax, Danish oil, or spray urethane)
References
- ↑ https://www.schaaftools.com/blogs/news/different-types-of-wood-carving
- ↑ https://www.ramelson.com/choosing-the-best-wood-carving-tools/
- ↑ https://www.ramelson.com/choosing-the-best-wood-carving-tools/
- ↑ http://www.motherearthnews.com/diy/crafting/woodcarving-ze0z1210zgar.aspx?PageId=1
- ↑ http://www.cristinsculpture.com/finishes-for-wood-carving.htm
About This Article
To learn the art of wood carving, you’ll need some soft wood, a sharp knife, and several gouges to work with. Pick a wood that’s somewhat soft, like basswood, butternut, or white pine. Additionally, choose a knife that’s sharp and easy to grip, like a chip carving knife or a utility knife. You’ll also need several gouges, which are curved tools used to scoop the wood instead of cut it, and chisels, which are sharp tools used with a rubber mallet. Try some practice cuts on scrap wood before working on a major piece. Carve along with the grain so you don’t splinter the wood. When you’re ready to make a finished work, sketch the design lightly in pencil to have a guide. Secure the wood by clamping it onto a table and cut the basic shape before adding details. To learn how to preserve your finished carving, keep reading!


