This article was co-authored by Mike Garcia. Mike Garcia is a Licensed Landscape Contractor and the Founder of Enviroscape LA, a full-service landscape design and construction firm in Los Angeles, California. With over 30 years of experience, Mike specializes in sustainable landscape practices. Mike holds an Ornamental Horticulture degree, C-27 Landscape Contractor and D-49 Tree Service Contractor licenses, and Permaculture Design, California Naturalist, International Certified Professional Pond Contractor, and Pond Building certifications. He is one of eight Internationally Certified Pond Builders in the world. Enviroscape LA has won landscape and water feature awards from the International Professional Pond Contractors Association (IPPCA), National Association of Pond Professionals (NAPP), and the California Landscape Contractors Association (CLCA). Mike is a past president of the CLCA and currently serves on their local Board of Directors. Enviroscape LA has been featured in PONDS USA Magazine, Pond and Garden Lifestyles Magazine, and the Los Angeles Times. Mike has appeared on Extreme Home Makeover, HGTV's Landscapers Challenge, and A & E's series Fix That Yard.
There are 7 references cited in this article, which can be found at the bottom of the page.
wikiHow marks an article as reader-approved once it receives enough positive feedback. In this case, 80% of readers who voted found the article helpful, earning it our reader-approved status.
This article has been viewed 1,064,644 times.
There's a certain satisfaction that comes from building things that you get to use every day and a fence is a great starting project. Easy to do even for a beginner, building a wood fence requires few tools or skills. Building your own can also, of course, save you some serious cash! Just get started with Step 1 below to build your own fence.
Steps
Preparing to Build a Wood Fence
-
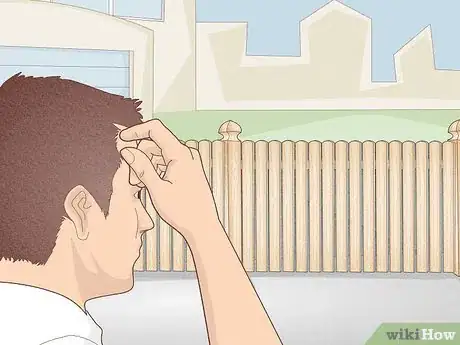
1Check on any local restrictions. It's important to check that your fence is not illegal before you build it! If there are any restrictions on fences in your neighborhood or in your city, then all your hard work can be torn down. Check with your local planning department and neighborhood association before you get too far into the process.[1]
-
2Apply for a permit. Most cities require a building permit in order to place a fence. Get one to ensure that both you and your fence are safe! Many electrical, gas and sewer lines, as well as water mains are buried at the levels you will be digging to. When you apply for a permit, you should also call 811 to request that your local utility companies come out to the site and mark any areas where pipes and wires are located. This will help to ensure the safety of your project.[2]Advertisement
-
3Choose your materials. You'll want to be sure that you're using wood that will last a long time, right? If you use the best woods and treat them well, a wood fence can last 20 years or more. But choose the wrong wood and your fence might only make it 5 years. Consult with your local lumberyard to find the best wood for your area, but treated woods are usually your best option.[3]
-
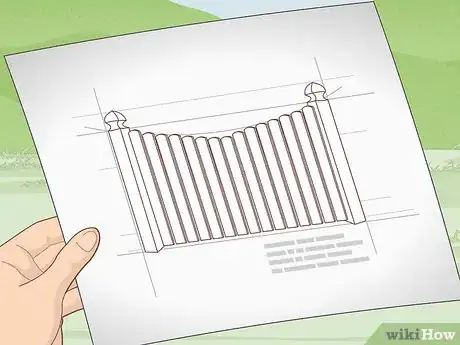
4Decide on a style. There are also lots of different styles of wood fences. Do some research before you start so that you don't end up with builder's remorse! There are picket, lattice, concave, convex, board on board, shadowbox, privacy, and many other styles with just as many variations within each style. Each style also has specifics of how the fence should be built and how the boards should be placed.[4]
- The information in this article is general and can apply broadly to many fence styles, but you might want to find specifics on your fence style to compliment these instructions.
Constructing Your Fence
-
1Find your property line. Determine where your property line is before you start so that you don't accidentally go over. The best advice is to hire a Registered Land Surveyor in your home state to mark the property line for you before you begin construction. Your city or town usually does not keep very detailed records of your property's boundary information. GIS (geographic information system) maps and Assessors maps are highly inaccurate when it comes to property boundaries.[5]
- You can search for Property\Survey Pins on your property. These are also located on the corners of a lot. Just because an old fence or other “assumed” property boundary was\is in place that does not always mean that it is correct.
-
2Decide on the height. Choose a fence height before getting too far into the project. Six foot is normal for a privacy fence, a livestock fence four feet high is usually sufficient, and picket fences are often three feet high. Fence height is important in the early stages, as it determines things like post hole depth.[6]
- Most cities have a height ordinance, so be sure to check this before you choose your fence height.
-
3Stake the corner locations. Place stakes at the corners roughly where you wish your fence to go.
-
4Square the corners. Tie a string around the stakes and run the string between stakes. Use a square or square-level to make sure that the corners" where our stakes are placed are squared (the two sides form a 90° angle).
- You can also square the corners by measuring the strings. Measure 3' on one side and 4' on the other. If the distance between the two marks (diagonally) is equal to 5', then the corner is square.
-
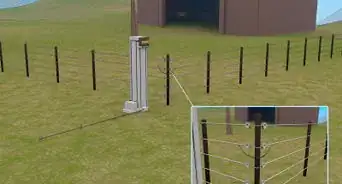
5Stake the middle posts. Measure out lengths of 8' or less along the strings once you've square your corners and stake those locations to indicate the location for your support posts.[7]
- You generally want to take the total distance and divide it by 8 but if you have a length of fence that is not divisible by 8, you'll need to break it down into smaller sections. For example, a 24' fence would need 2 middle posts to create the three 8' sections, but a 25' fence would need 3 middle posts at 6.25' for each section in order to look even and be structurally sound.
- To find the length and number for odd fence lengths, go up to the next number of posts and then divide the total length of the fence by the number of resulting sections.
-
6Dig the holes. Use a post-hole digger to dig holes at the locations you staked. The posts will need to be buried at least 33% as deep as they are tall (example: an 8' high fence needs a hole 2.5' deep), so your hole will need to be at least that depth plus a few extra inches.[8]
- The hole should be wide enough that there is room around the post when you put it in.
- Because soil conditions vary, and the height of the fence, the type of fencing, and other factors must be considered in determining how deep the post should be, you will have to calculate the hole depth for yourself.
-
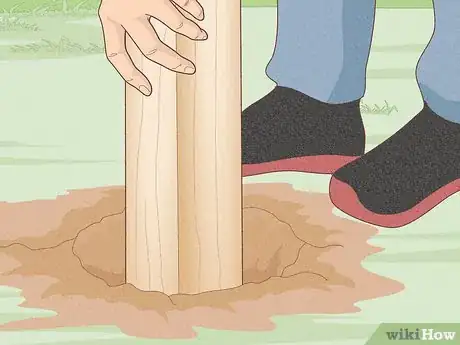
7Place your posts. Place 3-4" of gravel at the bottom of the hole. Place the post in the hole and get it into alignment. Check to make sure that the corners are still square, use a post leveler to make sure it is straight, and make sure it is sitting at the correct height.[9]
-
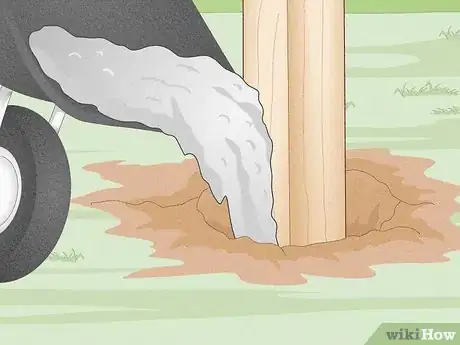
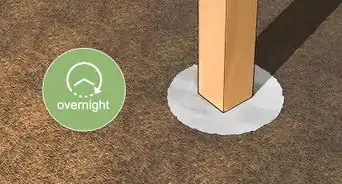
8Pour the concrete footing.[10] Carefully holding your post in place, pour in instant concrete until the hole is 2/3 full. Add water to the top and use a stirring stick to mix the cement. Prop the post into place (stabilize using temporary nailed boards if necessary) and allow the concrete to set following the manufacturer's instructions.[11]
-
9Fill with dirt. Fill any remainder of the hole with dirt once the concrete has set.[12]
-
10Add a builder's or mason's line. Pull a builder's line from one end post to the other, at an equal height above the ground, preferably at the top of the post (if your posts were placed correctly). This will help you keep the height of the fence the same along the way.
-
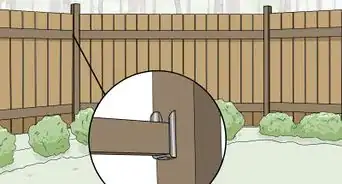
11Add on your support boards. Cut 2x4 rails (or horizontal support boards) to the appropriate length to reach between the centers of the posts. If you can, use a single rail for the entire length of the fence section. Rails should be no more than 24" apart, so most fences will have 2-3 rails. Attach the rails using decking screws.
-
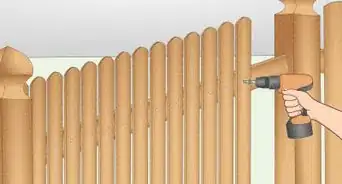
12Add your privacy boards. With your support boards in place, you can attach your pickets (vertical boards, also called privacy boards). There are many different styles and ways of doing this, depending on how you want your fence to look. The most basic is a board on board fence, where the fence boards are nailed (using a nail gun, nailed at the support boards) with the distance of less than one board between them. Place the first board up and then use a level to “plumb” (vertical level) the board. Then, nail or screw the board in place. Use a spacer and then place the next board. Use the level periodically to check that it is “plumb.”
- These boards are usually 1X6 rough sawn lumber but you can buy other pre-cut fencing boards as well.
- If nailing the boards by hand, use 8d spiral shank galvanized nails.
-
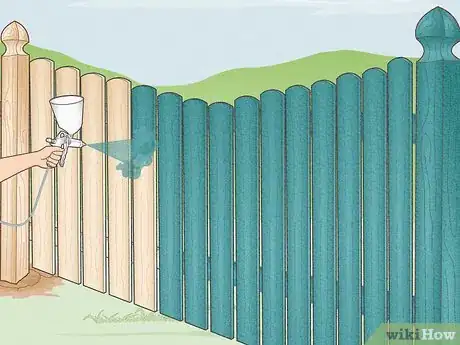
13Treat the boards. Once you're done, you will want to treat the boards to increase the longevity of your fence. You can paint your fence, stain it, or simply apply a weather-proofing finish to keep your fence looking great for years to come. Enjoy!
- This will usually either contain silicone solids, or linseed oil. If you plan on painting a finish paint, stick with an oil-based sealer, and use an oil-based polyurethane paint or exterior enamel for the finish paint.
Expert Q&A
Did you know you can get expert answers for this article?
Unlock expert answers by supporting wikiHow
-
QuestionHas anyone built a fence out of all 2x4s?
 Anthony "TC" WilliamsAnthony "TC" Williams is a Professional Landscaper in Idaho. He is the President and Founder of Aqua Conservation Landscape & Irrigation, an Idaho Registered Landscape Business Entity. With over 21 years of landscaping experience, TC has worked on projects such as the Idaho Botanical Garden in Boise, Idaho. He is a Idaho Registered Contractor and a previously Licensed Irrigator in the State of Texas.
Experienced Landscaper
-
QuestionWill 4x4 posts support 1x6 boards on both sides?
 Anthony "TC" WilliamsAnthony "TC" Williams is a Professional Landscaper in Idaho. He is the President and Founder of Aqua Conservation Landscape & Irrigation, an Idaho Registered Landscape Business Entity. With over 21 years of landscaping experience, TC has worked on projects such as the Idaho Botanical Garden in Boise, Idaho. He is a Idaho Registered Contractor and a previously Licensed Irrigator in the State of Texas.
Experienced Landscaper
-
QuestionHow can I add a gate to a wood fence?
 Anthony "TC" WilliamsAnthony "TC" Williams is a Professional Landscaper in Idaho. He is the President and Founder of Aqua Conservation Landscape & Irrigation, an Idaho Registered Landscape Business Entity. With over 21 years of landscaping experience, TC has worked on projects such as the Idaho Botanical Garden in Boise, Idaho. He is a Idaho Registered Contractor and a previously Licensed Irrigator in the State of Texas.
Experienced Landscaper
Warnings
- Make sure you know where your property line is prior to constructing the fence.⧼thumbs_response⧽
- Wear safety glasses and gloves when they are needed.⧼thumbs_response⧽
- Digging post holes by hand in hard or rocky soil can be a challenge. Power hole "augers" are available at tool rental stores, but they can be dangerous.⧼thumbs_response⧽
- Check in your jurisdiction for permit requirements prior to building your fence. Some homeowner's associations have guidelines or ordinances governing fence construction.⧼thumbs_response⧽
- Locate your utility and/or sprinkler system lines prior to digging the fence post holes. You may have to call all the utility companies separately to come locate their lines, however some areas have a common number to call that works for all utilities.[16]⧼thumbs_response⧽
Things You'll Need
- Post hole diggers.
- Posts. These can be pressure treated 4X4 southern yellow pine, Cedar, or other rot resistant wood.
- 2X4 lumber, either pressure treated or rot resistant woods mentioned earlier.
- Fence boards. These are usually cut specially for fencing. They are often "dog eared", 5⁄8 inch (1.6 cm) thick by 5 5⁄8 inch (1.6 cm) wide and six feet long.
- Sakrete post mix by the bag or cement and sand
- Material for staking and bracing posts to set in concrete and screws to attach bracing
- Water to mix concrete
- Wheelbarrow or piece of plywood to mix cement on
- String lines
- Post level or bubble level
- Hammer
- Saw
- Drill and drill bits that fit screws (if using)
- Brackets for the rails and screws or galvanized nails to attach
References
- ↑ https://www.familyhandyman.com/garden-structures/fences/build-a-privacy-fence/
- ↑ https://www.todayshomeowner.com/video/how-to-build-a-wood-privacy-fence-in-your-yard/
- ↑ https://www.popularmechanics.com/technology/a21189/how-to-build-a-fence/
- ↑ https://www.homedit.com/diy-fence/
- ↑ https://www.todayshomeowner.com/video/how-to-build-a-wood-privacy-fence-in-your-yard/
- ↑ https://www.familyhandyman.com/garden-structures/fences/build-a-privacy-fence/
- ↑ https://www.todayshomeowner.com/video/how-to-build-a-wood-privacy-fence-in-your-yard/
- ↑ Mike Garcia. Licensed Landscape Contractor. Expert Interview. 20 November 2020.
- ↑ Mike Garcia. Licensed Landscape Contractor. Expert Interview. 20 November 2020.
- ↑ Mike Garcia. Licensed Landscape Contractor. Expert Interview. 20 November 2020.
- ↑ https://www.todayshomeowner.com/video/how-to-build-a-wood-privacy-fence-in-your-yard/
- ↑ Mike Garcia. Licensed Landscape Contractor. Expert Interview. 20 November 2020.
- ↑ https://www.cpsc.gov/s3fs-public/270_0.pdf
- ↑ https://www.familyhandyman.com/garden-structures/fences/build-a-privacy-fence/
- ↑ http://call811.com/before-you-dig
- ↑ http://call811.com/before-you-dig
About This Article
To build a wood fence, start by digging holes in the areas where you want to place your fence posts. Then, place the posts into the holes and fill the areas around them with concrete to stabilize the posts in the ground. After that, attach 2 by 4 fence rails in between the posts, which will act as support boards. Once the supports boards are in place, nail your privacy boards in the design of your choosing, then paint over the boards with a stain or weather-proofing finish to help protect your fence against the elements. For more advice from our Landscaping co-author, including how to decide between fence styles like board on board and shadowbox, keep reading!
