This article was co-authored by Ashley Crawford. Chef Ashley Crawford is a Private Chef and the Founder of A Taste of Chef Ash. Chef Ashley started in the culinary industry when she was 14. She specializes in Creole and Cajun cuisine but has experience in all culinary topics. She has been featured in ESPN and Sports Illustrated for her culinary work with athletes.
This article has been viewed 43,856 times.
Baked potatoes are a classic side dish because they're delicious and very easy to make. Russet potatoes are the best choice when baking because they're high in starch and provide a fluffier texture than other varieties. While baking russets traditionally means cooking them in the oven, you can get a similar effect by making them in the microwave or slow cooker. Whatever method you choose, the key is seasoning the outside with olive oil, salt and pepper and pricking the potatoes so steam can escape during cooking.
Ingredients
- 4 russet potatoes
- 4 tablespoons (60 ml) olive oil, for rubbing
- Sea salt
- Freshly ground black pepper
- Butter, sour cream, chopped chives, shredded cheese, or your favorite toppings
Makes 4 servings
Steps
Preparing the Potatoes
-
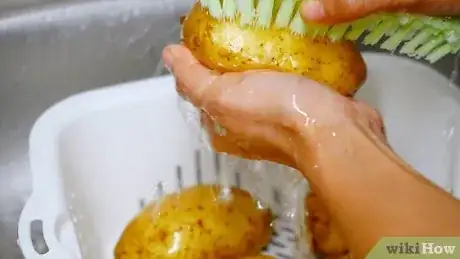
1Scrub the potatoes. Turn the cold water on at the sink, and hold the potatoes under the running water. Use a vegetable brush to scrub at the skins to remove any dirt and debris. Pat the potatoes dry with a clean kitchen towel or paper towel.[1]
- Large russet potatoes work best for baking, so be sure to choose the largest available.
- If you notice any blemishes in the potatoes' skins, use a paring knife to cut them away.
-
2Rub the potatoes with olive oil. Drizzle the clean potatoes with olive oil, using approximately 1 tablespoon (15 ml) for every potato that you're baking. Use clean hands to gently rub the oil into the potato skins, so they’re evenly coated.[2]
- The procedure for baking russet potatoes in the oven is the same whether you’re making 4 potatoes or just a single potato, so adjust the recipe based on how many people you’re serving.
Advertisement -
3Season the potatoes with salt and pepper. Once the potatoes are coated with oil, sprinkle them with some coarse sea salt. Add some freshly ground black pepper as well, making sure to season the potatoes on all sides.[3]
-
4Prick the potatoes with a fork. Steam can build up inside the potatoes as they cook, so it’s important to make sure that it can be released to prevent the potatoes from exploding. Press the tines of a fork into the potatoes 8 to 12 times to ensure that there are holes on all sides.[4]
- Make sure that you push the fork into the potatoes, so the indentation is at least 1⁄2 inch (13 mm) deep.
Using the Oven
-
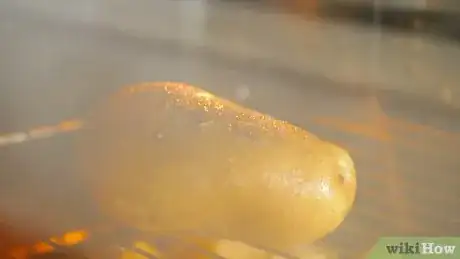
1Preheat the oven. To properly bake russet potatoes, your oven must be very hot. Set it to 425°F (220°C) and allow it to fully heat.[5]
-
2Place the potatoes on the middle rack. Using the center rack ensures that the potatoes cook evenly. You can place them directly on the rack, but oil and moisture may drip off during baking, so setting a baking sheet on the rack beneath it helps keep your oven from getting too dirty. If you prefer, you can also place the potatoes on a foil-lined baking sheet and set it on the center rack.[6]
- Placing the potatoes directly on the oven rack creates a crispier skin.
- You can also wrap the individual potatoes in foil and place them directly on the oven rack if you prefer. However, the skins can sometimes get soggy because of the trapped steam inside the foil.
-
3Bake the potatoes for 50 to 60 minutes. Allow them to bake until the skin is dry and the insides are soft. You can test for doneness by piercing the potatoes with a fork -- if the tines easily press into the flesh, the potatoes are done baking.[7]
- While the potatoes are cooking, it’s a good idea to turn them every 20 minutes for even baking.
-
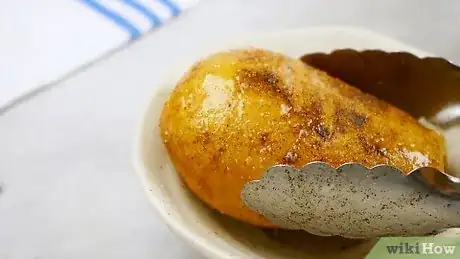
4Remove the potatoes from the oven and let them cool for 3 minutes. When the potatoes are done, carefully remove them from the oven with tongs. Set them down on a plate, and allow them to cool for about 3 minutes.[8]
- If you baked the potatoes on a baking sheet, remove them from the sheet to set them aside for cooling.
- If you wrapped the potatoes in foil for baking, carefully unwrap them for cooling. Be sure to use an oven mitt or potholder to remove the foil because it will be hot.
-
5Cut the potatoes open and add toppings for serving. When the potatoes are cool enough to handle comfortably, use a knife to cut them down the middle. Pry the potato open with a fork, and top it with your favorite toppings, such as butter, salt, and pepper.[9]
- If you have any leftover potatoes, cover them in plastic wrap and store them in the refrigerator. Be sure to eat them within 2 to 3 days.
Cooking in the Microwave
-
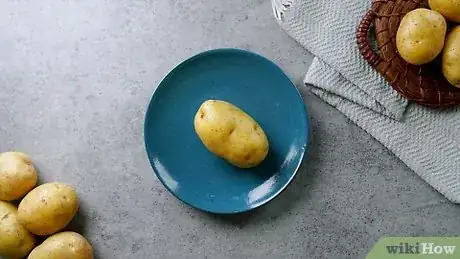
1Place the potatoes on microwave-safe plate and heat for 5 minutes. Set the potatoes in a single layer on the plate in the microwave. Heat the potatoes on high for 5 minutes.[10]
-
2Turn the potatoes over and heat for 3 to 5 minutes. After the first heating session, carefully turn the potatoes over on the plate to the other side. Heat them on high until they feel soft when you squeeze them.[11]
- If the potatoes are still hard after another 5 minutes, continue heating them in 1 minute increments until they’re done.
- Be sure to use a pot holder to handle the plate and a pair of tongs to turn and squeeze the potato because they'll both be very hot.
-
3Remove the potatoes and let them to sit for 3 minutes. When the potatoes are tender, take the plate out of the microwave. Allow the potatoes to cool for about 3 minutes or until they’re cool enough to handle.[12]
- Use a pot holder or oven mitt to take the plate out of microwave because it will be hot.
-
4Serve the potatoes with your favorite toppings. Once you can handle the potatoes easily, use a knife to cut them open. Add sour cream, chives, or your favorite toppings, and serve.[13]
- You can store any leftover potatoes in the refrigerator once they've cooled and been wrapped in plastic wrap. They should stay fresh for 2 to 3 days.
Working with a Slow Cooker
-
1Place the potatoes in the bottom of a slow cooker and cover them. Set the potatoes down in the bottom of the empty slow cooker. If possible, keep the potatoes in a single layer. Next, place the lid on the slow cooker.[14]
-
2Set the cooker to low and let the potatoes cook for about 8 hours. Because the slow cooker uses such a low temperature, the potatoes will take longer to bake than in a conventional oven. Check on the potatoes to see if you can pierce them with a fork after 8 hours. If they’re still hard, they may need up to 10 hours of baking.[15]
- Avoid opening the slow cooker while the potatoes are baking because you may increase their cooking time.
-
3Remove the potatoes and top with your favorite toppings. Use a pair of tongs to carefully take the potatoes out of the slow cooker, and set them on a plate. Let them cool for 2 to 3 minutes, and then slice them open. Add shredded cheese, bacon, or other toppings and serve.[16]
- Any leftover baked potatoes can be wrapped in plastic wrap and kept in the fridge. Eat them within 2 to 3 days, though.
Community Q&A
-
QuestionShingeled potatoes: Is the peeled side down with skin side up and sliced?
 TorpiTop AnswererNo, it's the other way around: skin side down, and the peeled side up and sliced.
Things You’ll Need
Oven
- Bowl
- Fork
- Baking sheet
- Tongs
- Plate
- Knife
Microwave
- Bowl
- Fork
- Microwave-safe plate
- Knife
Slow Cooker
- Pastry brush
- Tongs
- Plate
- Knife
References
- ↑ http://www.thekitchn.com/how-to-bake-a-potato-in-the-oven-165615
- ↑ https://www.bonappetit.com/recipe/perfect-baked-potato
- ↑ http://www.thekitchn.com/how-to-bake-a-potato-in-the-oven-165615
- ↑ http://www.foodnetwork.com/recipes/alton-brown/the-baked-potato-recipe1-1908821
- ↑ http://www.thekitchn.com/how-to-bake-a-potato-in-the-oven-165615
- ↑ http://www.thekitchn.com/how-to-bake-a-potato-in-the-oven-165615
- ↑ http://www.thekitchn.com/how-to-bake-a-potato-in-the-oven-165615
- ↑ http://www.foodnetwork.com/recipes/alton-brown/the-baked-potato-recipe1-1908821
- ↑ http://www.foodnetwork.com/recipes/alton-brown/the-baked-potato-recipe1-1908821
- ↑ https://www.thekitchn.com/how-to-bake-a-potato-three-easy-methods-157073
- ↑ https://www.thekitchn.com/how-to-bake-a-potato-three-easy-methods-157073
- ↑ https://www.thekitchn.com/how-to-bake-a-potato-three-easy-methods-157073
- ↑ https://www.thekitchn.com/how-to-bake-a-potato-three-easy-methods-157073
- ↑ https://www.thekitchn.com/how-to-bake-a-potato-three-easy-methods-157073
- ↑ https://www.thekitchn.com/how-to-bake-a-potato-three-easy-methods-157073
- ↑ https://www.thekitchn.com/how-to-bake-a-potato-three-easy-methods-157073
