Word XP
Edit Tables
Inserting and Deleting Columns and Rows
Estimating how many rows and columns you will need in a table is not always easy. Therefore, it is important to know how to insert and delete rows and columns in your existing table.
To Add Rows to Your Table:
- Move the insertion point to the last cell in the table and press Tab.
To Insert Rows in the Middle of the Table:
- Place the insertion point anywhere in the table.
- Choose Table
 Insert
  Rows above OR Rows below.
To Delete Rows:
- Select the row(s) you want to delete.
- Choose Table
 Delete
  Rows.
Rows.
OR
- Right-click and choose Table
 Delete
  Rows from the shortcut menu.
To Delete Single Table Cell:
- Place the insertion point inside the cell you wish to delete.
- Choose Table
 Delete
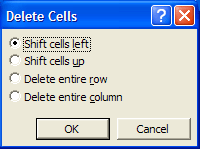
  Cells from the menu bar. The Delete Cells dialog box appears.
 - Click Shift cells left, Shift cells up, Delete entire row, or Delete entire column.

To Insert a Column:
- Position the mouse pointer where you want to column to be located.
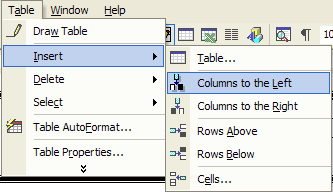
- Choose Table
 Insert
  Insert Columns to the Right or Insert Columns to the Left.


