

Word 2013
Mail Merge
Step 3:
Now you'll need an address list so Word can automatically place each address into the document. The list can be in an existing file, such as an Excel workbook, or you can type a new address list from within the Mail Merge Wizard.
- From the Mail Merge task pane, select Use an existing list, then click Browse... to select the file.
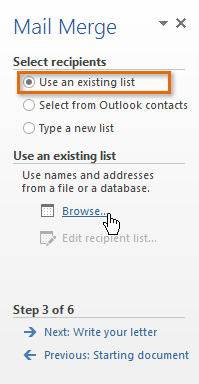 Clicking Browse...
 - Locate your file and click Open.
 Opening the Address List
 - If the address list is in an Excel workbook, select the worksheet that contains the list and click OK.
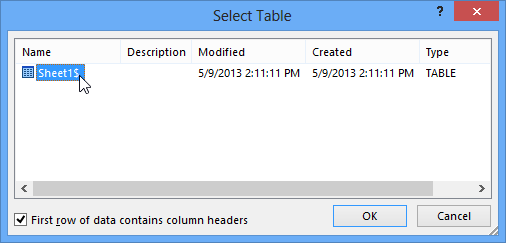 Selecting a worksheet
 - In the Mail Merge Recipients dialog box, you can check or uncheck each box to control which recipients are included in the merge. By default, all recipients should be selected. When you're done, click OK.
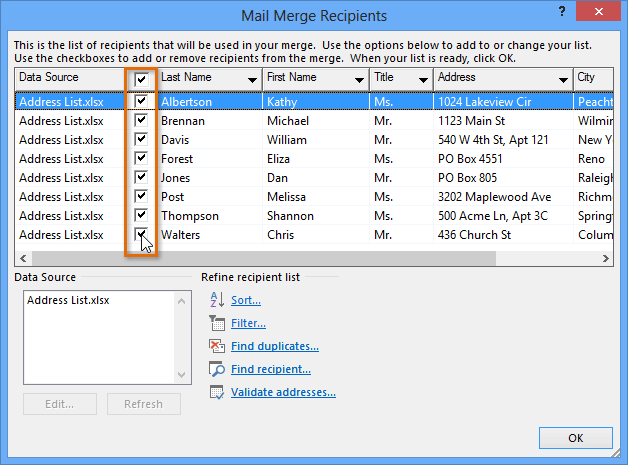 Selecting recipients to include or exclude
 - From the Mail Merge task pane, click Next: Write your letter to move to Step 4.
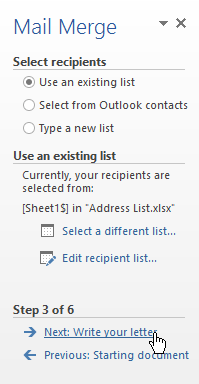 Clicking Next
If you don't have an existing address list, you can click the Type a new list button and click Create. You can then type your address list.


