

Word 2013
Headers, Footers, and Page Numbers
Editing headers and footers
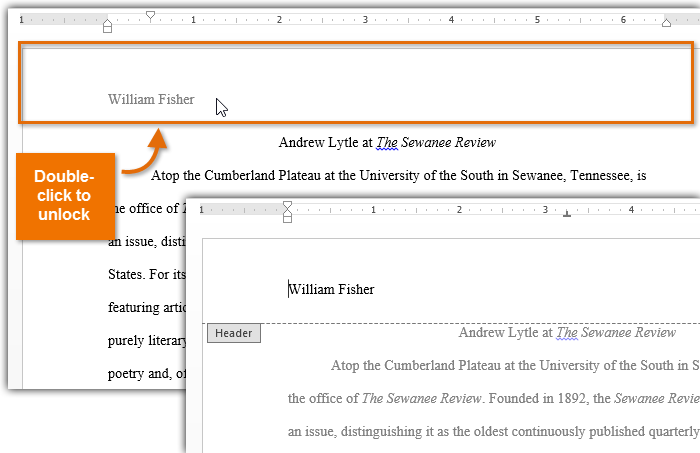
After you close the header or footer, it will still be visible, but it will be locked. Simply double-click a header or footer to unlock it, which will allow you to edit its content.
 Opening a header
Design tab options
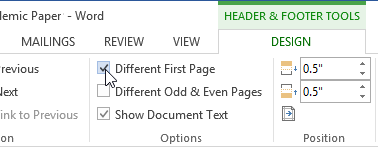
When your document's header and footer are unlocked, the Design tab will appear on the right side of the Ribbon, giving you various editing options:
- Hide the first page header and footer: For some documents, you may not want the first page to show the header and footer, like if you have a cover page and want to start the page numbering on the second page. If you want to hide the first page header and footer, check the box next to Different First Page.
 Hiding the first page header and footer
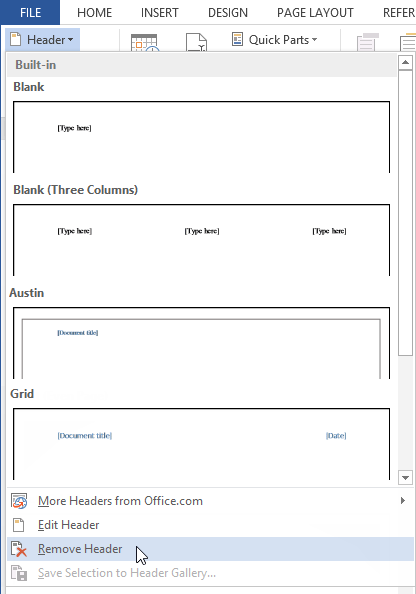
 - Remove the header: If you want to remove all information contained in the header, click the Header command and select Remove Header from the menu that appears.
 Removing the header
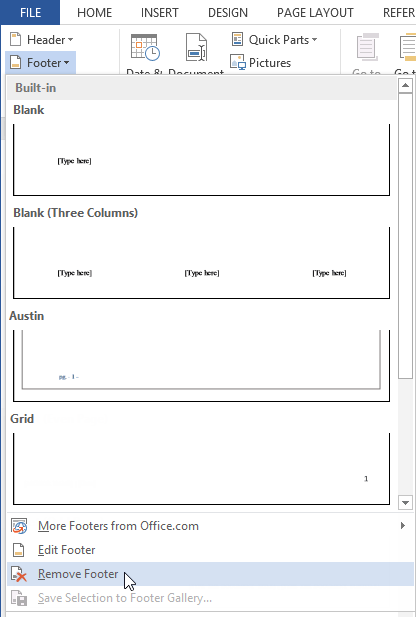
 - Remove the footer: If you want to remove all information contained in the footer, click the Footer command and select Remove Footer from the menu that appears.
 Removing the footer
 - Additional options: With the Page Number command and the commands available in the Insert group, you can add page numbers, the date and time, pictures, and more to your header or footer.
 Insert group on the Ribbon
To insert the date or time into a header or footer:
Sometimes it's helpful to include the date or time in the header or footer. For example, you may want your document to show the date when it was created.
On the other hand, you may want to show the date when it was printed, which you can do by setting it to update automatically. This is useful if you frequently update and print a document, since you'll always be able to tell which version is the most recent.
- Double-click anywhere on the header or footer to unlock it. Place the insertion point where you want the date or time to appear. In our example, we'll place the insertion point on the line below the author's name.
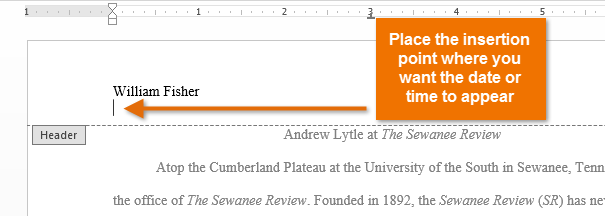 Placing the insertion point in the unlocked header
 - The Design tab will appear. Click the Date & Time command.
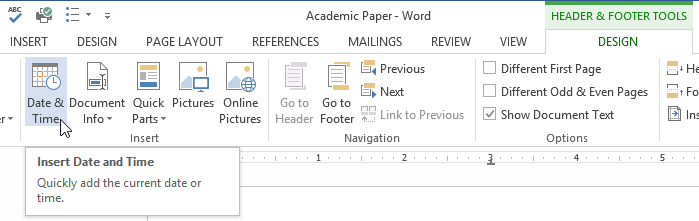 Clicking the Date & Time command
 - The Date and Time dialog box will appear. Select the desired date or time format.
- Check the box next to Update Automatically if you want the date to change every time you open the document. If you don't want the date to change, leave this option unchecked.
- Click OK.
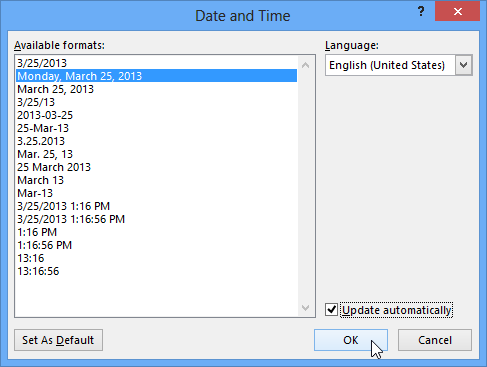 Selecting a date option
 - The date will appear in the header.
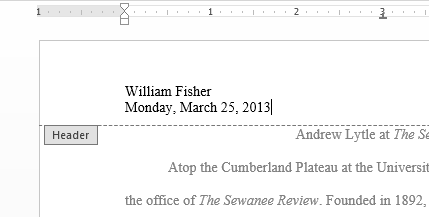 The date in the header


