

Publisher 2010
Working with Pictures
Additional formatting options in Word and PowerPoint
If you've worked with pictures in Word or PowerPoint 2010, you probably noticed that Publisher includes only a fraction of the image editing tools featured in those programs. If you find yourself reaching the limit of Publisher's editing capabilities, you may wish to edit your picture in one of those programs, then insert it back into your publication.
While some of these tools are simply better, more complex versions of features that already exist in Publisher, other useful tools like image background removal and Artistic Effects are not present in Publisher 2010.
 Extra picture editing options in PowerPoint
Additional image editing features available in these programs include:
- More advanced brightness and contrast tools
- A larger selection of recoloring options
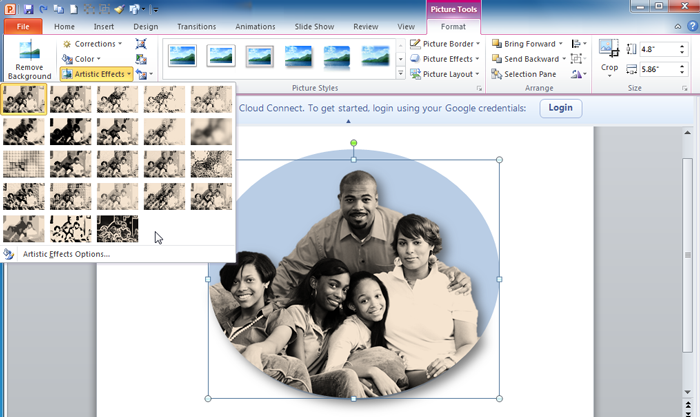
- Artistic effects that allow you to apply a number of filters to your pictures
- Additional cropping options, including the option to crop your picture into any shape
- A larger and more visually appealing selection of picture styles
- The ability to capture and modify screenshots
These tools are identical in Word and PowerPoint, so use the program you feel more comfortable with. To learn more about these tools and how to use them, review one of the following lessons:
To edit your pictures in another program:
- Open Microsoft Word or PowerPoint 2010. A blank document or presentation will be created.
- Insert the picture you wish to edit into your blank document or presentation. You can do this in two ways:
- Copy the desired picture from your publication and paste it into the document or presentation
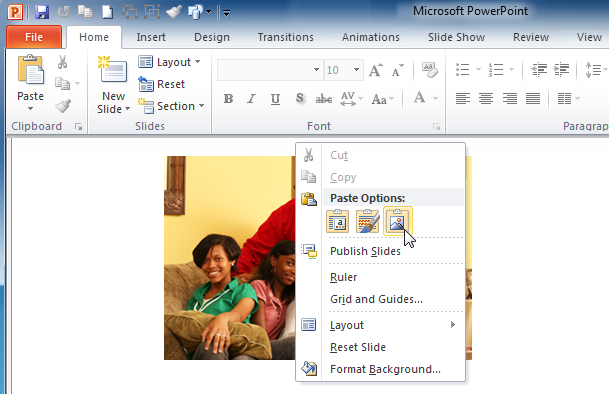 Pasting an image into PowerPoint
 - Use the Picture command to insert the picture
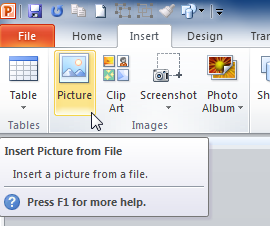 The Picture command in PowerPoint
- Copy the desired picture from your publication and paste it into the document or presentation
- Use the tools in the Picture Tools Format tab to modify the picture as desired.
 Removing the picture background
 - When you are satisfied with the appearance of your picture, right-click it and select Save as Picture... from the menu that appears.
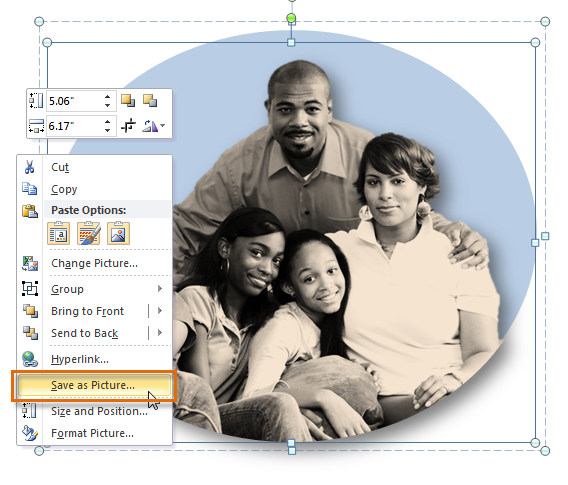 The Save as Picture command
 - Browse for the desired save location, then click Save.
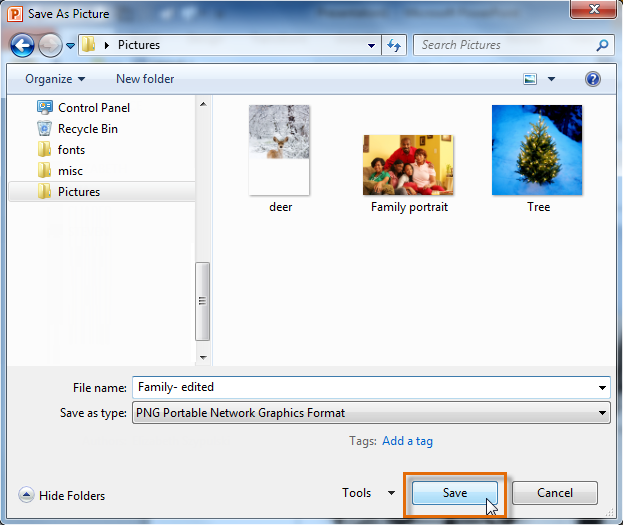 Saving the picture
 - Return to your publication in Publisher, then follow the Insert Picture instructions on page 2 of this lesson to insert the edited picture into your publication.
 The inserted picture
While you could skip steps 4-6 by copying the picture from Word or PowerPoint and pasting it back into your publication, this is not recommended. Depending on the tools you used to modify your picture, some of the edits may not be saved.


