

PowerPoint 2010
Formatting Pictures
Basic image formatting
Video: Formatting Pictures in PowerPoint 2010
 Watch the video (3:56).
Have you inserted a picture onto a slide that you'd like to trim or make appear smaller on the slide? Perhaps you'd like to add an artistic effect or a border to the image to make it stand out from the slide's background. You can use PowerPoint's picture tools to help you modify the picture style and shape, add a border, crop, add artistic effects, and even compress pictures.
To crop an image:
- Select an image. The Format tab will appear.
- Select the Format tab.
- Click the Crop command. The black cropping handles appear.
 The black cropping handles
 - Click and drag a handle to crop an image.
- Click the Crop command to deselect the crop tool.
Corner handles will allow you to simultaneously crop the image horizontally and vertically.
To crop an image to a shape:
- Select the image. The Format tab will appear.
- Select the Format tab.
- Click the Crop drop-down arrow (below the Crop command). A drop-down menu will appear.
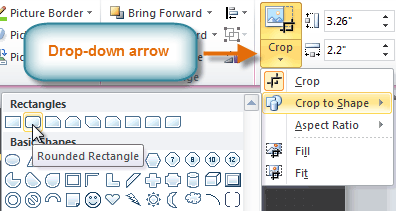 The Crop drop-down arrow and menu
 - Select a shape from the drop-down menu.
- The image will take the shape you have selected.
 After cropping to shape
You may want to crop the image to the desired size before cropping it to a shape.


