

Office 2000 Basics
Save and Save As
Save As
After choosing Save using on the of two methods described on the previous page, the Save As dialog box appears.
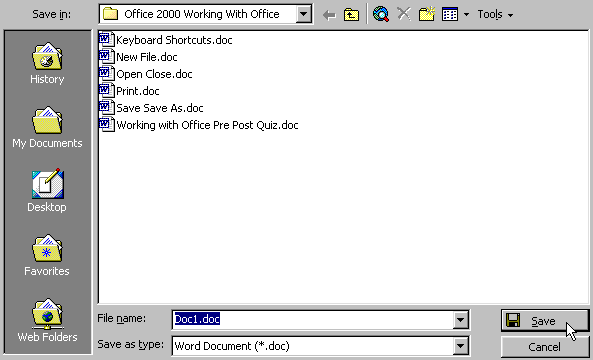
To specify a file location:
- Open the Save In: drop-down list box.
- Choose 3 1/2 floppy (A:) if saving to a floppy disk.
- Choose (C:) if saving to your hard disk.
- Name your file in the file name box.
- Click OK.
After naming and saving a file once:
![]() Click the Save button
Click the Save button ![]() on the Standard toolbar.
on the Standard toolbar.
Or:
![]() Go to the File menu and choose Save. You will not get a Save As dialog box again.
Go to the File menu and choose Save. You will not get a Save As dialog box again.
If you do not choose a filename, Office 2000 applications assign a file name for you. It assigns the first line of text in your document, unless you give it a different name when prompted in the file name box.
If you do not specify a file location, Office uses the My Documents folder as the default location. If you can't find a file, check My Documents.
Important warning:
Save periodically when you are working in an application. If you lose information, you'll be sorry!


