

Google Docs
Inserting Text Boxes and Shapes
Introduction
Google Documents has a drawing tool that's designed for inserting text boxes and shapes into your document. Although they're not necessary for every document, text boxes and shapes can be used to set important details apart from the rest of your document or to organize information. For example, rectangles, lines, and arrows can be used together to create a flow chart.
In this lesson, you'll learn the drawing tool's commands and how to insert a drawing or text box into your document. You will also learn how to format and change the order of text boxes and shapes.
Creating drawings
 Watch the video (3:48).
Watch the video to learn how to create drawings in Google Documents using shapes and text boxes.
About the drawing tool
When you're ready to add a text box or shape to your document, you'll work with the drawing tool. It offers a variety of shapes, arrows, callouts, and line styles that are easily customized for your needs. For example, you can create a diagram using shapes and add text to each shape to highlight important information. The drawing tool opens as a dialog box in your document, and this is where you will create, format, and edit text boxes and shapes using the drawing tool's commands.
Click the buttons in the interactive below to become familiar with the drawing tool's commands.
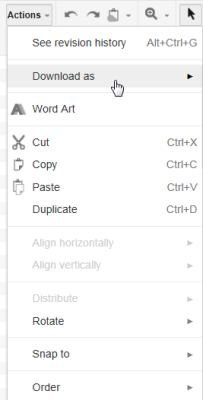
Actions Menu
The actions menu provides a variety of editing options for working with your document like cut, copy, and paste. You can also edit the rotation and order of the shapes in your drawing.
When you have finished your drawing, you can choose download to save it in a different image format.
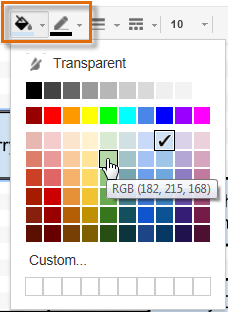
Fill Color and Line Color
Select Fill color or Line color to display the color palette. Fill color changes the background color of the shape or text box, and Line color modifies the color of the border line around the shape or text box.
Text Box Command
Text boxes allow you to easily move or set text apart in a document. In Google Documents, you can customize the lines of a text box, the size and color of the font, and the color of the background inside the text box.
To create a text box, select the text box command. Then click, hold and drag the mouse in the drawing area to create the desired size.
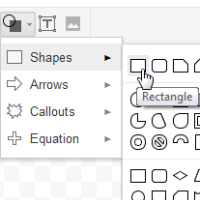
Shape Command
Google Documents provides a wide variety of shapes, arrows, callouts, and equation shapes. They can be resized, reordered, and customized with text.
To create a shape, select a shape style. Then click, hold and drag the mouse in the drawing area to create the desired size.

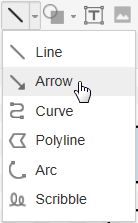
Line Command
The line command offers a variety of line styles. Use the basic line to create an organizational map, the arrow to design a flowchart, or the polyline to create your own shape.
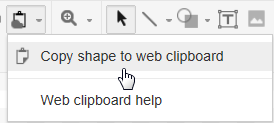
Web Clipboard
Use the web clipboard to copy your drawing to another Google Doc.
Undo and Redo
If you've made a mistake or if you would like to remove a previous action, you can Undo it.
Choose Redo to make removed changes reappear.
Line Type Command
To customize the border line of a shape or text box, click the line type command. It offers a varity of line styles like dotted, dashed, and a combination dash and dot line.

Line Width Command
Selecting the line width command allows you to narrow or widen the border line of your shape or text box.

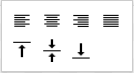
Alignment Command
The alignment command allows you to left-align, center, right-align, or justify the text inside the text box or shape.
Additionally, you can choose to align the text to the top, middle, or bottom of the text box or shape.
Formatting Commands
If you have added text to a text box or shape, you can use the formatting commands to edit the font size and color of the text. You also have the option of bolding, italicizing, and underlining text.
These commands appear when a text box or shape is selected.

Image Selection
Click on a text box or shape and the formatting commands will appear in the toolbar.
Double-click on the text box or shape to add to or edit the text inside it.
Save & Close
When you are satisfied with your drawing and are ready to insert it into your document, click Save & Close.
Google Docs has a stand-alone version of the drawing application. This version has more features than the Documents Drawing app, including the ability to upload your own images as part of the drawing. If you want more features, you can use the stand-alone version to create your drawing. Then you can download the drawing as an image to your Google Drive and insert it into your document.
 Accessing the stand-alone Drawing application
Adding shapes
You can add a variety of shapes to your document, including arrows, callouts, squares, stars, and flowchart shapes. Shapes are customizable, so you can add text and change their background color and line width. You may find shapes useful for creating diagrams and flow charts, and they can add visual appeal to your document as well.
To insert a shape:
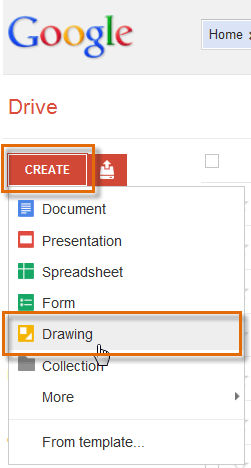
- Click Insert, then select Drawing... from the drop-down menu.
 Inserting a new drawing
 - The Drawing dialog box will appear.
- Select a drawing command. Hover the mouse over a style, then select the desired shape.
 Selecting a shape
 - Click, hold, and drag in the drawing area to create the shape to the desired size.
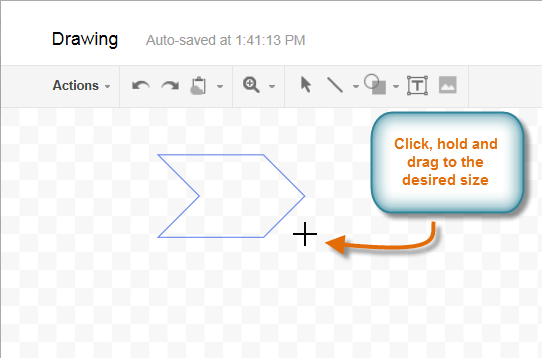 Creating the shape to the desired size
 - Release the mouse. The shape appears.
 The new shape
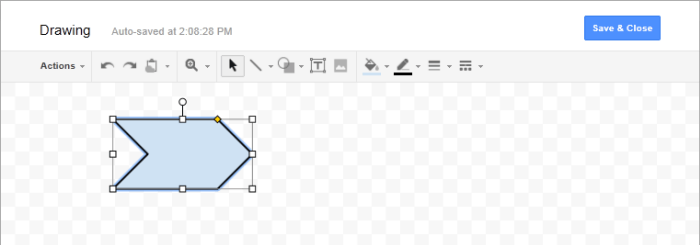
 - If desired, you can add more shapes. When you have completed the drawing, click Save & Close to insert it into your document.
 Clicking Save & Close
 - The drawing will appear in the document.
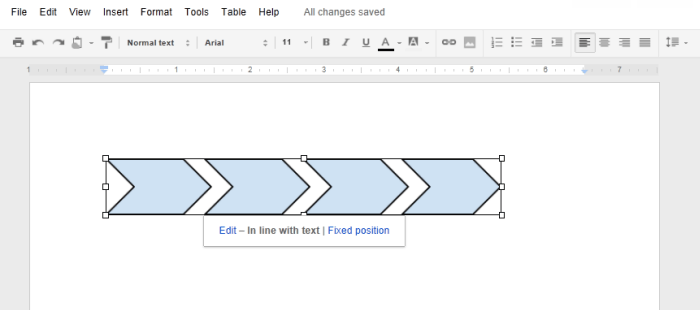 An inserted drawing
 - If you want to resize the shape, hold and drag a resizing handle to the desired size.
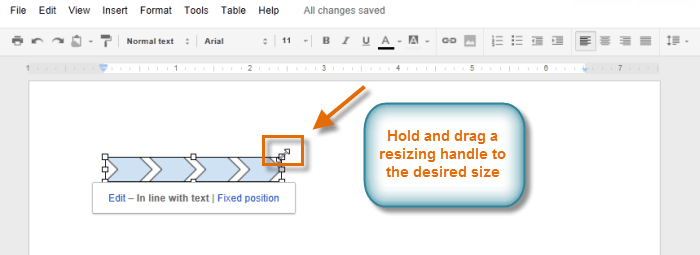 Resizing the shape in the document
To delete a shape from your document, select it and press the Backspace or Delete key on your keyboard.
To reopen the drawing tool to edit the shape, select the desired shape and click Edit from the options that appear below the drawing.
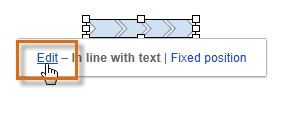 Clicking Edit
Adding text boxes
You may want to insert a text box into your document to draw attention to specific text or to have the ability to easily move text around within your document. Text boxes are similar to shapes. You can apply many of the same formatting options, like changing the background color and line style.
To insert a text box:
- Click Insert, then select Drawing... from the drop-down menu. The Drawing dialog box will appear.
- Click the Text box command.
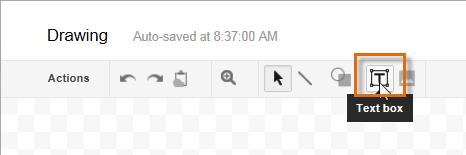 Clicking the Text box command
 - Click, hold, and drag in the drawing area to create the text box.
 Creating a new text box
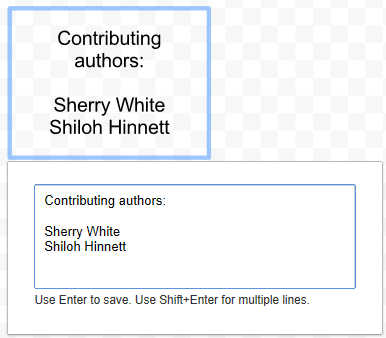
 - Release the mouse, and a text editing box will appear below the text box you created. Enter the desired text in the text editing box. To create a new line, press Shift+Enter on your keyboard.
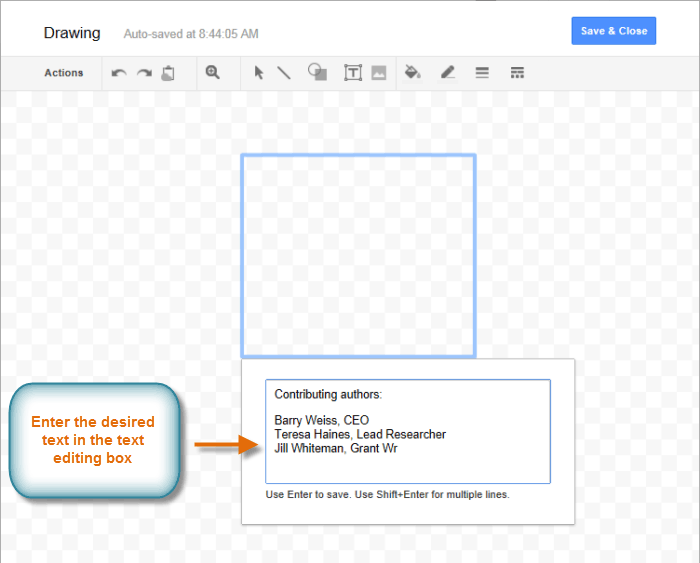 Entering text in the text editing box
 - When you are satisfied, press Enter on your keyboard. The text will appear in the text box.
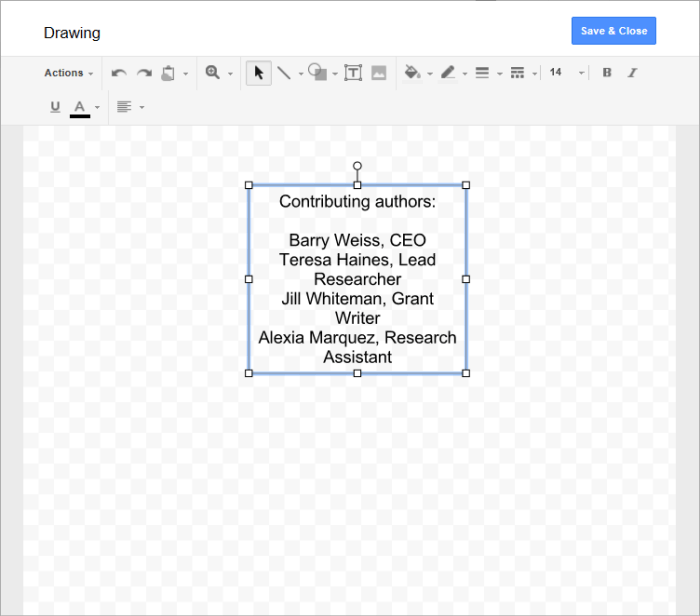 Text appears in the text box
 - Click Save & Close. The text box will appear in your document.
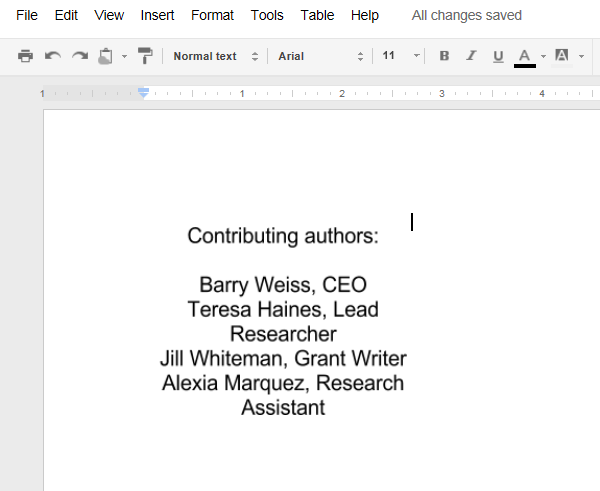 The text box appears
Customizing text boxes and shapes
The drawing tool has a variety of line and shape tools you can use to format your text box or shape. You can also modify the size and color of the font inside the text box or shape, and the colors of the background and lines.
To format a text box or shape:
- With the drawing tool open, select the desired text box or shape.
 Selecting a text box to format
 - Click the desired formatting command to modify the text box or shape.
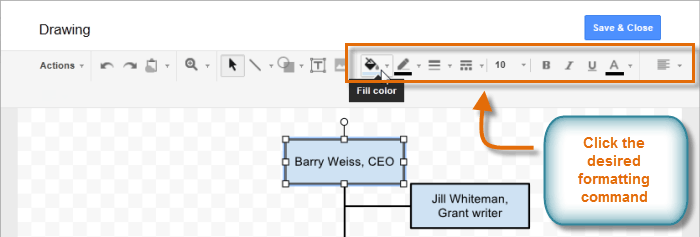 The formatting commands
 - The shape will appear formatted.
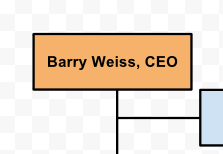 The formatted shape
To add or edit the text inside of a text box or shape, double-click it to open the text editing box.
To change the order of text boxes or shapes:
If one shape overlaps another, you may need to change the ordering so the correct shape appears in front. You can bring a shape to the front or send it to the back. If you have several overlapping objects, you may need to use Bring forward or Send backward to achieve the correct ordering.
- In the Drawing dialog box, right-click the desired text box or shape. Hover the mouse over Order, then select an ordering option.
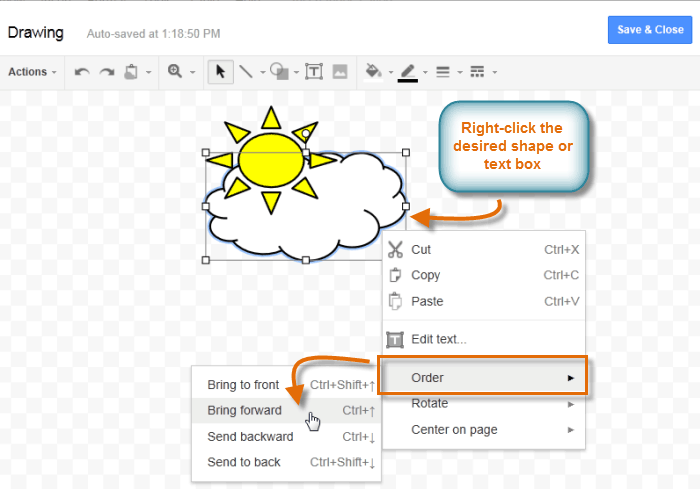 Modifying the order
 - The order will appear changed in the drawing.
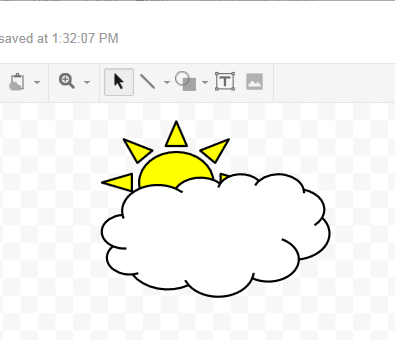 The reordered shapes
Challenge!
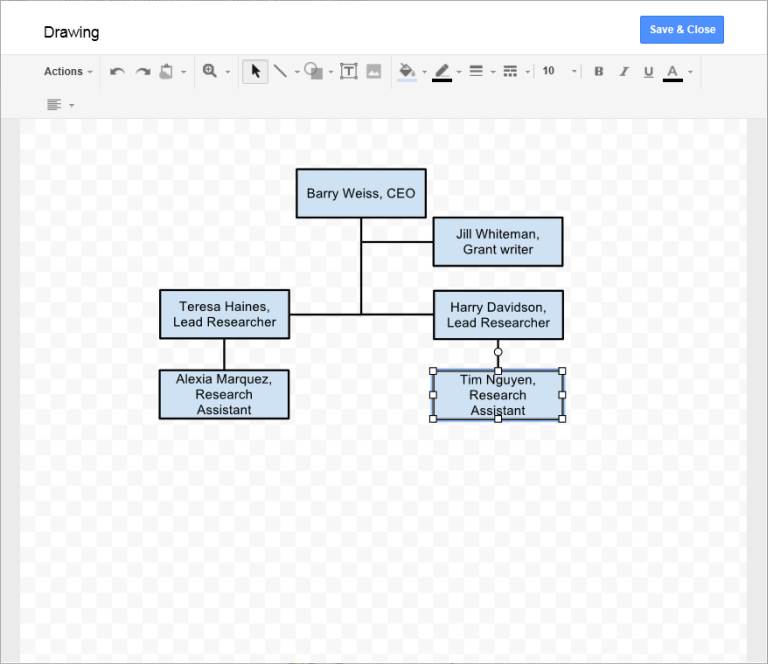
To work through the challenge, open GCFLearnFree L14: Department Tree and copy the file to your Google Drive. View the instructions below the challenge if you're not sure how to make a copy of the file. Open the drawing dialog box to edit the department tree.
- Insert a new rectangle next to the rectangle that says Tim Nguyen, Research Assistant.
- Add some text to it.
- Change the background color of the Lead Researcher's rectangles.
- Save & Close the drawing to insert it into the document.
- On the second page, reorder the shapes to bring the white shape forward.
To copy the example file to your Google Drive:
In these tutorials, we will provide example files you can use to practice what you've learned in each lesson. Because these files are Google Docs we have chosen to share, you will need to copy the file to your Google Drive before you can edit the file.
- Click the link at the top of this page to open the example file.
- The example file will appear in a new browser tab or window. If you are not currently signed in to your Google account, locate and click Sign in on the top-right corner of the page.
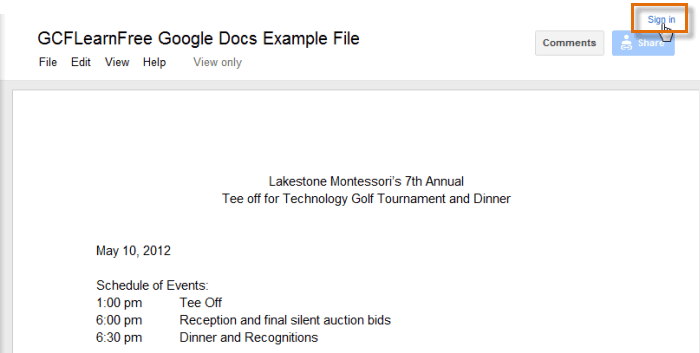 Signing in to your Google Account
 - After you have signed in to your Google account, locate and select File in the toolbar menu, then select Make a copy... from the drop-down menu.
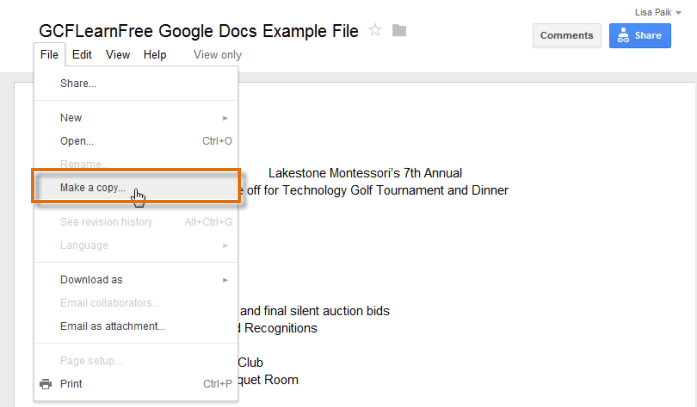 Making a copy of the example file
 - The Copy Document dialog box will appear. Click OK.
 Clicking OK
 - The copy of the file will appear in a new browser tab. Now you're ready to start using the example file.
 Viewing the copied example file in a new tab