

Google Docs
Using Indents, Tabs, and Lists
Introduction
Indenting and lists are great ways to draw attention to important areas of your document. There are several ways you can indent text in Google Documents. However, it's important to use these tools appropriately and indent correctly each time. This can save time and make the editing process go smoothly.
In this lesson, you will learn how to create tabs and indents using tab stops and the ruler. You'll also learn how to adjust indents using the Increase indent and Decrease indent buttons, as well as how to create a list.
Using indents and tab stops
 Watch the video (3:12).
Watch the video to learn how to add indents and tab stops in Google Documents.
Indenting text
In many types of documents, you may want to indent only the first line of each paragraph. This helps to visually separate paragraphs from one another.
 First Line Indent
To indent using the Tab key:
A quick and common way to indent is to use the Tab key. This will create a first line indent of 1/2 inch.
- Place the insertion point at the very beginning of the paragraph you wish to indent.
 Placing the insertion point
 - Press the Tab key on the keyboard. The text in the first line will move to the right by 1/2 inch.
 Pressing the Tab key
To indent using the Indent shortcut buttons:
If you want to indent all lines in a paragraph, you can use the Increase indent or Decrease indent shortcut buttons.
- Select the text you wish to indent.
 Selecting text to indent
 - Click the Increase indent shortcut button to increase the indent by increments of 1/2 inch.
 Increasing the indent
 - All lines of the paragraph will indent.
 Multiple indented lines
 - Click the Decrease indent shortcut button to decrease the indent by increments of 1/2 inch.
 Decreasing the indent
Alternatively, you can click Format from the menu toolbar and select Paragraph styles to locate the Increase indent and Decrease indent commands.
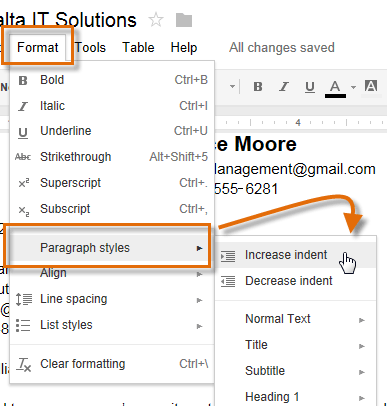 Using the Format menu
Customize indents
You can use the three indent markers and the ruler to create custom indents that are larger or smaller than the Tab key's default 1/2-inch indent. When you move the indent markers, the ruler provides a blue guide line to help you see where the indent will appear.
- First Line Indent marker: Adjusts the first-line indent of a paragraph
- Left Indent marker: Moves in unison with the First Line Indent marker to indent all lines in the paragraph
- Right Indent marker: Increases or decreases the right indent by moving all lines of the paragraph from the right margin
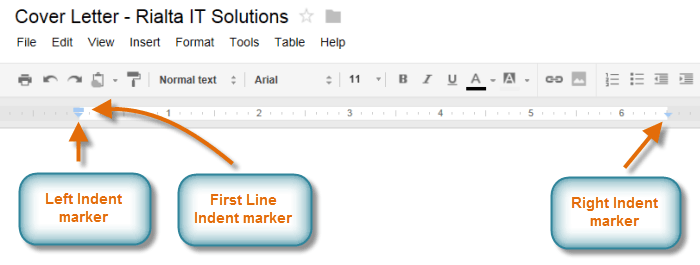 The three indent markers
To customize indents with the ruler:
- Place the insertion point anywhere in the text or paragraph you wish to indent (you can select one or more paragraphs).
 Selecting text to indent
 - Click, hold, and drag the desired indent marker. As the marker moves, the blue guide line extends from the ruler.
 Holding and dragging the Left Indent marker
 - Release the mouse at the desired location. The text will indent.
 The customized indent
To indent the paragraph on the right side, click, hold and drag the Right Indent marker.
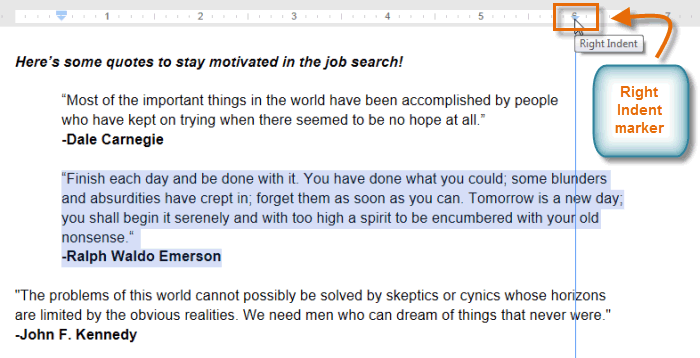 Customizing with the Right Indent marker
Using tab stops
Using tab stops gives you more control over the placement of text. By default, each time you press the Tab key on the keyboard the insertion point will move 1/2 inch to the right. By adding tab stops to the ruler, you can change the size of the tabs, and you can apply more than one tab stop to a single line. For example, on a resume you can right-align important dates by adding a right tab stop.
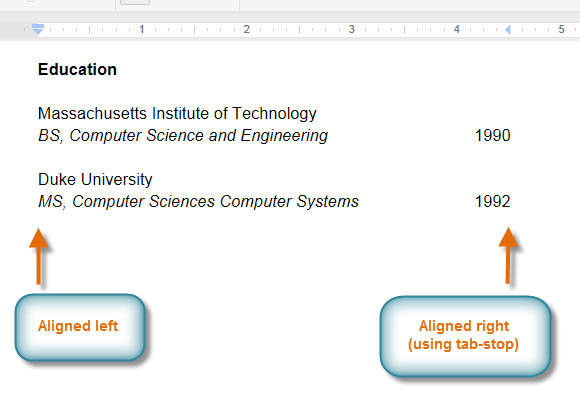 Using two types of alignment on the same line
There are three types of tab stops in Google Documents.
- Left tab-stop
 : Left-aligns text at the tab stop
 - Center tab-stop
 : Centers text around the tab stop
 - Right tab-stop
 : Right-aligns text at the tab stop
Pressing the Tab key can either add a tab or create a first-line indent depending on the location of the insertion point. Generally, if the insertion point is at the beginning of an existing paragraph it will create a first-line indent; otherwise, it will create a tab.
To add tab stops:
- Select the paragraph or paragraphs where you want to add tab stops. If you don't select any paragraphs, the tab stops will apply to the current paragraph and any new paragraphs you type below it.
 Selecting text to add a tab-stop
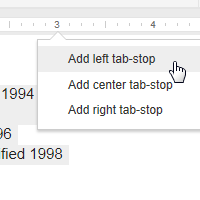
 - Click the location on the ruler where you want your text to appear. A drop-down menu of tab stop selections will appear.
 Clicking the ruler
 - Select the desired tab stop. You can add as many tab stops as you want.
 Selecting a tab-stop
 - Place the insertion point at the location where you wish to add the tab.
 Placing the insertion point
 - Press the Tab key on the keyboard. The text will jump to the location of the next tab stop.
 Applying the tab stop
To remove the tab stop, click, hold, and drag it off of the ruler.
Creating lists
 Watch the video (2:13).
Bulleted and numbered lists can be used in your documents to format, arrange, and emphasize text. In Google Documents, you can insert new bulleted and numbered lists, restart a numbered list, modify the existing bullet style of a list, and format multilevel lists.
Watch the video to learn how to work with lists.
To create a list:
- Select the text you wish to format as a list.
 Selecting text to be formatted
 - Click the Bulleted or Numbered list shortcut button.
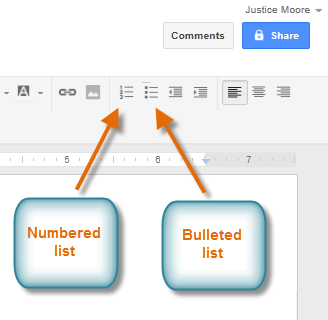 The Numbered and Bulleted list shortcut buttons
 - The bulleted or numbered list will appear in the document.
 A bulleted list
Options for working with lists
- To remove numbers or bullets from a list, select the list and click the Bulleted or Numbered list shortcut button.
- When you're editing a list, you can press Enter to start a new line, and the new line will automatically have a bullet or number. When you've reached the end of your list, press Enter twice to return to "normal" formatting.
- By dragging the indent markers on the ruler, you can customize the indenting of your list and the distance between the text and the bullet or number.
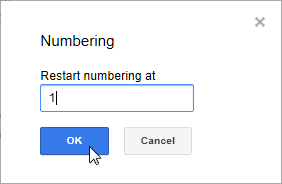
To restart the numbering of a list:
If you want to change the numbering of a list, Google Documents has a restart numbering option. It can be applied to numeric and alphabetical lists.
- Right-click the list item you would like to restart the numbering for.
- Select Restart numbering... from the drop-down menu.
 Selecting Restart numbering...
 - The Numbering dialog box will appear. In the Restart numbering at field, type the desired number or letter.
- Click OK.
 Restarting the numbering of a list
 - The list numbering will restart.
 Viewing the restarted list
To change list styles:
- Select an existing list.
 Selecting an existing list
 - Click Format, then select List styles to select a new style from the drop-down menu. The current style has a check mark
 next to it.
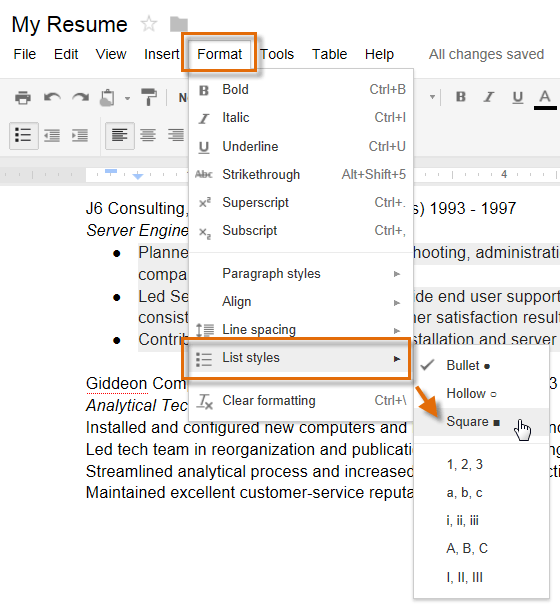 Clicking on the Square bullet
 - The new list style will be applied.
 The new list style
You can also quickly change between the numbered and bulleted list styles by selecting the list and clicking the Bulleted or Numbered list shortcut buttons.
To create a multilevel list:
Multilevel lists allow you to create an outline with multiple levels. Any bulleted or numbered list can be turned into a multilevel list by simply placing the insertion point at the beginning of a line and pressing the Tab key to change the level for that line.
- Place the insertion point at the beginning of the line.
 Placing the insertion point at the beginning of a line
 - Press the Tab key to increase the level of the line.
 Pressing the Tab key to increase the level of a line.
 - Hold Shift and press Tab to decrease the level.
Alternatively, you can increase or decrease the levels of text by selecting the text and then clicking the Increase indent or Decrease indent shortcut buttons.
Challenge!
To work through the challenge, open GCFLearnFree L10: Cover Letter and Resume and copy the file to your Google Drive. View the instructions below the challenge if you're not sure how to make a copy of the file.
- Press the Tab key to indent the paragraphs in the cover letter.
- Try using a tab stop to align the dates in the professional experience section of the resume.
- In the resume example, create a bulleted list of job experiences under Giddeon Computers.
- Create a new page for the document. Create a to-do list using a multilevel list.
To copy the example file to your Google Drive:
In these tutorials, we will provide example files you can use to practice what you've learned in each lesson. Because these files are Google Docs we have chosen to share, you will need to copy the file to your Google Drive before you can edit the file.
- Click the link at the top of this page to open the example file.
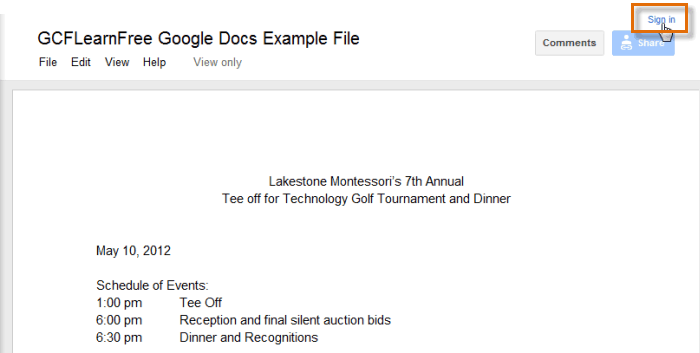
- The example file will appear in a new browser tab or window. If you are not currently signed in to your Google account, locate and click Sign in on the top-right corner of the page.
 Signing in to your Google Account
 - After you have signed in to your Google account, locate and select File in the toolbar menu, then select Make a copy... from the drop-down menu.
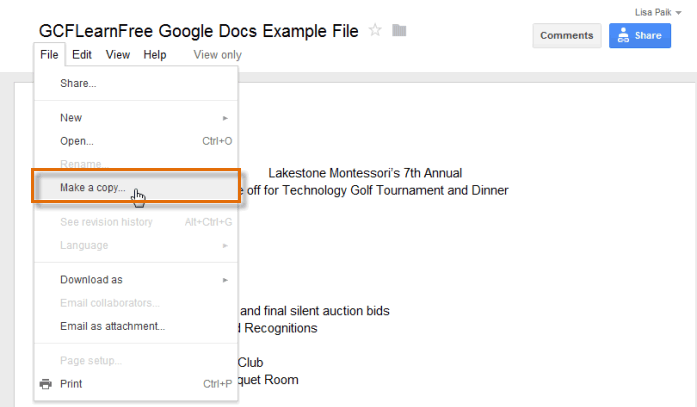 Making a copy of the example file
 - The Copy Document dialog box will appear. Click OK.
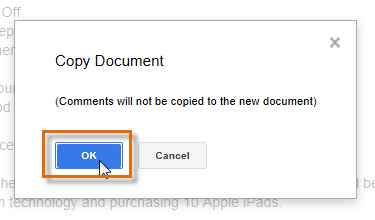 Clicking OK
 - The copy of the file will appear in a new browser tab. Now you're ready to start using the example file.
 Viewing the copied example file in a new tab