

Excel XP
Create, Open, and Save Workbooks
Introduction
By the end of this lesson, learners should be able to:
- State the differences between New, Open, Close Save and Save As
- Create a workbook
- Save a workbook
- Open a workbook
- Close a workbook
Understanding File Terms
The File menu contains all the operations that we will discuss in this lesson: New, Open, Close, Save and Save As.
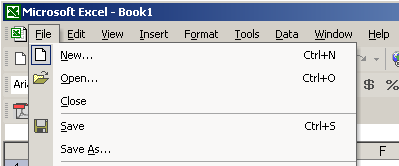
New
Used to create a new Workbook.
Open
Used to open an existing file from a floppy disk or hard drive of your computer.
Close
Used to close a spreadsheet.
Save As
Used when to save a new file for the first time or save an existing file with a different name.
Save
Used to save a file that has had changes made to it. If you close the workbook without saving then any changes made will be lost.
Creating a workbook
A blank workbook is displayed when Microsoft Excel XP is first opened. You can type information or design a layout directly in this blank workbook.
To Create an Excel XP Workbook:
- Choose File
 New from the menu bar.
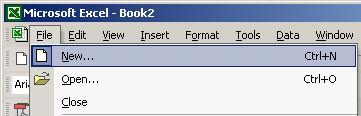
- The New Workbook task pane opens on the right side of the screen.
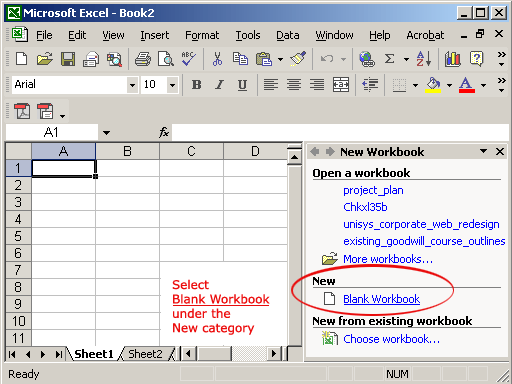
- Choose Blank Workbook under the New category heading.
- A blank workbook opens in the Excel window. The New Workbook task pane is closed.
Saving a workbook
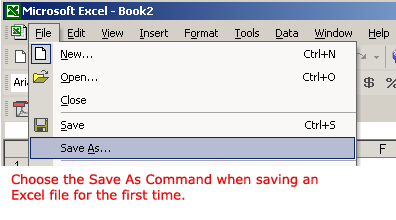
Every workbook created in Excel must be saved and assigned a name to distinguish it from other workbooks. The first time you save a workbook, Excel will prompt you to assign a name through the Save As operation. Once assigned a name, any additional changes made to the text, numbers or formulas need to be saved using the Save operation.
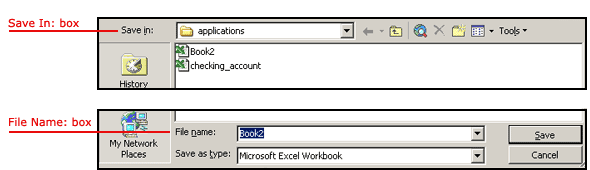
To Save a new Workbook:
- Choose File Save As from the menu bar.
- The Save As Dialog Box appears.
- Click on the Save In: dropdown menu and locate where the file will be saved. Choose 3 1/2 Floppy (A:) to save the file to a floppy disk or Local Disk (C:) to save the file to your computer.
- Type a name for your file in the File Name: box.
- Click the Save button.
To Save Changes Made to an Existing Workbook:
- Choose File Save from the menu bar, or
Click the Save button on the Standard toolbar.
 If you're saving the file for the first time and you do not choose a file name, Microsoft Excel will assign a file name for you.
It is a good idea to Save frequently when working in a spreadsheet. Losing information is never fun! You can quickly save your spreadsheet by using the quick-key combination Ctrl + S.
Opening a workbook
You can open any workbook that has previously been saved and given a name.
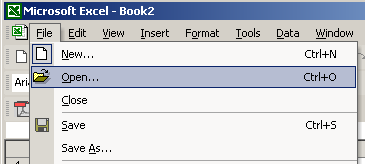
To Open an Existing Excel XP Workbook:
- Choose File Open from the menu bar.
- The Open dialog box opens.
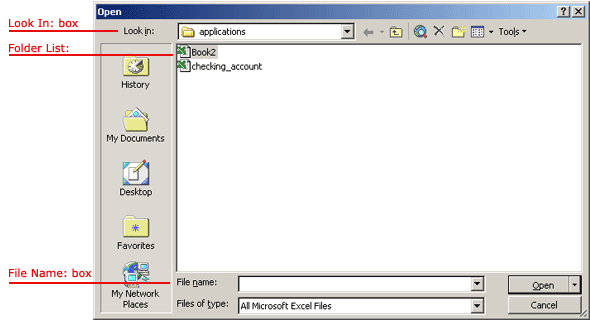
- In the Look in list, click the drive, folder, or Internet location that contains the file you want to open.
- In the folder list, open the folder that contains the file. Once the file is displayed, click on the file you want to open.
- Click the Open button.
Closing a Workbook
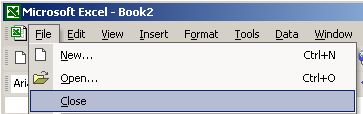
To close an existing Excel XP Workbook:
- Choose File Close from the menu bar. The workbook in the Excel window is closed.
Excel XP will prompt you to save information if any has been typed between the last save and the time you close the file.
Challenge
- Create a new blank file and save as to c:\my documents as "test.xls"
- Close the file "test.xls"
- Open the file "test.xls"
- Save the file "test.xls"